
With only three ingredients, that you probably already have at home, you can make these easy DIY Paw Print Ornaments and have an inexpensive paw print keepsake for years to come.
This post may contain affiliate links. This means, if you click a link and make a purchase, I may earn a small commission at no extra cost to you. Thank you! ❤️
I have made Salt Dough Ornaments for YEARS, including Salt Dough Paw Prints. I am SO grateful to have keepsakes of my babies.
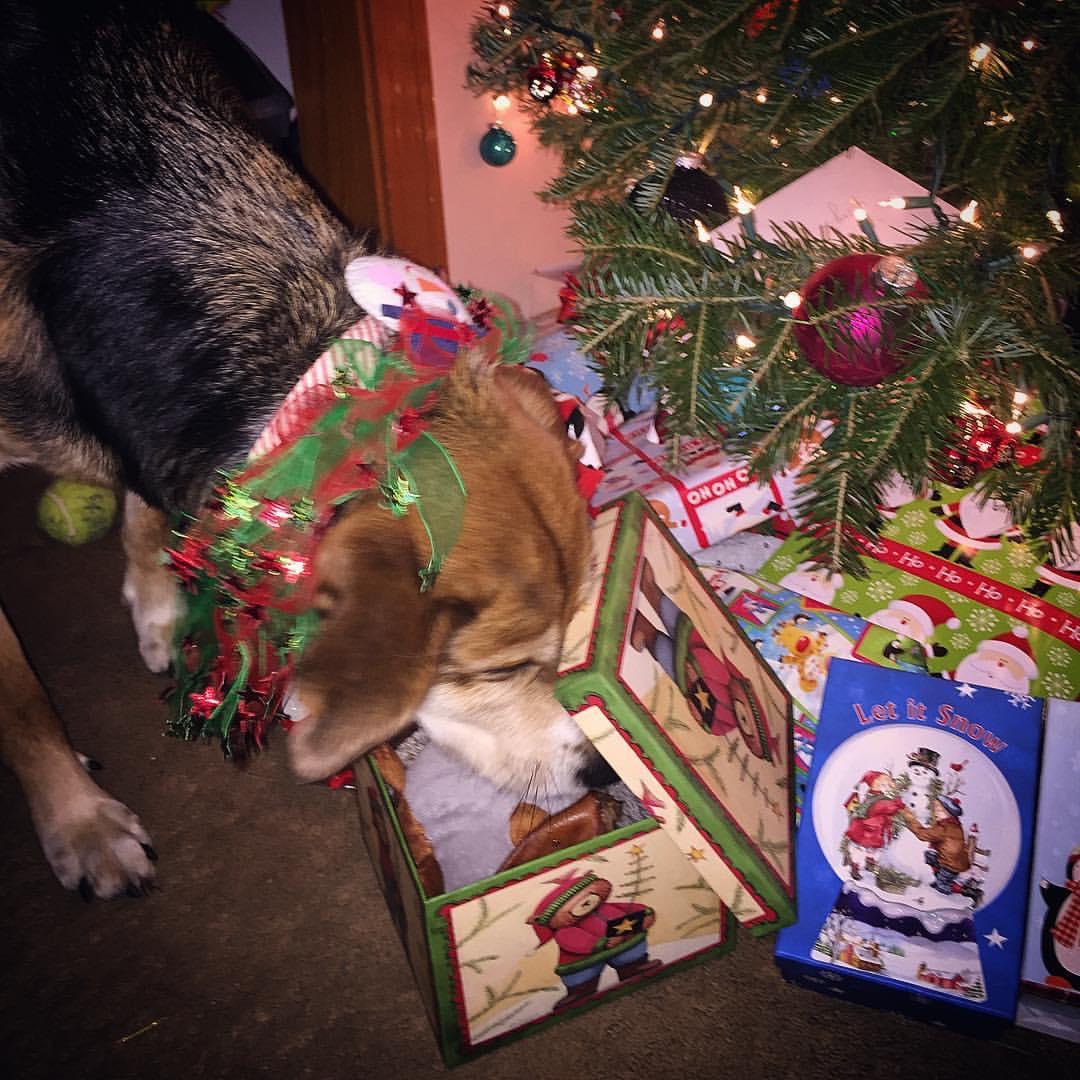
My dog, Emma, passed away in September. To say I’m devastated is an understatement. Her paw print ornaments from previous years are already on the Christmas tree. She LOVED Christmas. She would even peek into her gifts (see below), so I’m grateful we can still include her in some way.
Paw Print Ornament Recipe
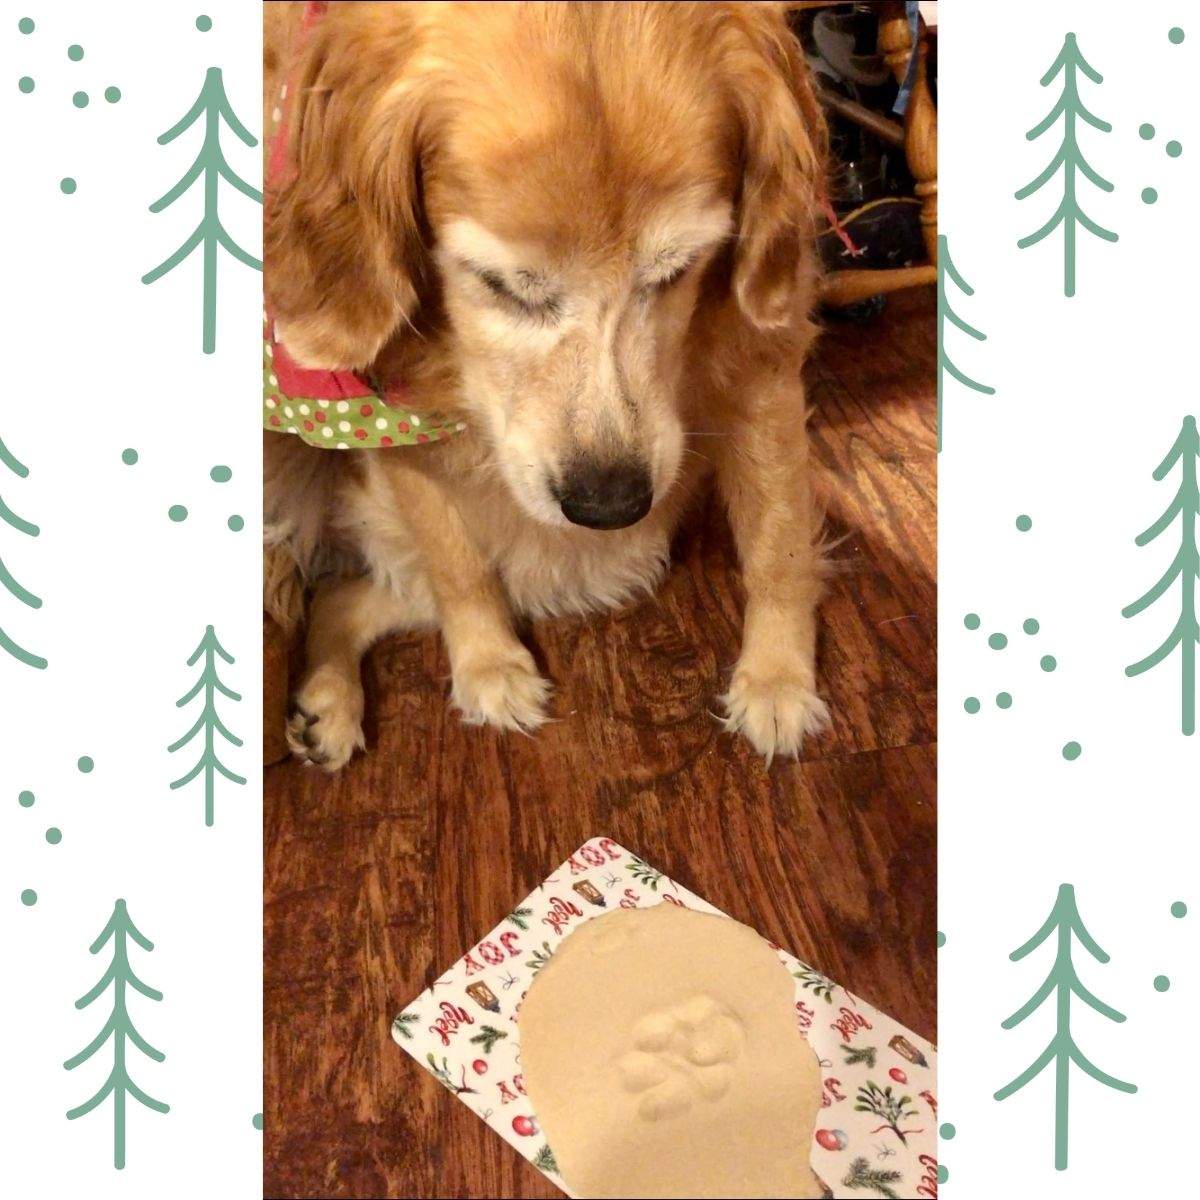
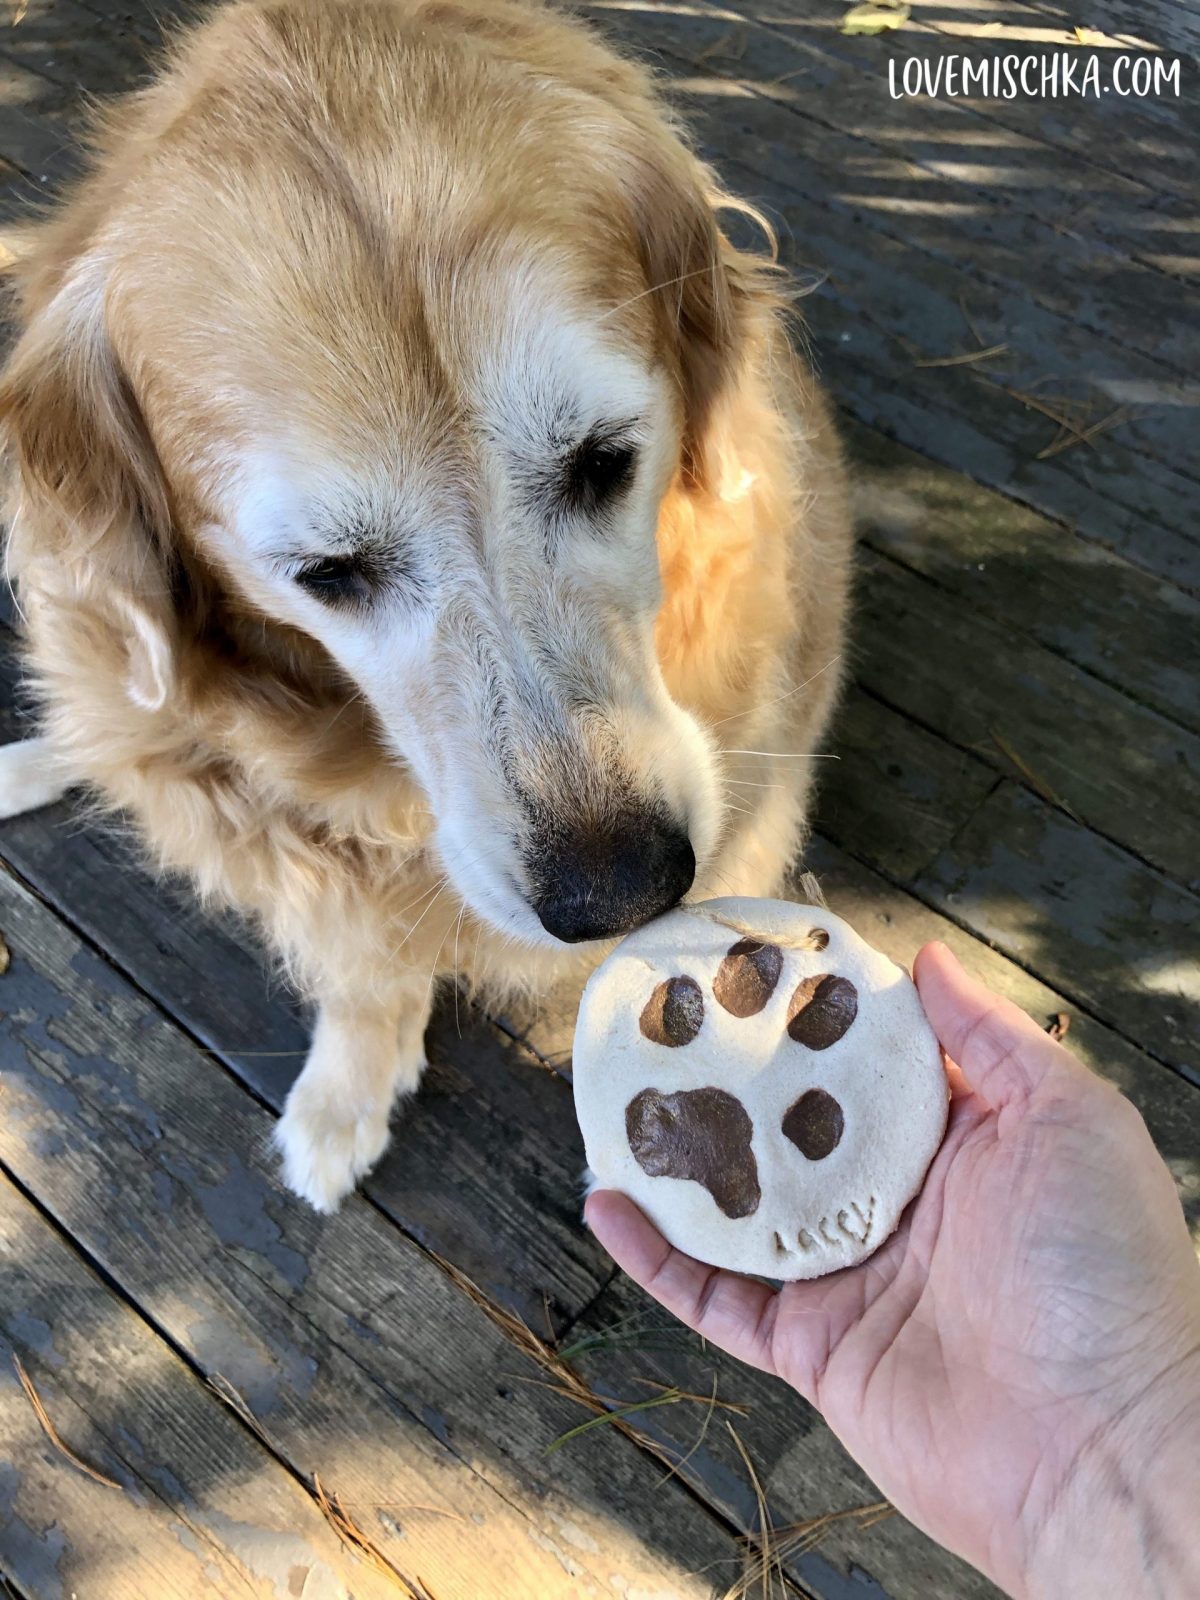
My old golden retriever helped to make these Dog Print Ornaments this year. She wasn’t really a fan, so I had to entice her with some of her favorite treats.
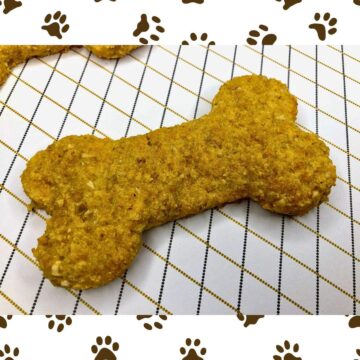
For homemade dog treat recipes, check out:
- Healthy Peanut Butter Banana Dog Treats (Only 3 Ingredients!)
- Easy 3-Ingredient Cheddar Dog Treats
- Easy Pumpkin Peanut Butter Dog Treats
This Paw Print Ornament Recipe has only THREE ingredients. Like I said above, you probably already have them at home. They are FLOUR, SALT, and WATER.
This is the same salt dough recipe that I use for regular salt dough ornaments or keepsakes of my cousins’ kids. It just makes a smaller batch.
This recipe makes about five medium-sized paw print ornaments.
You, of course, could make a couple paw print ornaments then use the rest of the dough to make other salt dough ornaments or preserve your child’s handprint.
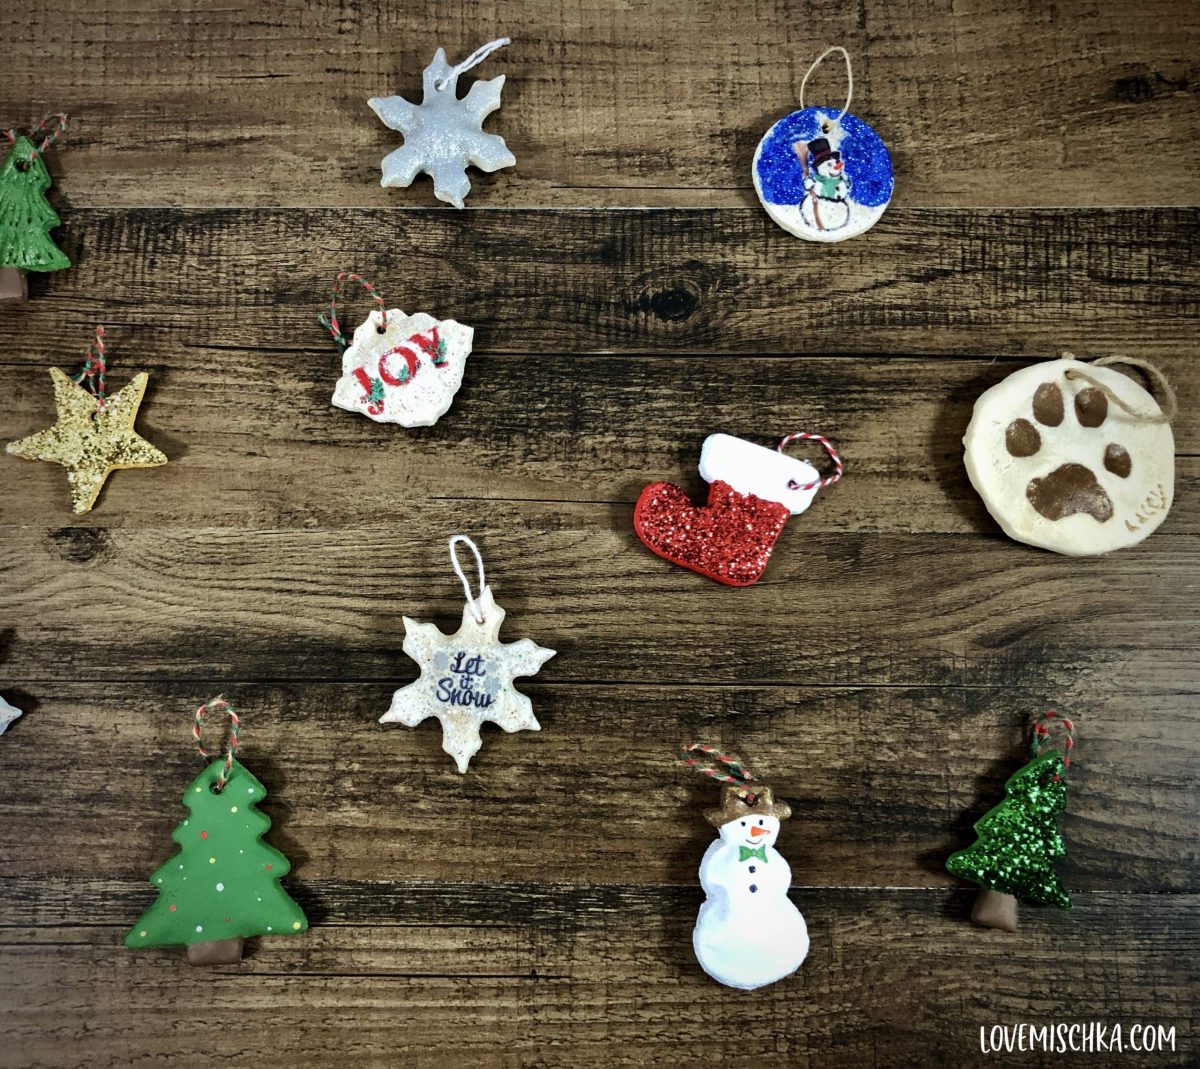
I like to make cute, holiday designs. Snowflake ornaments, made with this Wilton Snowflake Cookie Cutter Set, are my absolute favorite.
You could also try making paw print ornaments with my DIY Cinnamon Salt Dough Ornament Recipe.
Other Tools Needed
A Drinking Straw to poke a hole at the top of each ornament (for hanging).
Ribbon or Twine to hang the ornaments from. You just slide it in the hole created with the straw, loop it, then knot it at the ends. I prefer to use twine, like this Natural Jute Twine. I love the rustic look and it holds up better than some ribbons.
Cookie Cutters to cut around your pet’s paw print. I did this after I had Lacey press her paw in the dough. Some people cut the shapes then do the paw print.
The only problem I ran into with my method is that, if the dough where she pressed her paw was too thin or I didn’t flour underneath enough, it was difficult to remove the cut piece and place it on a prepared baking sheet without distorting her paw print. I had to be very careful.
So, if you do the paw print before cutting the shape, I recommend making sure the dough is at least ½-inch thick AND use a lot of flour on the surface below the rolled out dough.
Optional Supplies/Tools
Parchment Paper is used to prevent sticking while rolling the dough and baking the ornaments.
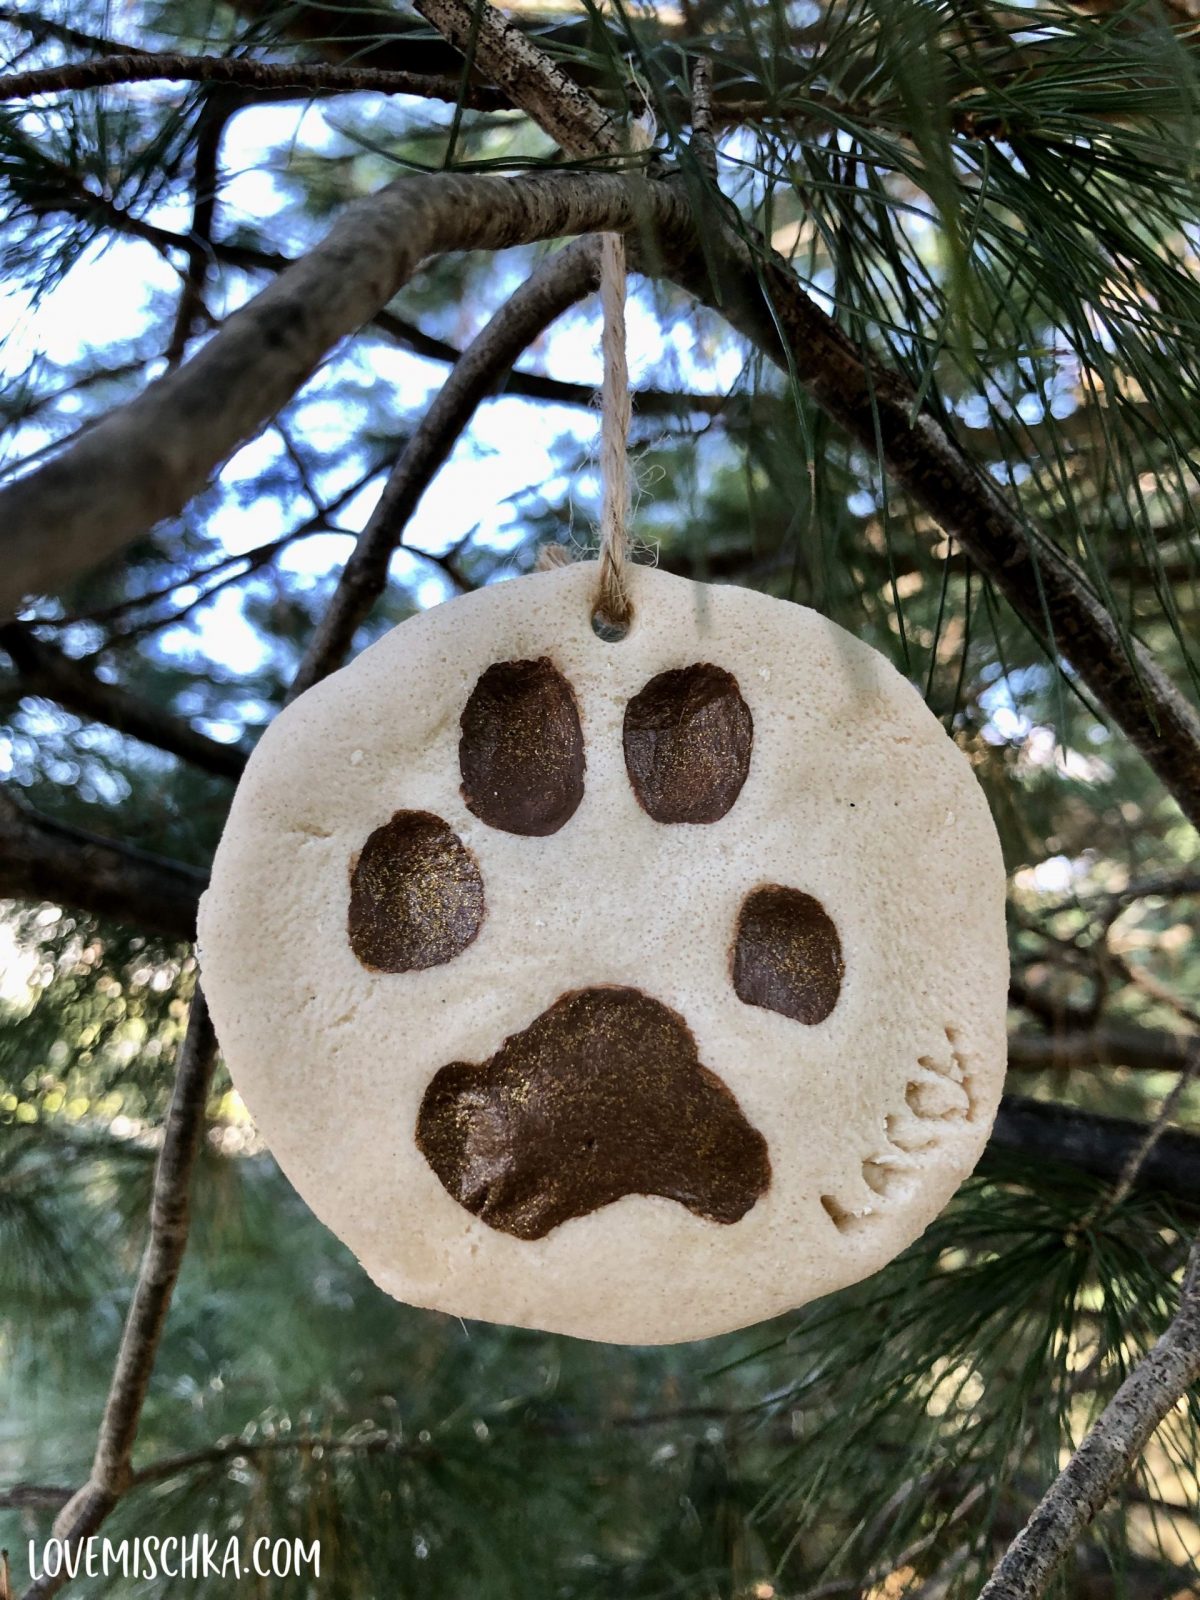
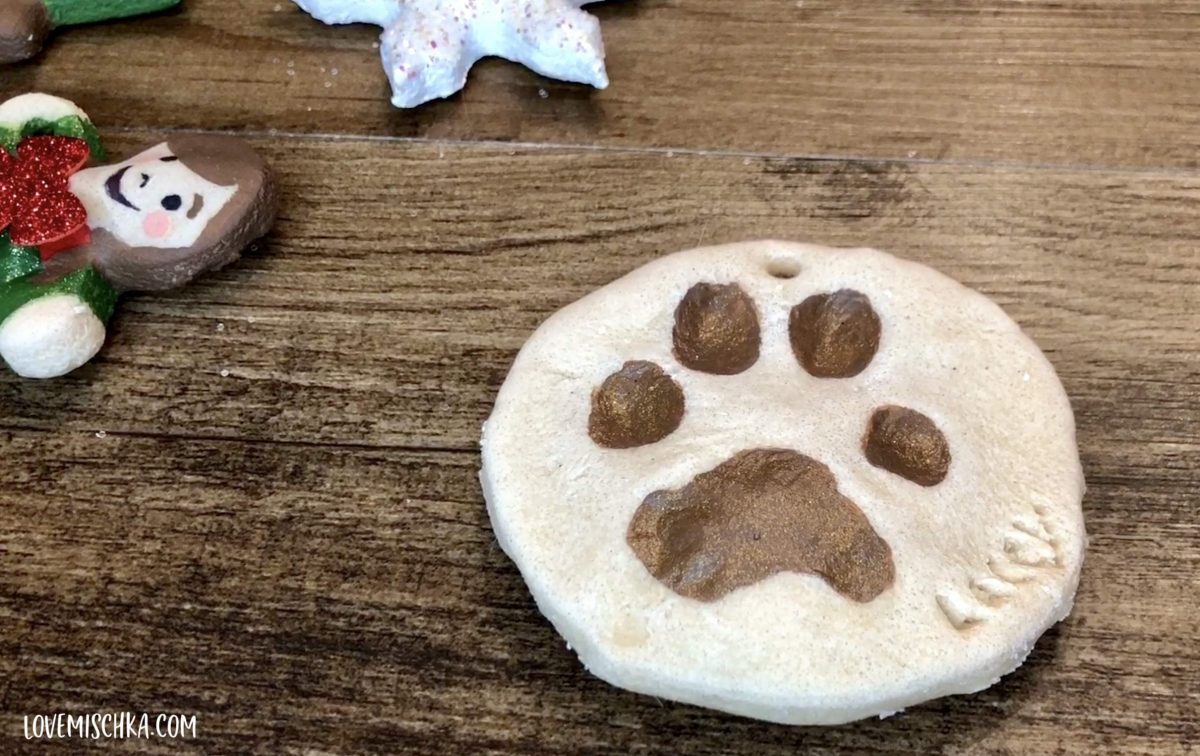
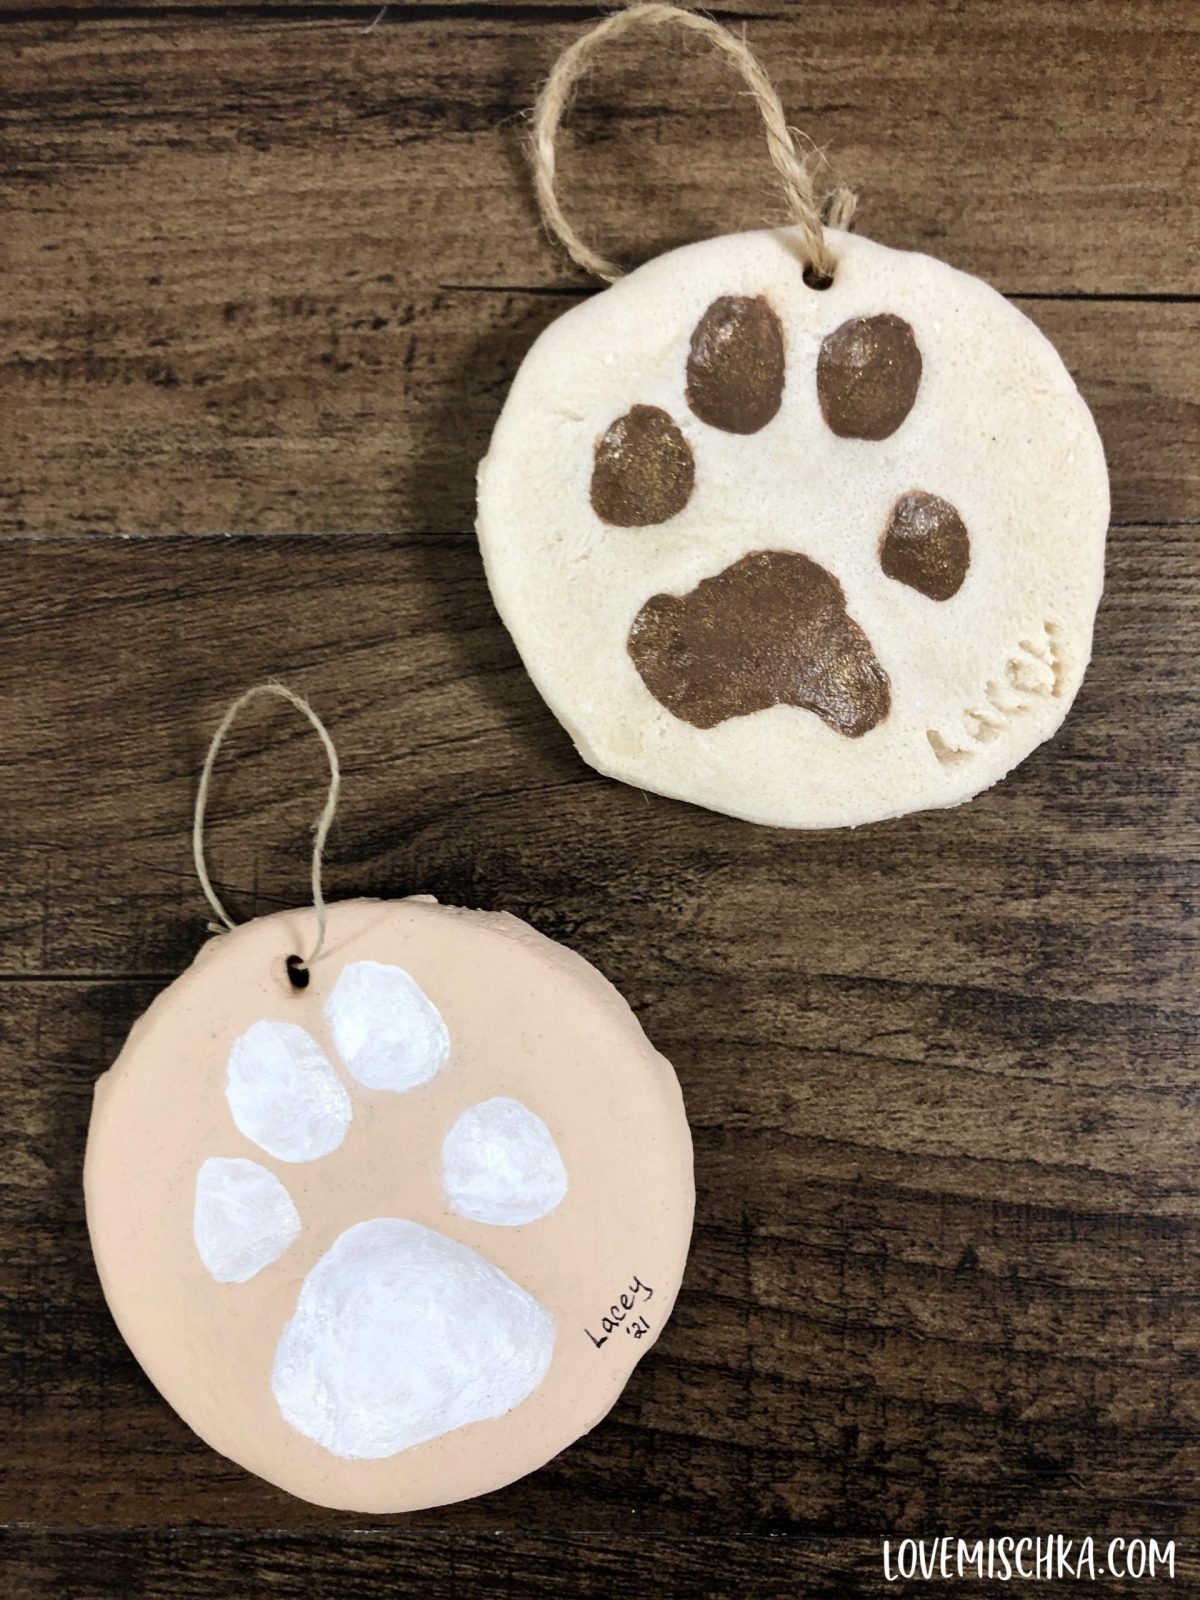
Acrylic Paint to decorate. I painted these paw print ornaments in a way that I could hang them up ALL year round. Christmas colors also look great. Annddd…..
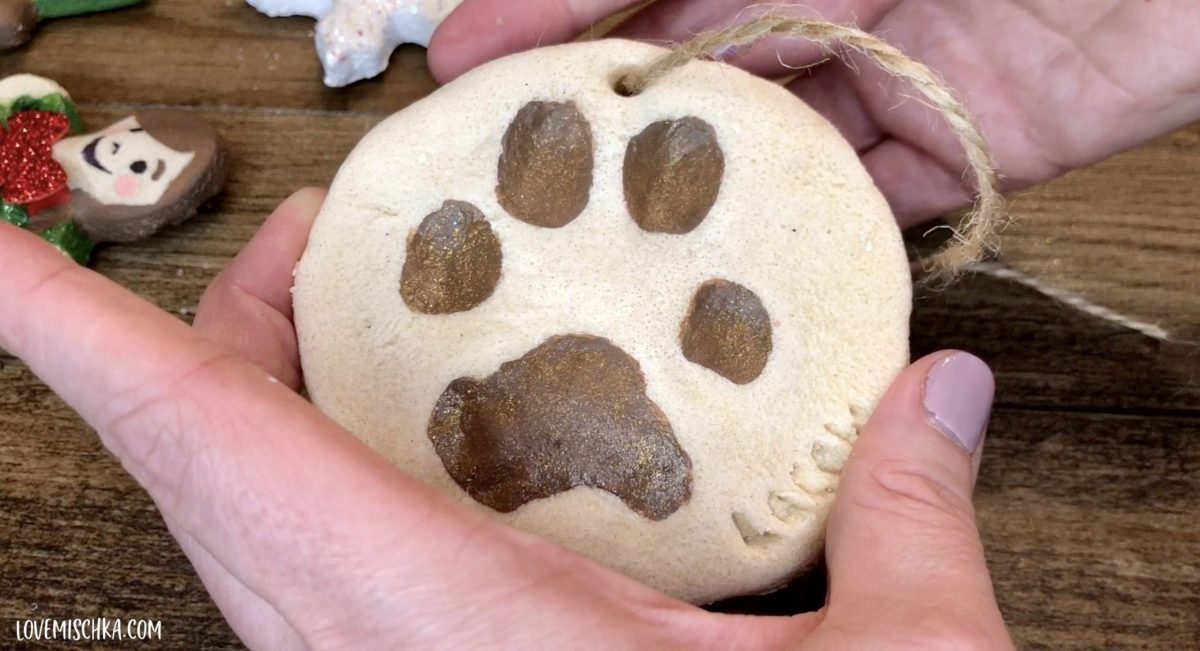
GLITTER, also for decorating. Sparkle always looks great on ornaments at Christmas. I used this FolkArt Extreme Glitter Acrylic Paint in Gold to add a little sparkle to one of Lacey’s paw print ornaments.
How to Make Paw Print Ornaments
In a medium-sized mixing bowl, combine all ingredients until a dough forms.
Sprinkle flour on a sheet of parchment paper. I recommend placing the paper on something mobile, like a baking sheet or a small cutting board. This will help you reach your dog's height level.
Roll out the dough with a rolling pin until it's about ½-inch thick. This is thicker than I recommend with regular salt dough ornaments or my cinnamon salt dough ornaments. This provides more depth for the paw print. If the paw print is too thin, this area can burn or bubble. It's not pretty.
I press Lacey's paw into the dough before cutting out shapes. This provides more room and freedom if her paw doesn't fit into the cut shape or if we miss the center of it.
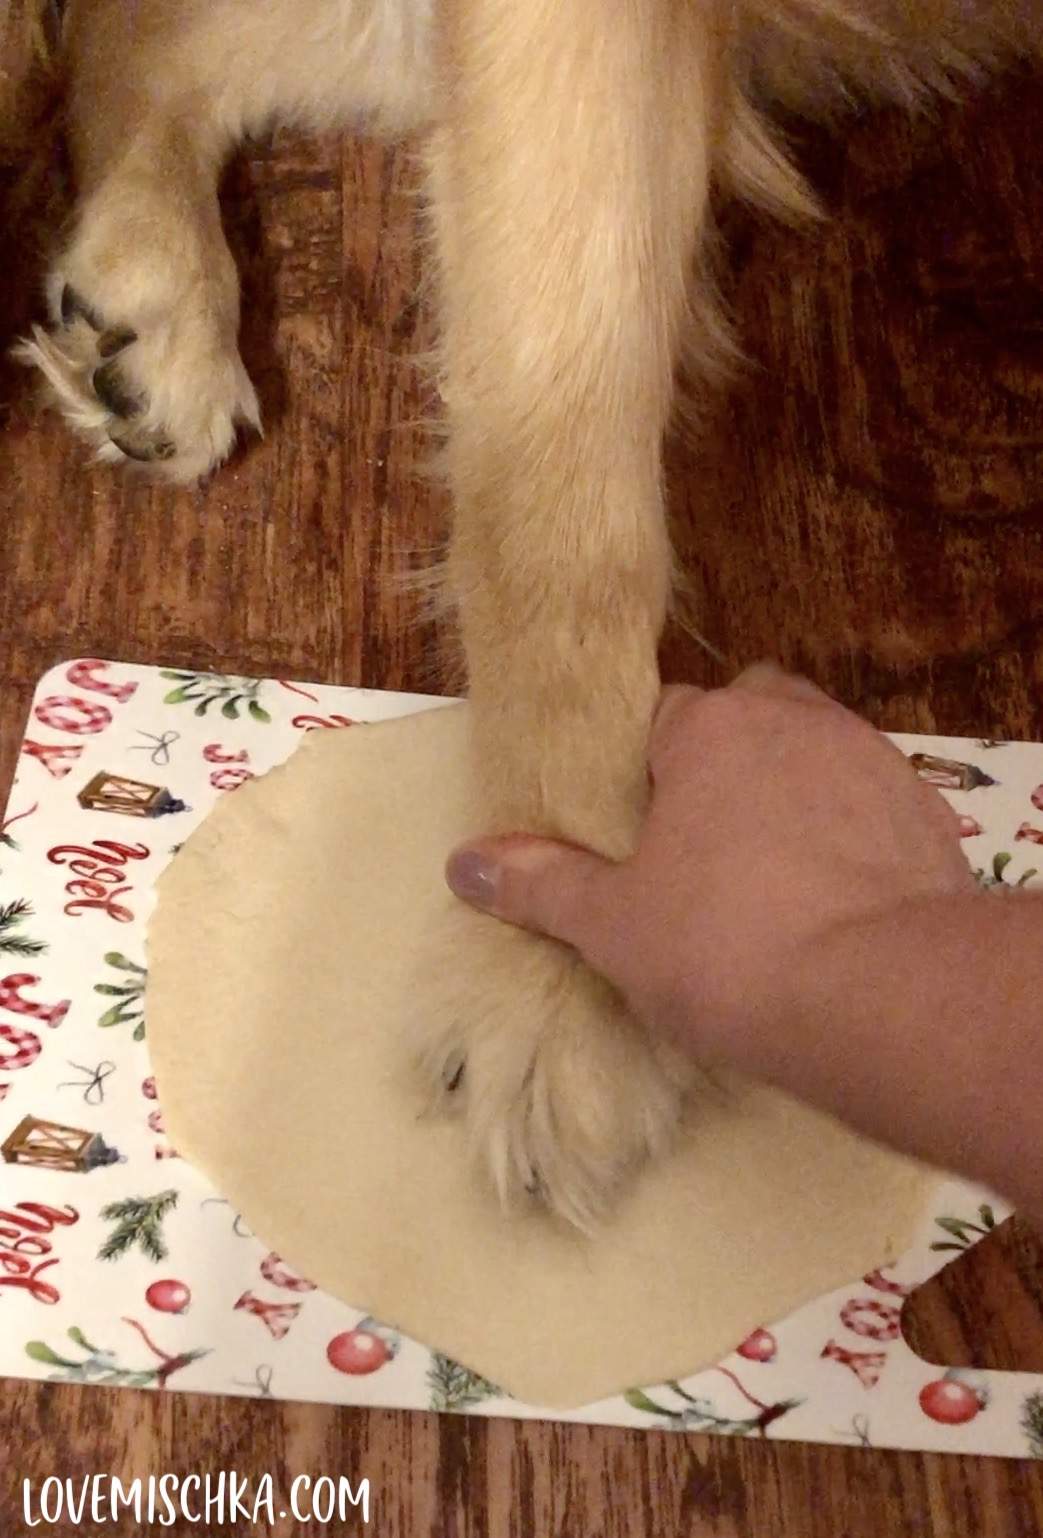
I do see the benefit of cutting out the shapes first with cookie cutters, putting them on a prepared baking sheet, then pressing your pet's paw in them though. Do whichever works best for you.
Remember to make holes for hanging BEFORE baking!
Once the cut paw print shapes are placed on a parchment-lined baking sheet, use a straw to poke a hole in the top of each ornament.
If you would like to write your dog's name in the dough, like I did below, now is the time to do so. I used a turkey lacer like these on Amazon to press into the dough.
Bake at 300°F for about an hour. Then let cool.
Decorate as desired. You can go all out in holiday colors and glitter. OR you could pick natural colors for a more rustic look. OR you could paint them any color and have them out all year long. They don't have to be seasonal.
Cut twine or ribbon to desired length. Slide it into the hole at the top of the ornament, tie the ends together, and knot it.
I also recommend writing the year somewhere on the ornament, so you can look back on your fur baby in the years to come!
When finished, hang your paw print ornaments on your Christmas Tree! Or anywhere else you'd like. You can even gift them to the other dog lovers in your life.
This easy DIY craft can also be used with cats and human babies.
It's a great Christmas craft for kids! They love to help!
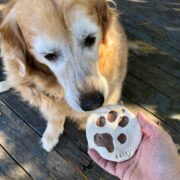
Lacey definitely approves of her's!
How long do these DIY Paw Print Ornaments last?
I have salt dough ornaments from 2013 that were made with this recipe. It’s been 8 years and they still look great! No mold. No chips. We STILL hang them on the tree every year.
So, these DIY Paw Print Ornaments should be a wonderful, heartwarming keepsake of your fur baby for many years to come!
For more Christmas DIY ideas, check out:
- DIY Cinnamon Salt Dough Ornaments (No Applesauce)
- How to Make DIY Reindeer Gift Bags
- How to Make DIY Reindeer Candy Canes
- Christmas Pretzel Rods Recipe
- Free Printable Christmas Bingo Game
DIY Paw Print Ornaments
Ingredients
- 1 cup Flour
- ½ cup Salt iodized
- ½ cup Water warm
Instructions
- Preheat the oven to 300°F.
- In a medium-sized mixing bowl, combine all ingredients until a dough forms.
- Sprinkle flour on a sheet of parchment paper.
- Roll out the dough with a rolling pin until it's about ½-inch thick.
- Carefully press your pet's paw into the dough.
- Cut around the paw print. This can be done with a cookie cutter in any shape you like.
- Place cut pieces on a baking sheet lined with parchment paper.
- Bake for about an hour or until dry and hard.
- Let cool completely.
- Decorate, if desired.
- Cut twine or ribbon to desired length. Slide it into the hole at the top of the ornament, tie the ends together, and knot it.
- Hang it on your Christmas Tree!
Video
If you make these DIY Paw Print Ornaments, tag me on Instagram (@lovemischka). I'd love to see your creation!!! (and fur babies!)


Sandra C Wirtanen says
I love the DIY Dog Ornaments.
Mischka says
Thank you!! ❤️
Kendra says
Can you make the dough ahead and refrigerate it to do at daycare the next day or something similar?
VP says
I made this and it's so lovely, thank you for sharing your recipe! Just wanted to ask though if your ornaments have also gotten soft? I made about 12 pcs, they all started to soften a couple of days after, others became puffy. But they're all still intact. I wonder if you've had this experience, too, and if you have suggestions to make them last longer? Thanks!
Christine says
Can you store extra dough?
Alex says
Dough was watery and hard to work with. Had to add several more spoonfuls of flour to get it to be rollable. How warm is “warm” water? Hand-washing warm? Needs to be more specific.
Manta Bridge says
Nice i really enjoyed reading your blogs. Keep on posting. Thanks