
These simple Cinnamon Salt Dough Ornaments are fun to make, smell AMAZING, and last for years. A great DIY holiday craft for the whole family. Hang them on your tree or make them as thoughtful, handmade gifts for family, friends, teachers, and more.
This post may contain affiliate links. This means, if you click a link and make a purchase, I may earn a small commission at NO extra cost to you. I appreciate any and all support. Thank you❤️
Salt Dough Ornaments are always fun to make, but CINNAMON SALT DOUGH ORNAMENTS are even better!! They’re my favorite DIY Christmas craft.
In addition to smelling AMAZING, Cinnamon Ornaments have a beautiful, natural, rustic look that doesn’t even need to be decorated or altered in any way.
There are ways to enhance their natural beauty though, without losing their charm or that comforting, cozy smell of cinnamon.
We’ll talk more about that after going over the basics.
For more holiday DIY ideas, check out:
- How to Make DIY Reindeer Gift Bags
- How to Make DIY Reindeer Candy Canes
- DIY Paw Print Ornaments
- Christmas Pretzel Rods Recipe (including how to make Reindeer and Snowman Pretzels)
- Free Christmas Bingo Printable
How to Make Cinnamon Ornaments Without Applesauce or Glue
This Cinnamon Salt Dough Recipe is SO easy. It doesn’t include applesauce or glue, so there’s less of a mess. Especially if kids are helping.
And they can help with each step. It’s that simple. It’s a great hands-on activity for many different ages (adults included!)
These Cinnamon Salt Dough Ornaments are made with only four ingredients - Cinnamon, Salt, Flour, and Water.
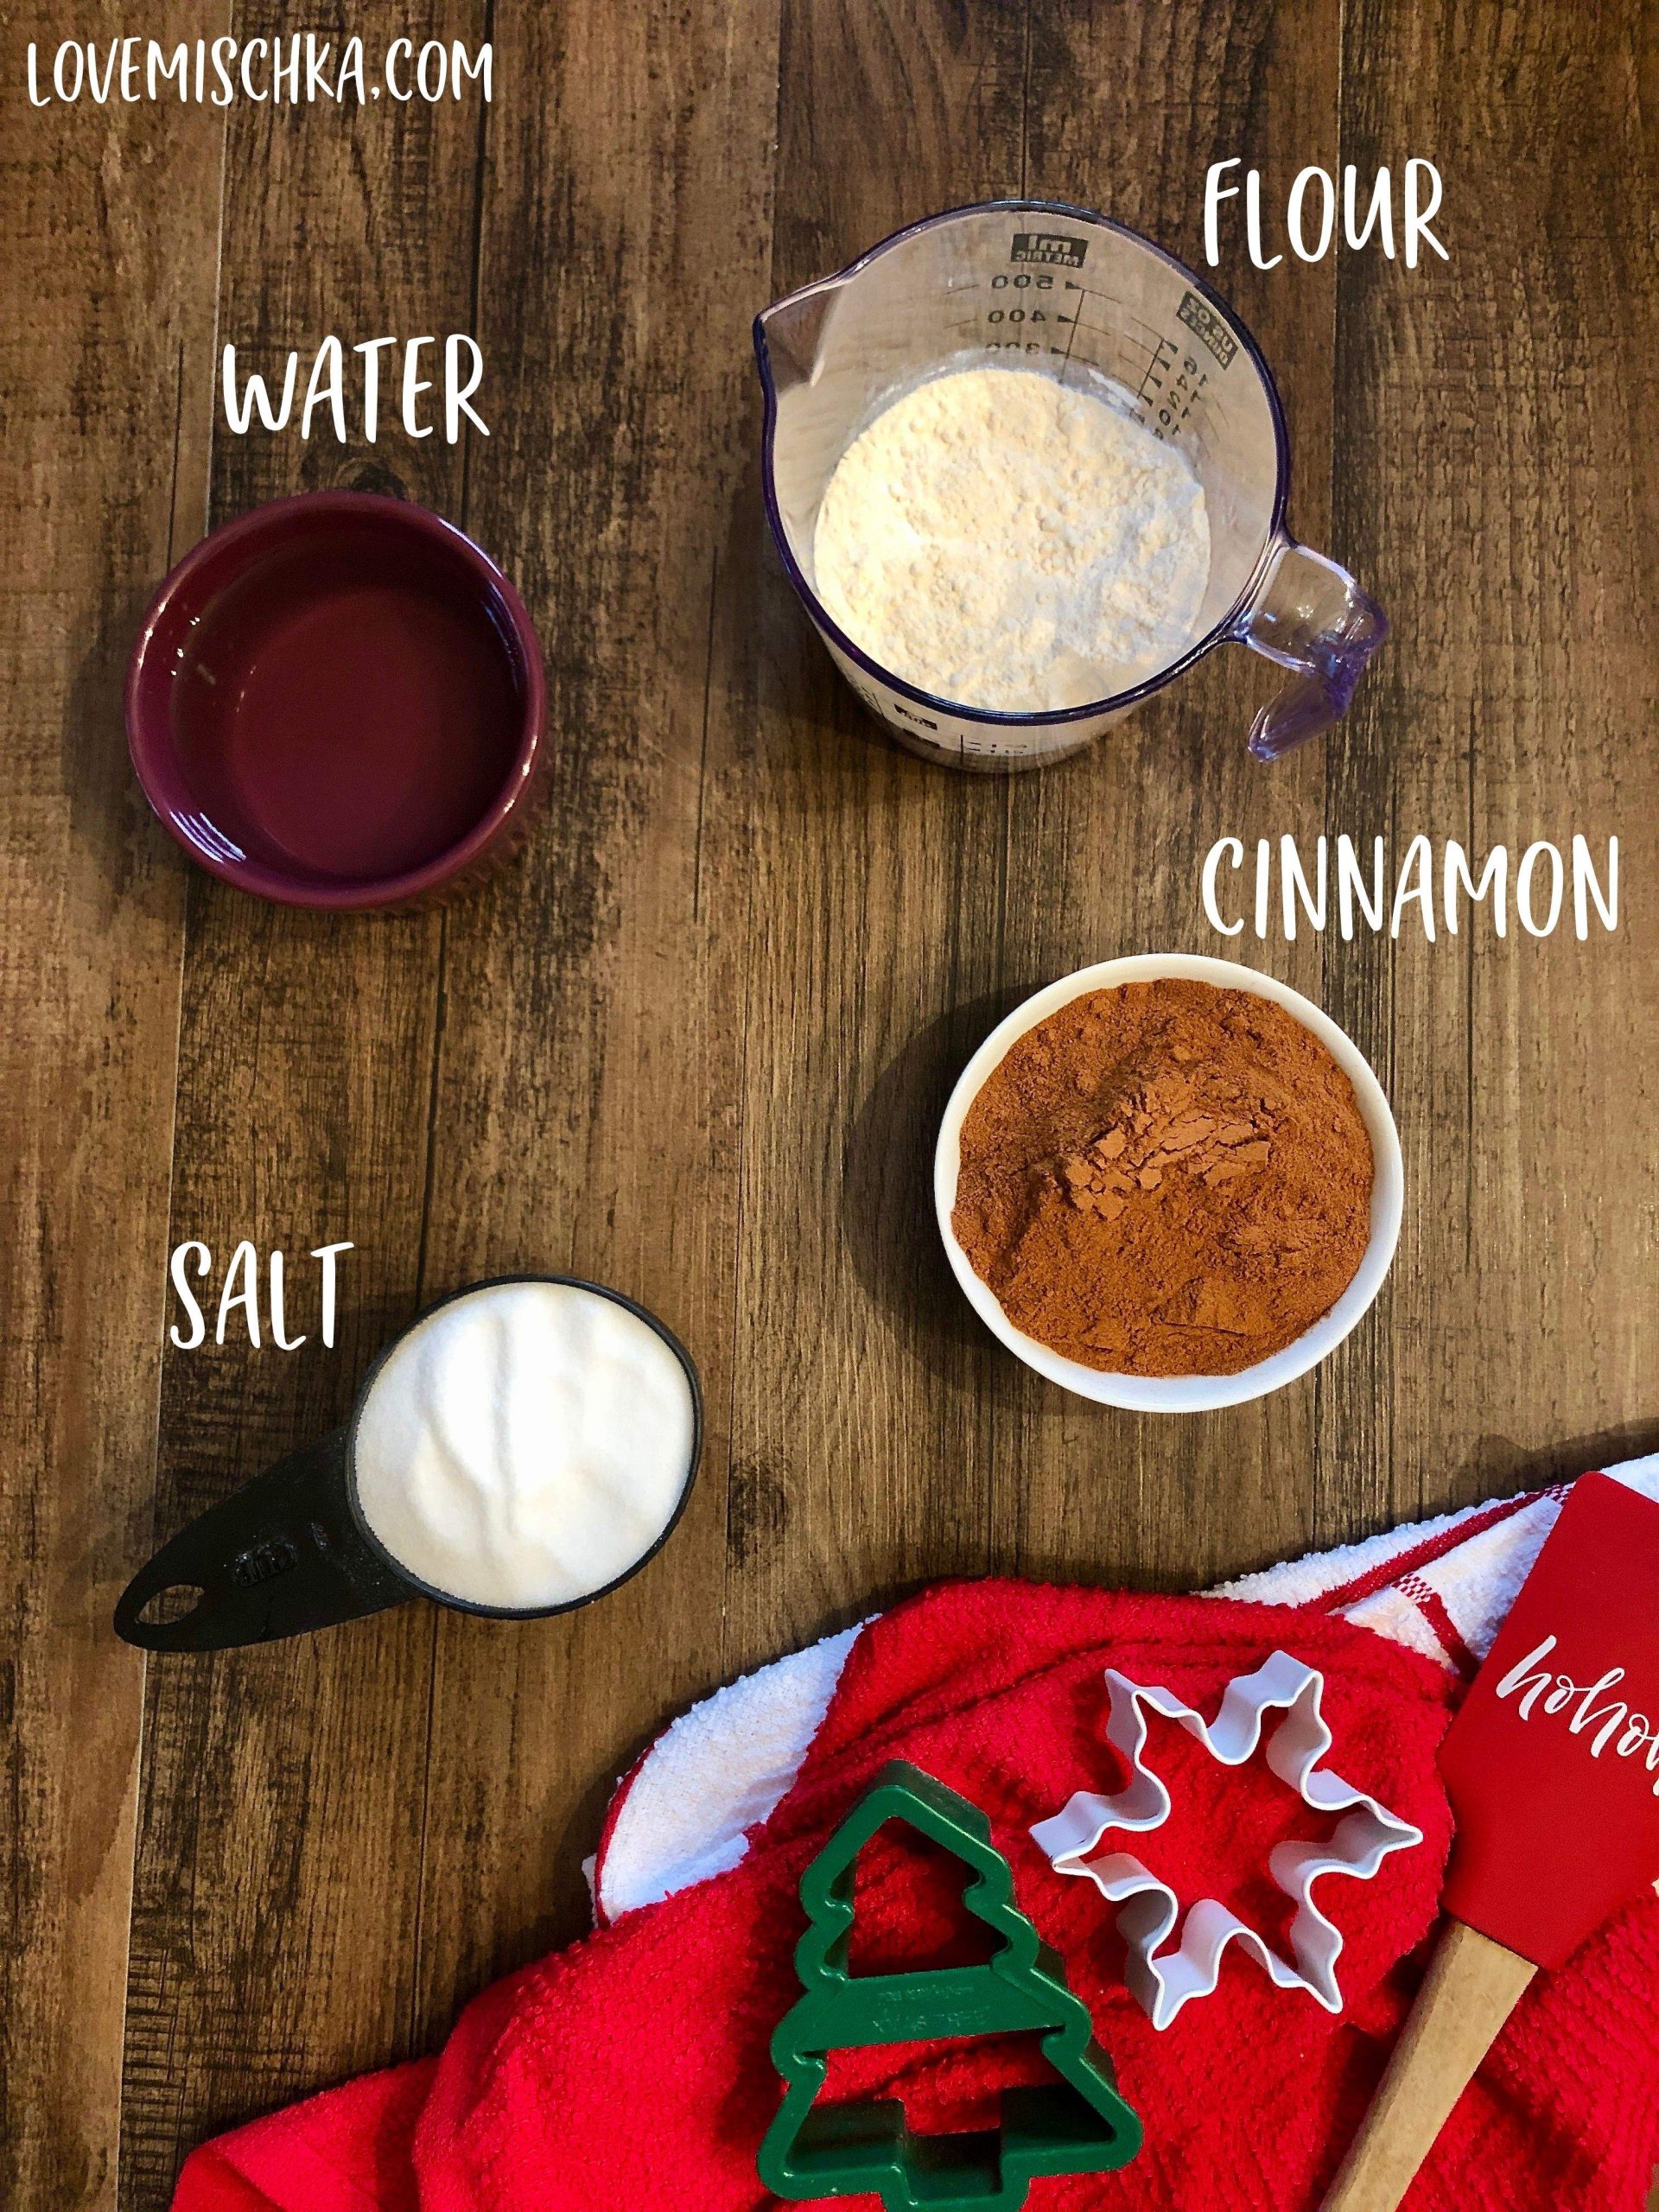
Simply mix the ingredients together in a bowl until a ball of dough forms.
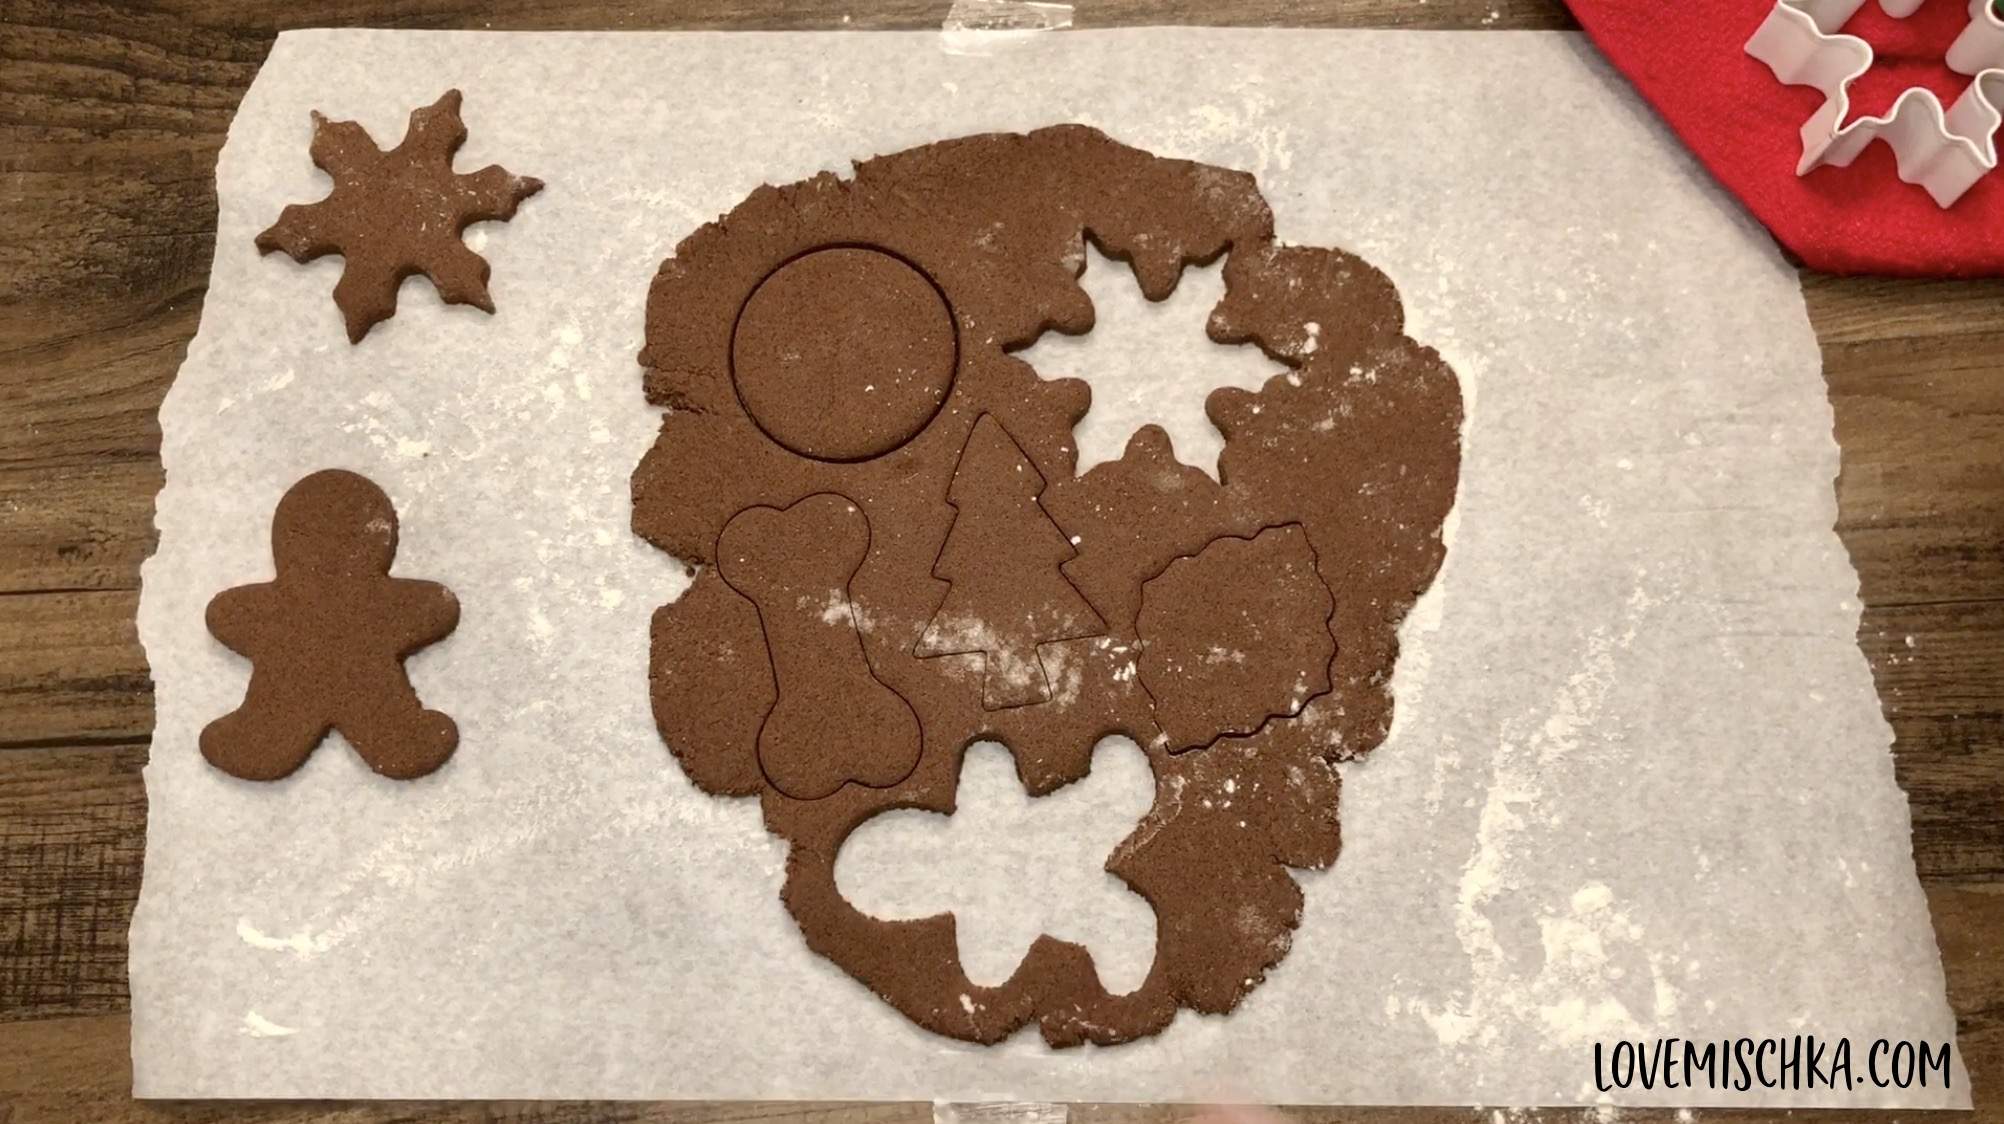
Plop that dough on a sheet of parchment paper (sprinkle flour on it first so it doesn’t stick) and roll it out to about ¼” thick.
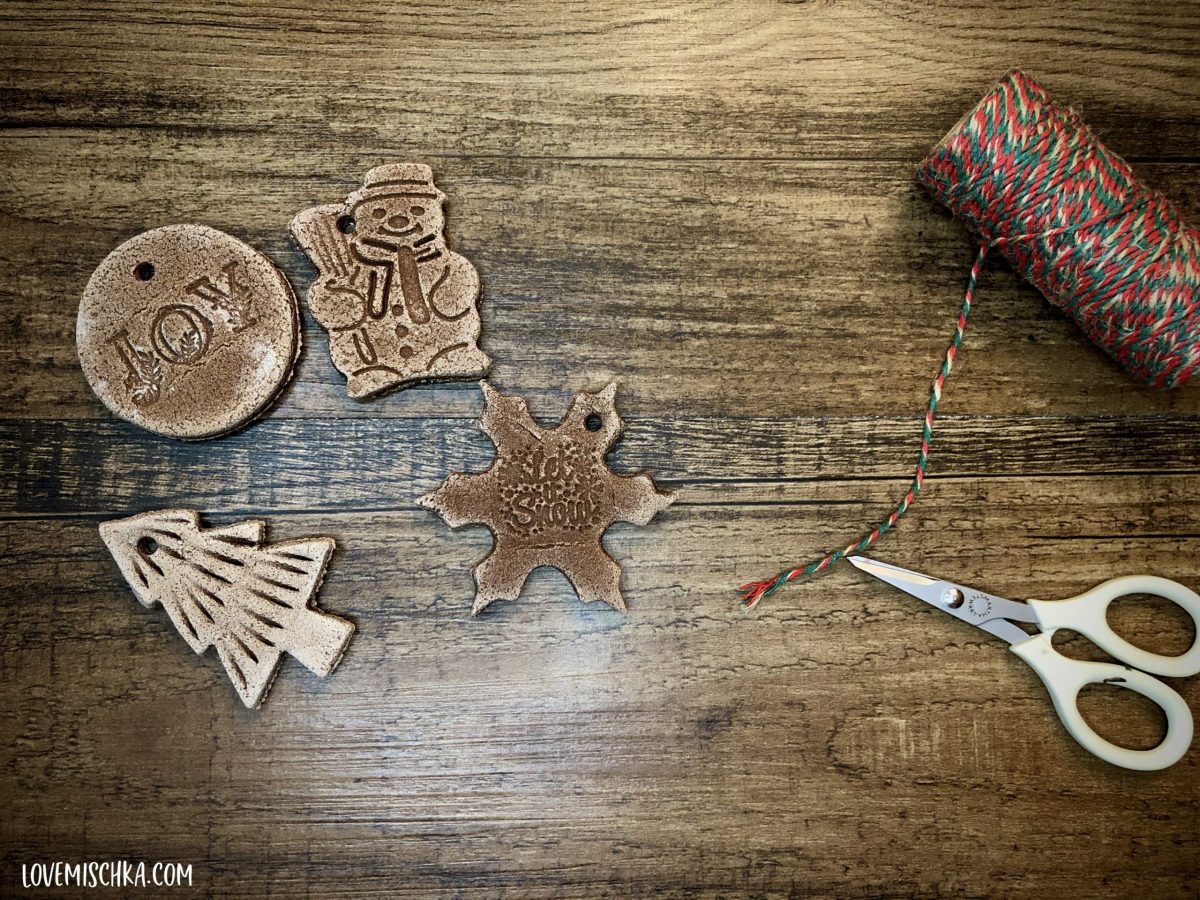
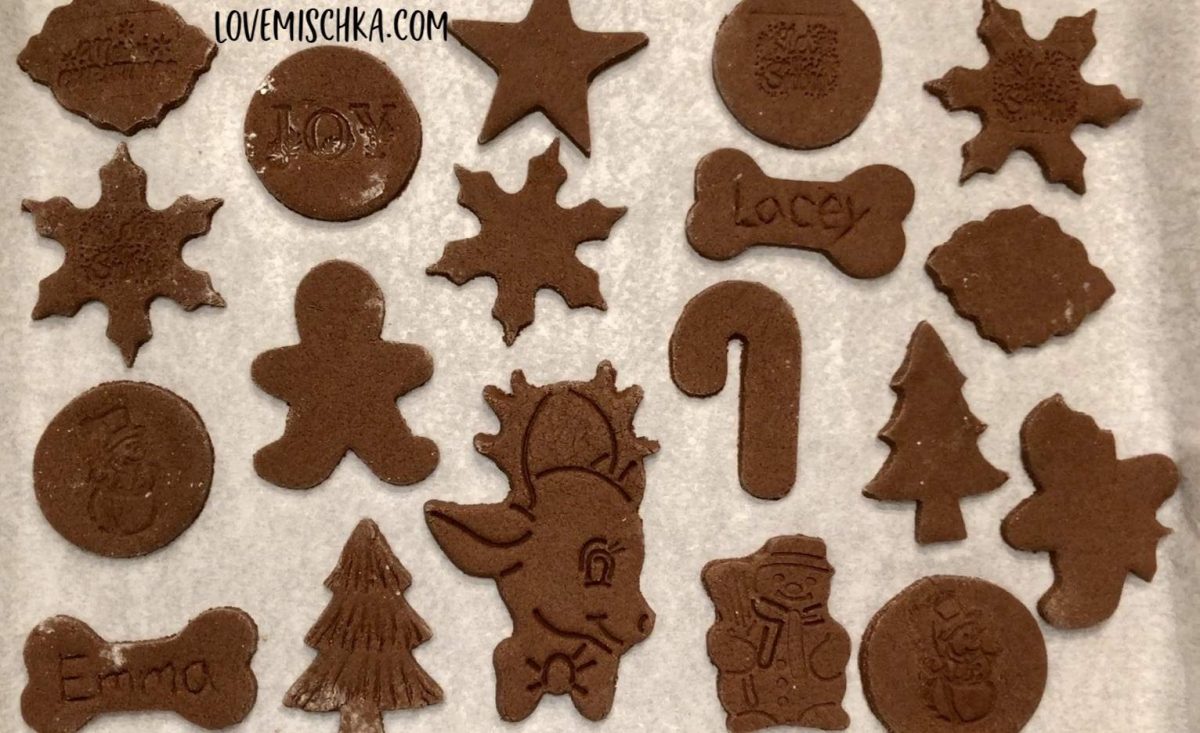
Use cookie cutters to cut out shapes. I always recommend this Wilton Cookie Cutters Set because it’s full of so many different designs, holidays, and events. I use them so much.
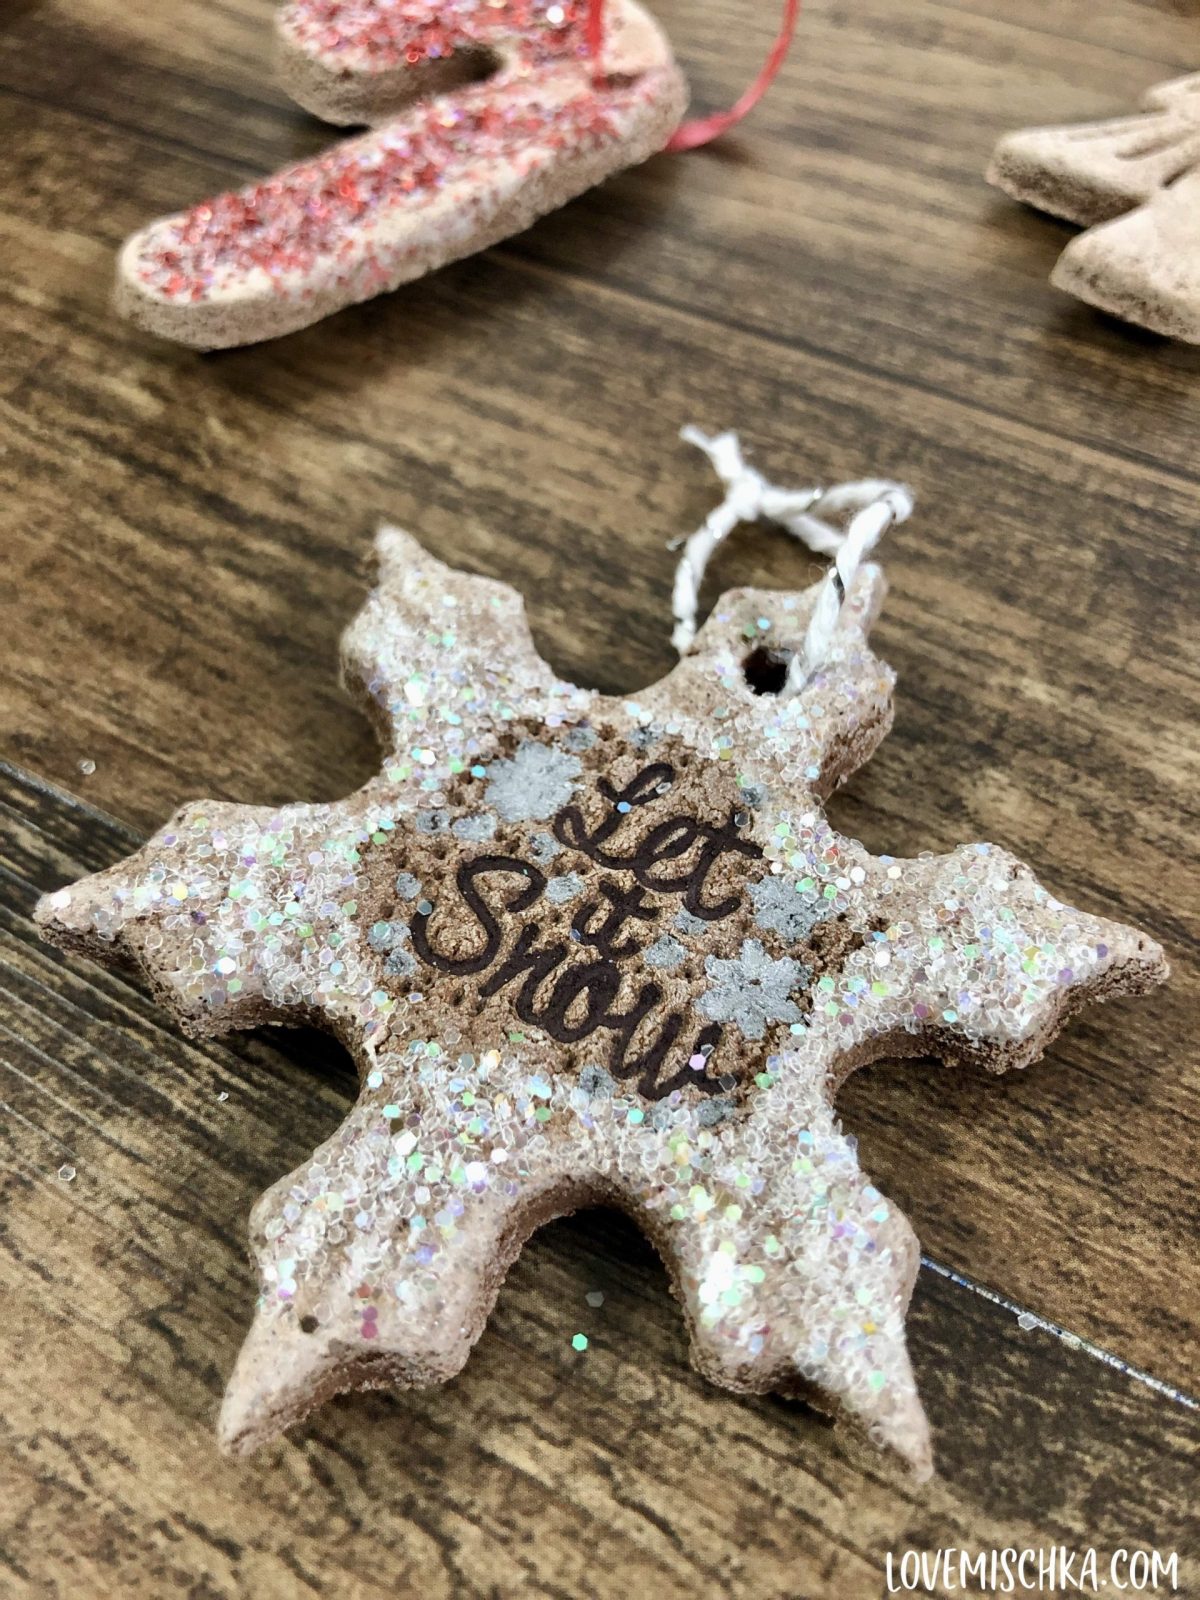
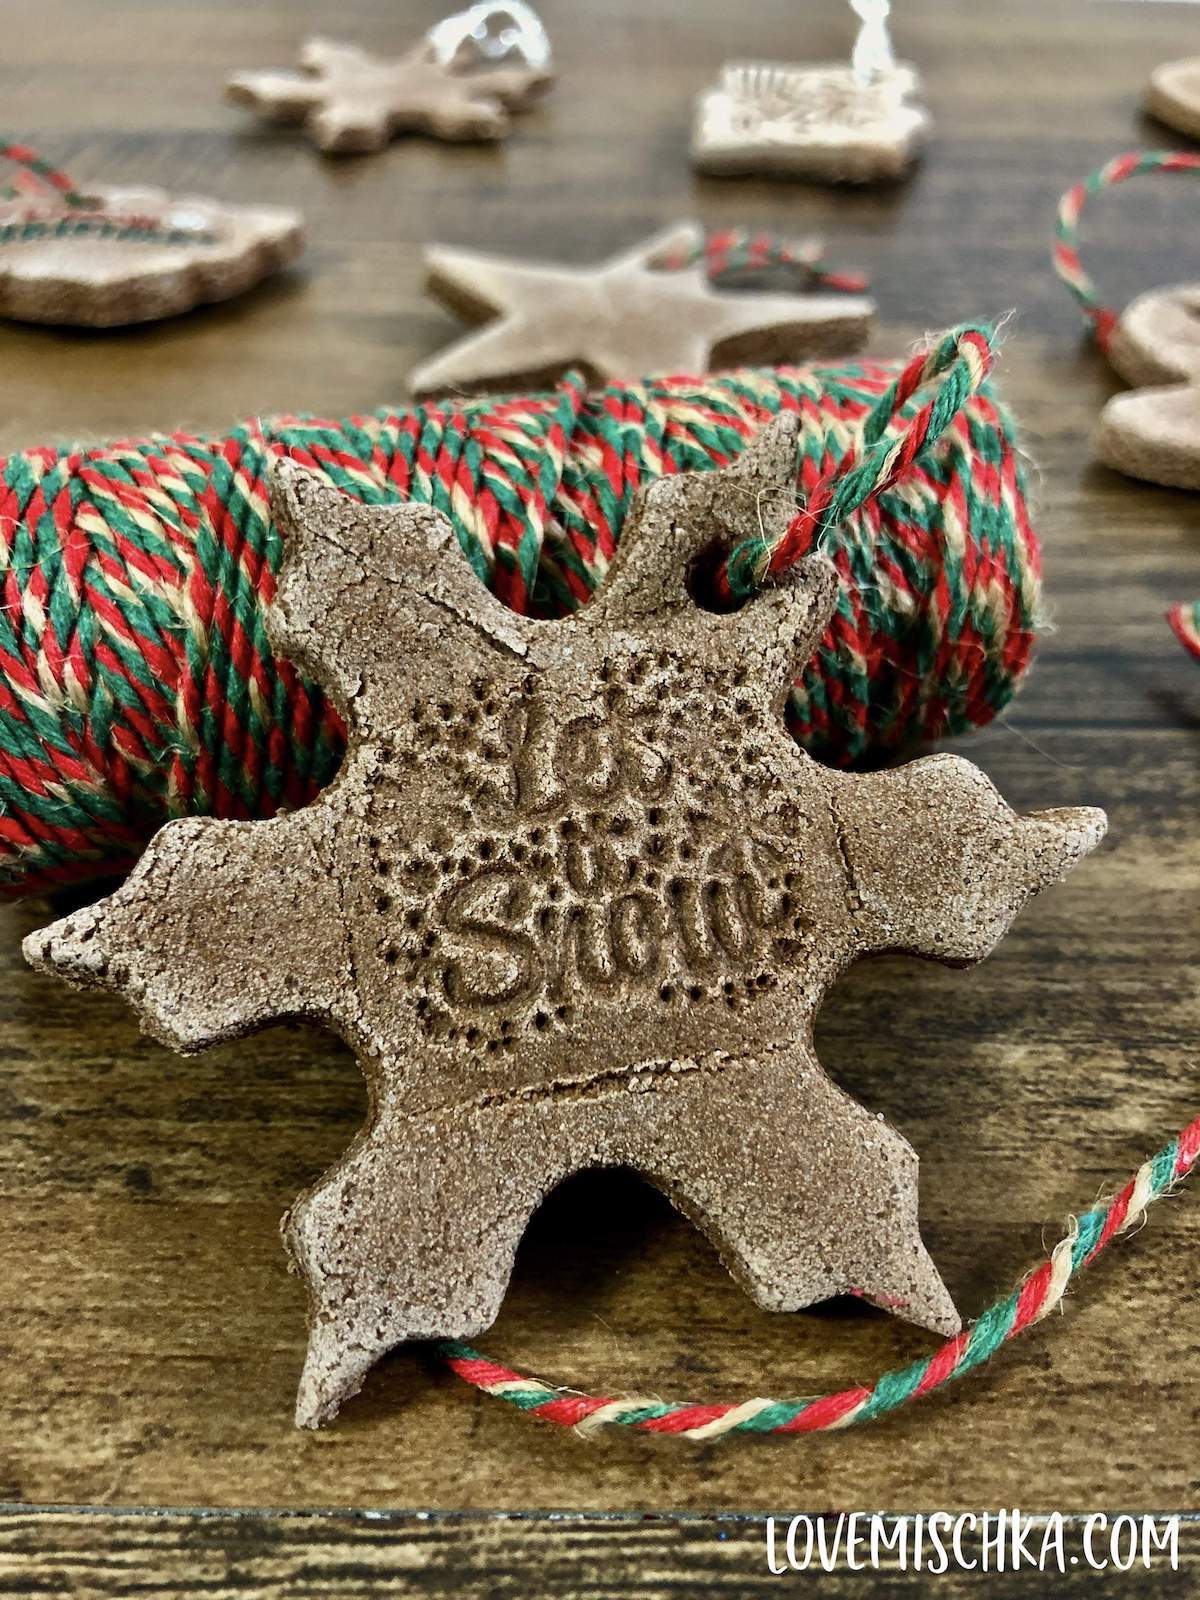
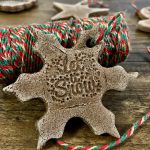
I also have this Wilton Snowflake Cookie Cutter Set. The snowflake shape is one of my favorites to use for homemade ornaments.
When I bake cookies, I don’t like to use “cookie stampers” or “molds” because I rarely have luck with them. No matter how much flour I use, dough tends to get stuck in it.
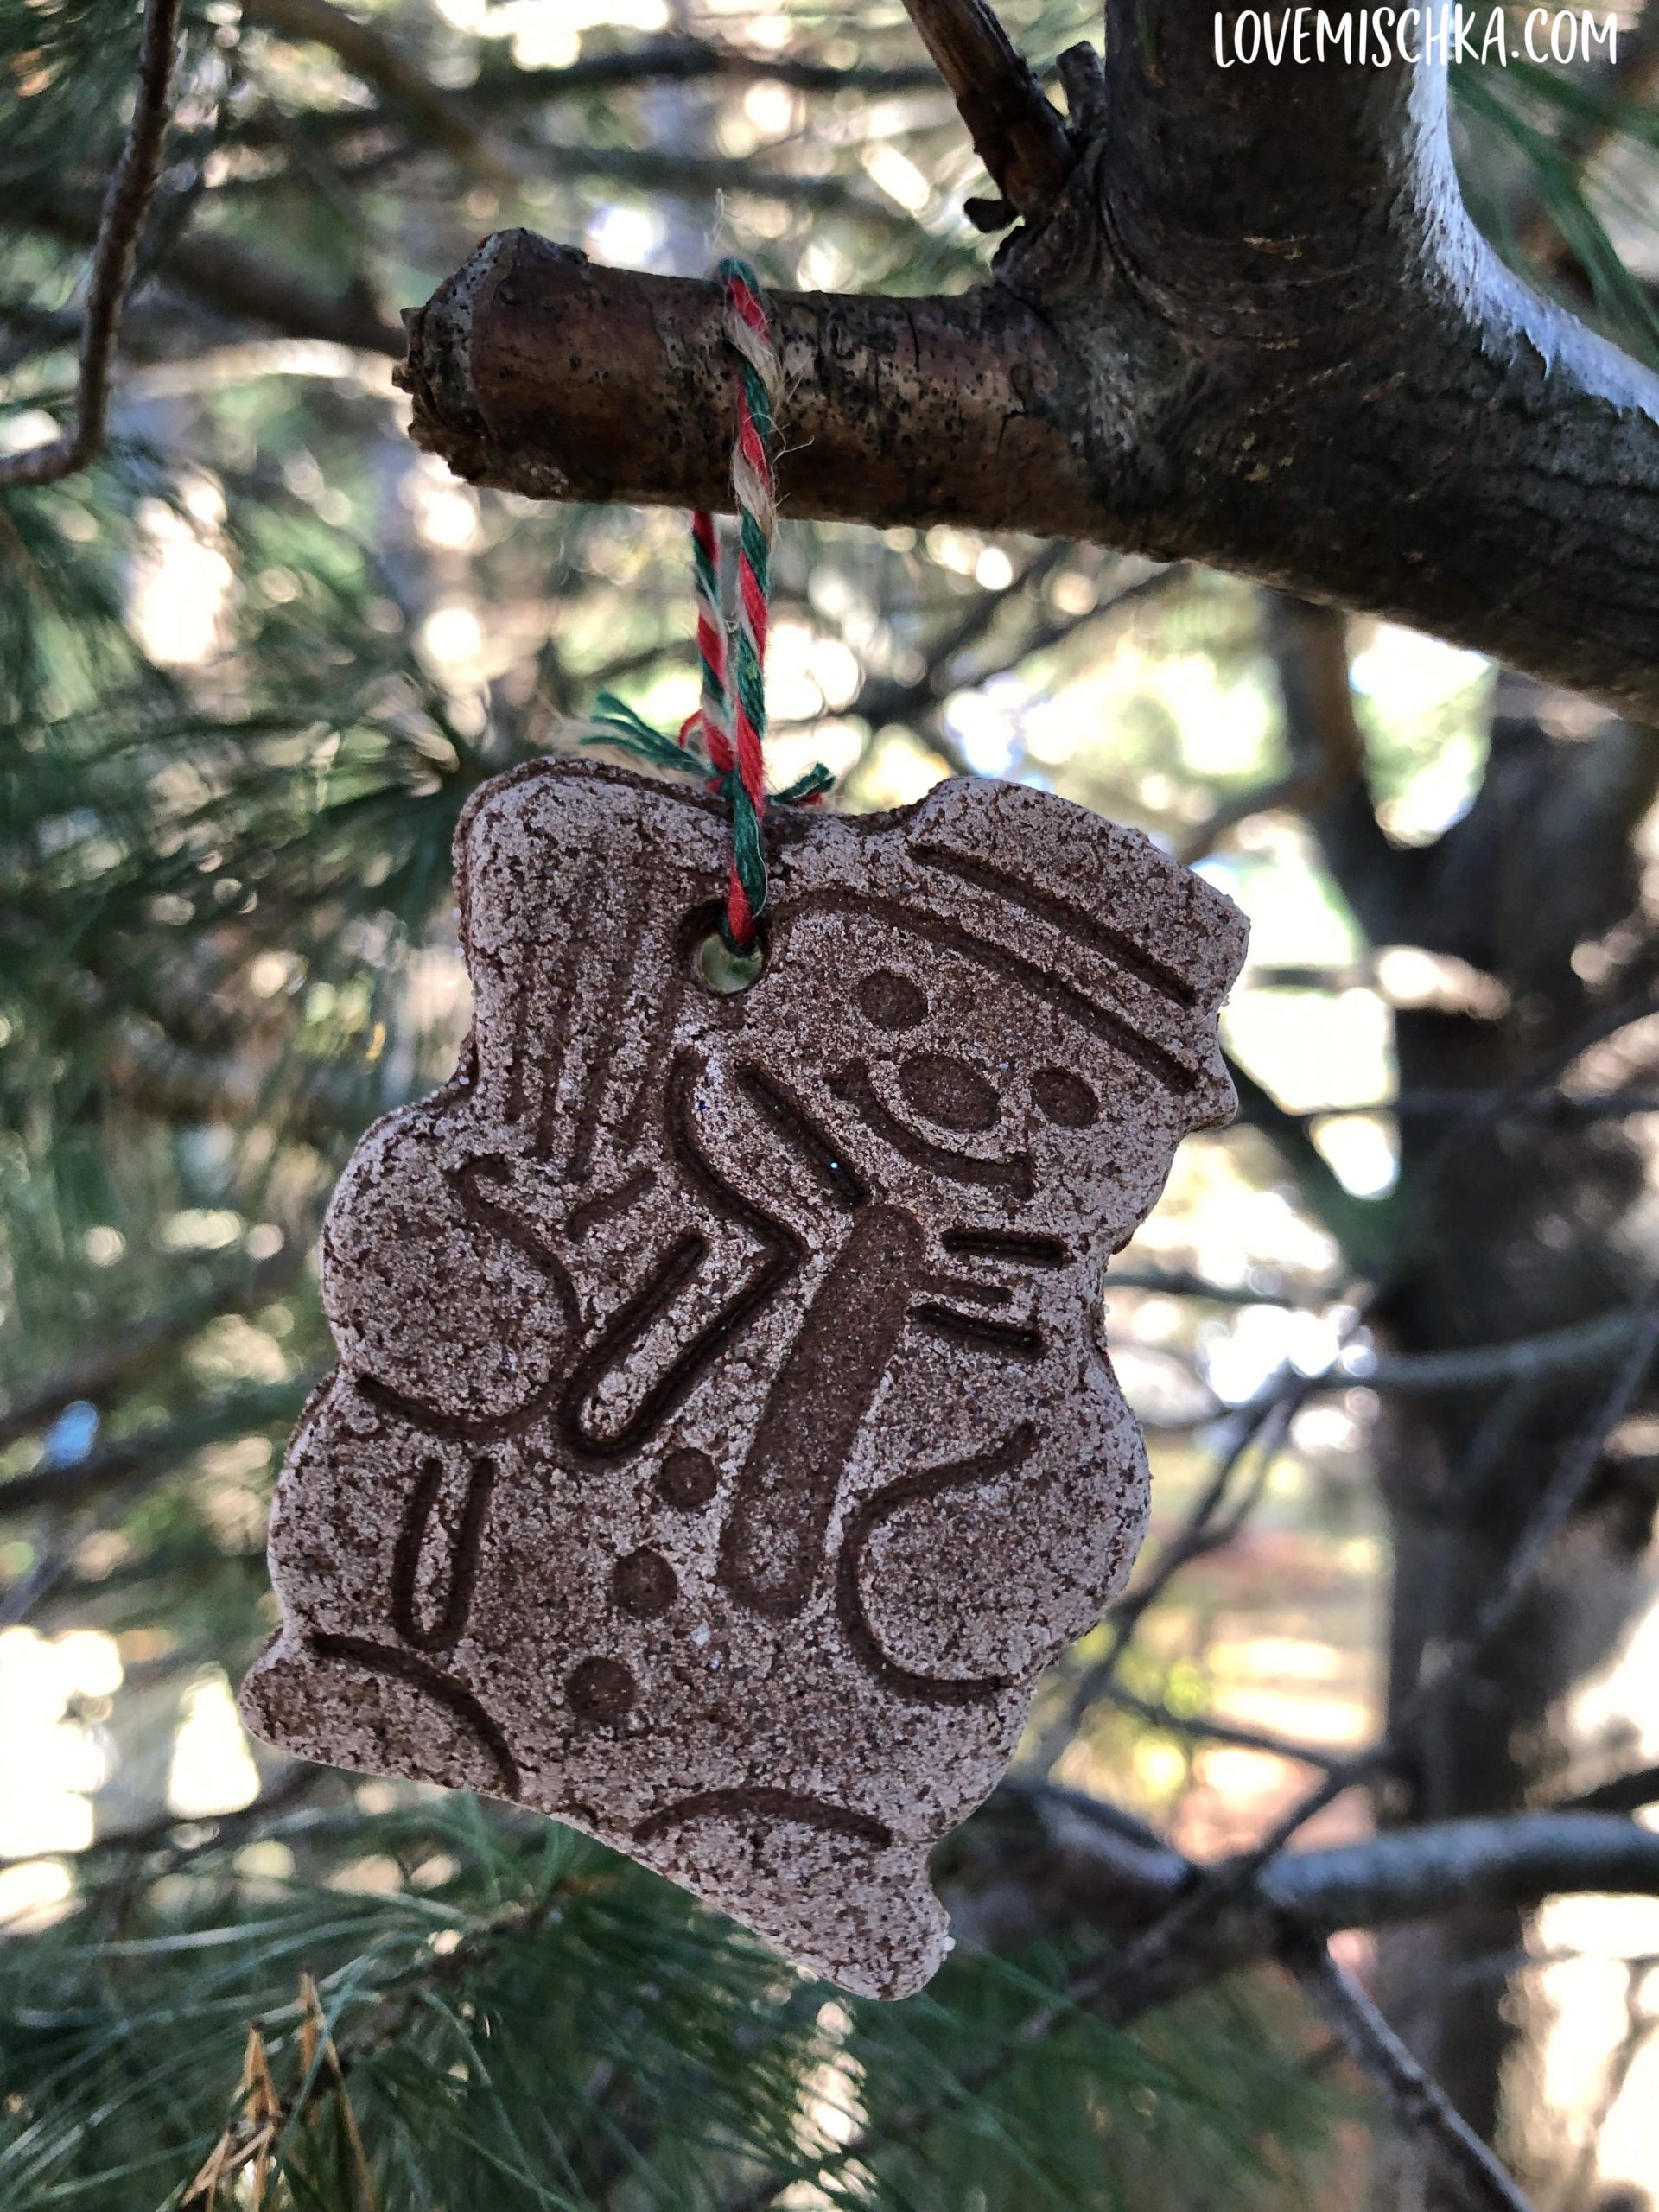
BUT, with DIY Cinnamon Salt Dough Ornaments, I make an exception. “Cookie Stampers” like in this 3D Cookie Cutters Set or this Cookie Cutters Stamps Set make such simple, beautiful ornaments.
They’re especially great if you do not plan to further decorate the ornament (with markers, paint, or glitter). It leads to such a classic, rustic design that I really love.
After you cut your desired shapes, place them on a prepared baking sheet.
Making Holes to Hang the Ornaments
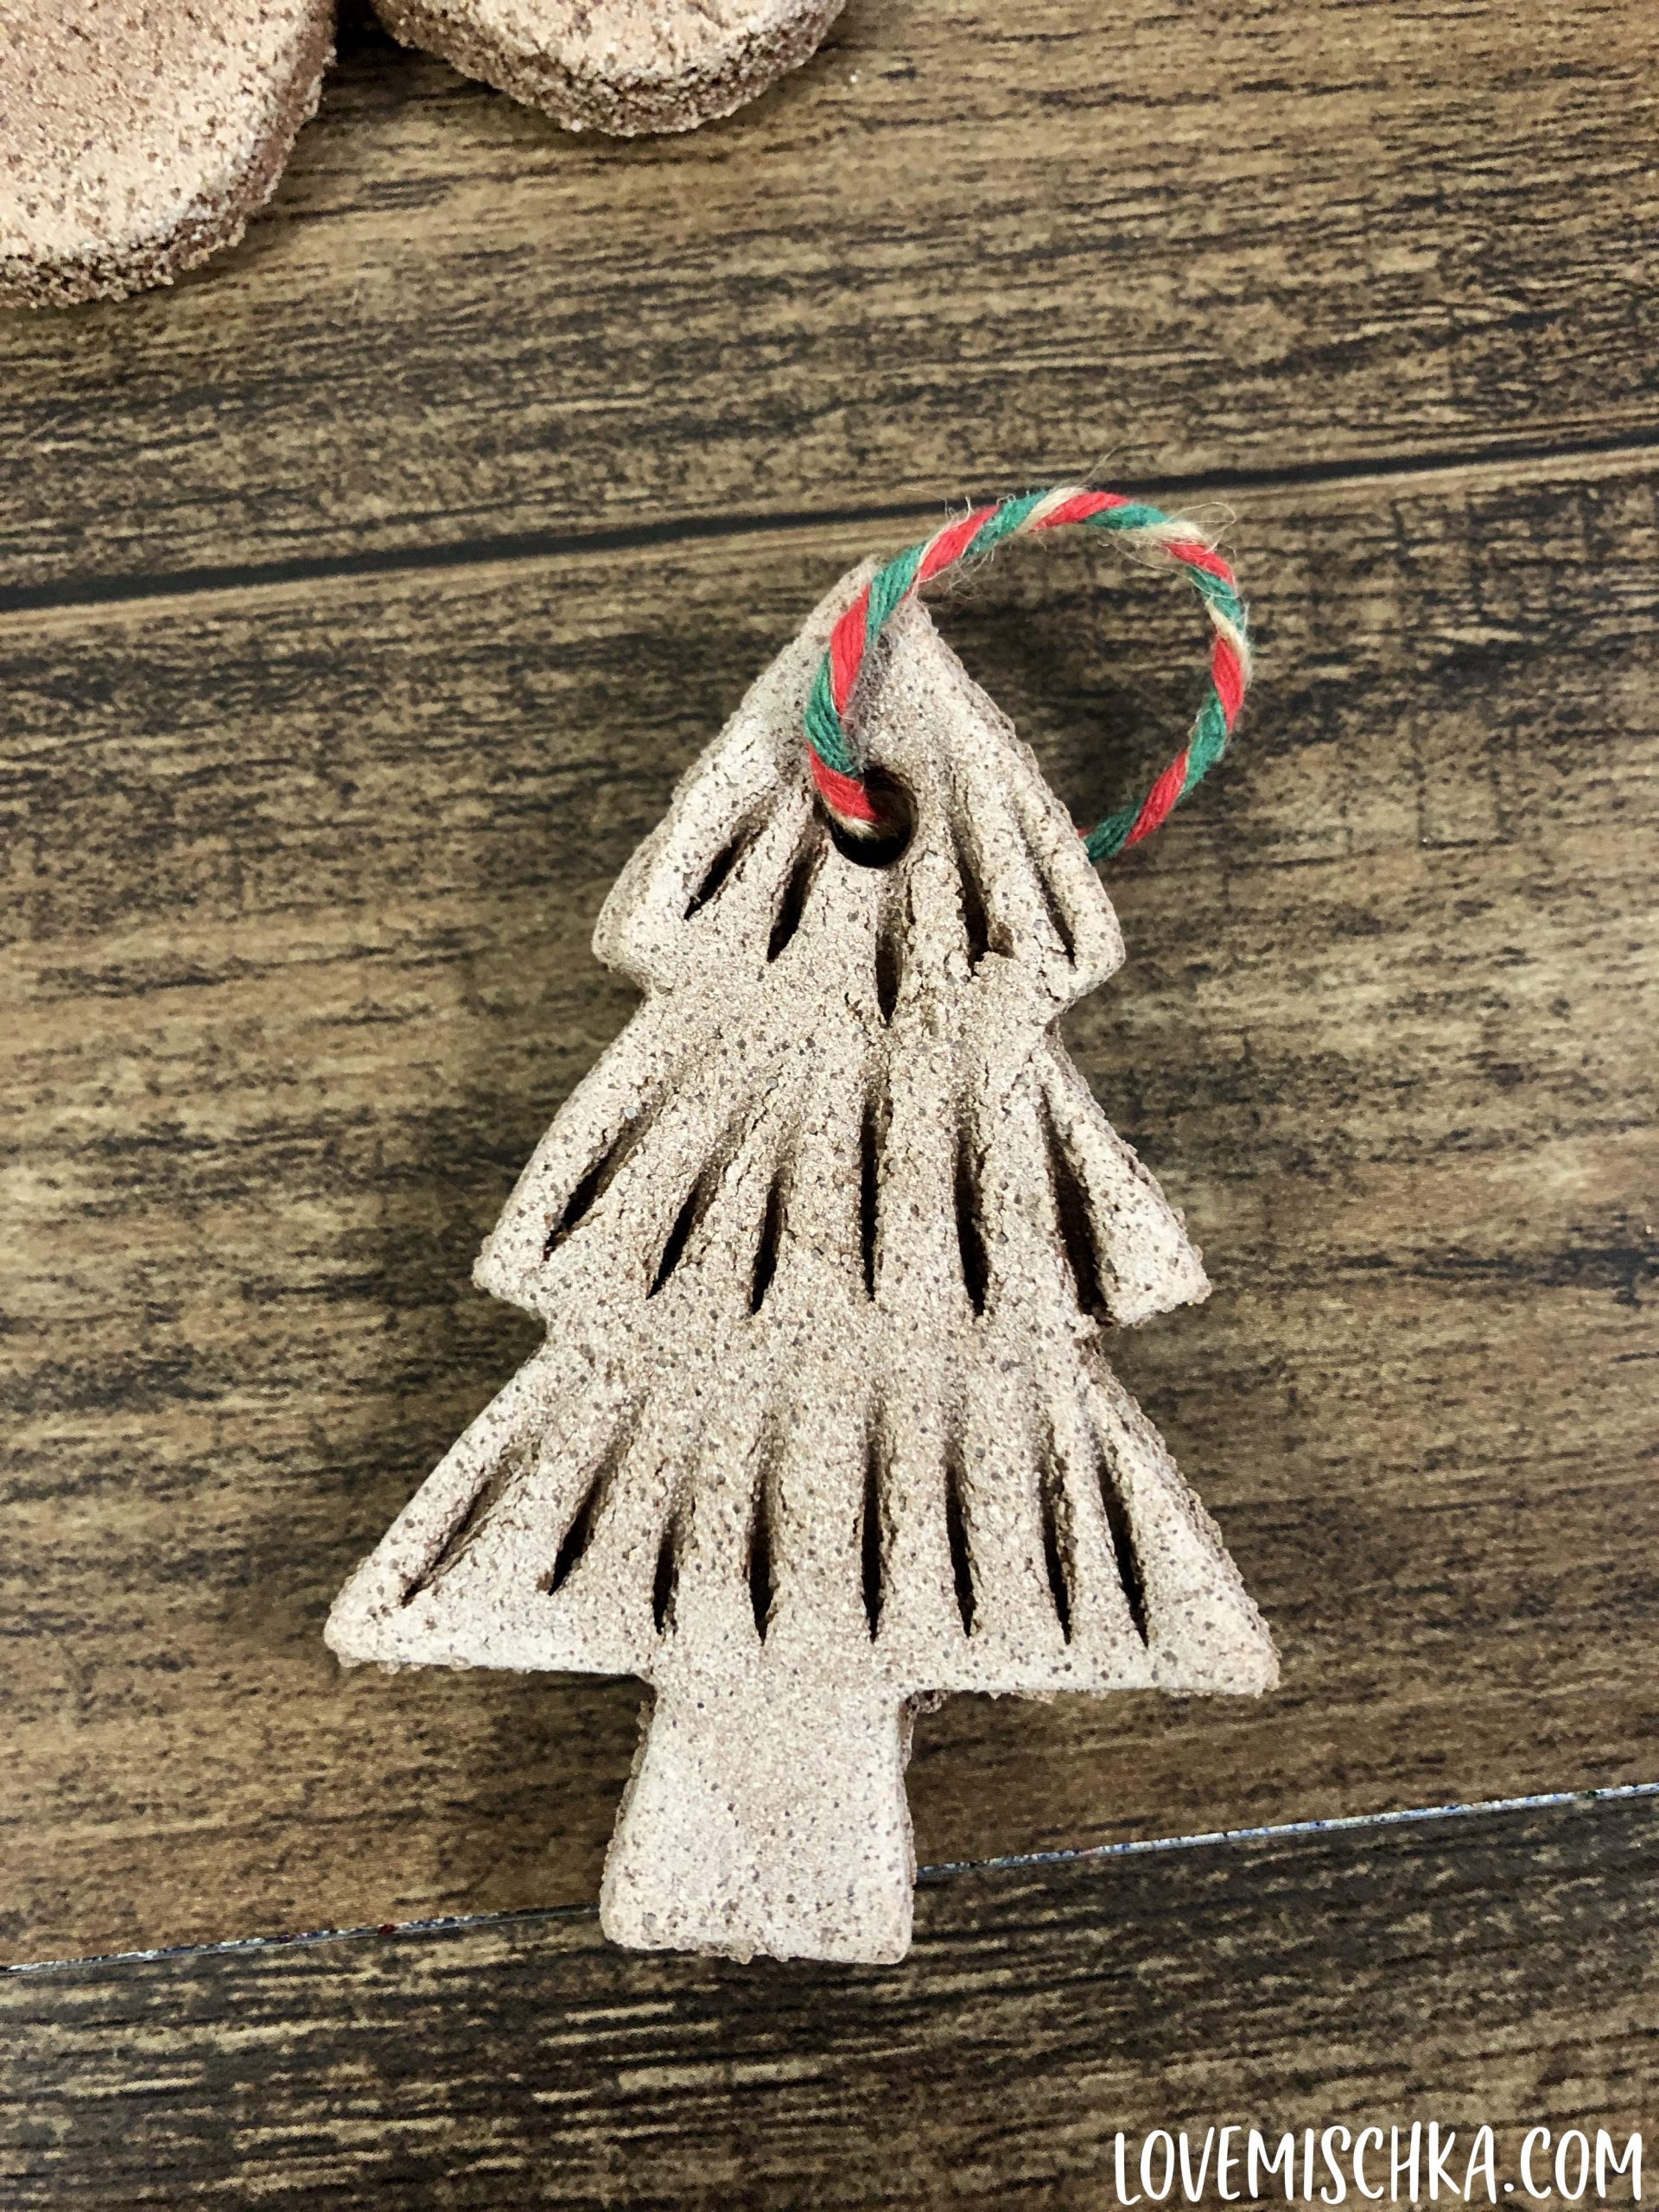
Don’t forget to make holes in the ornaments so you can hang them!! I have definitely forgotten before. It is not easy to make holes in the ornaments after they harden.
The best way to make holes for twine, thread, or ribbon is to use a straw. I recently received a gold straw as a gift and it worked perfectly.
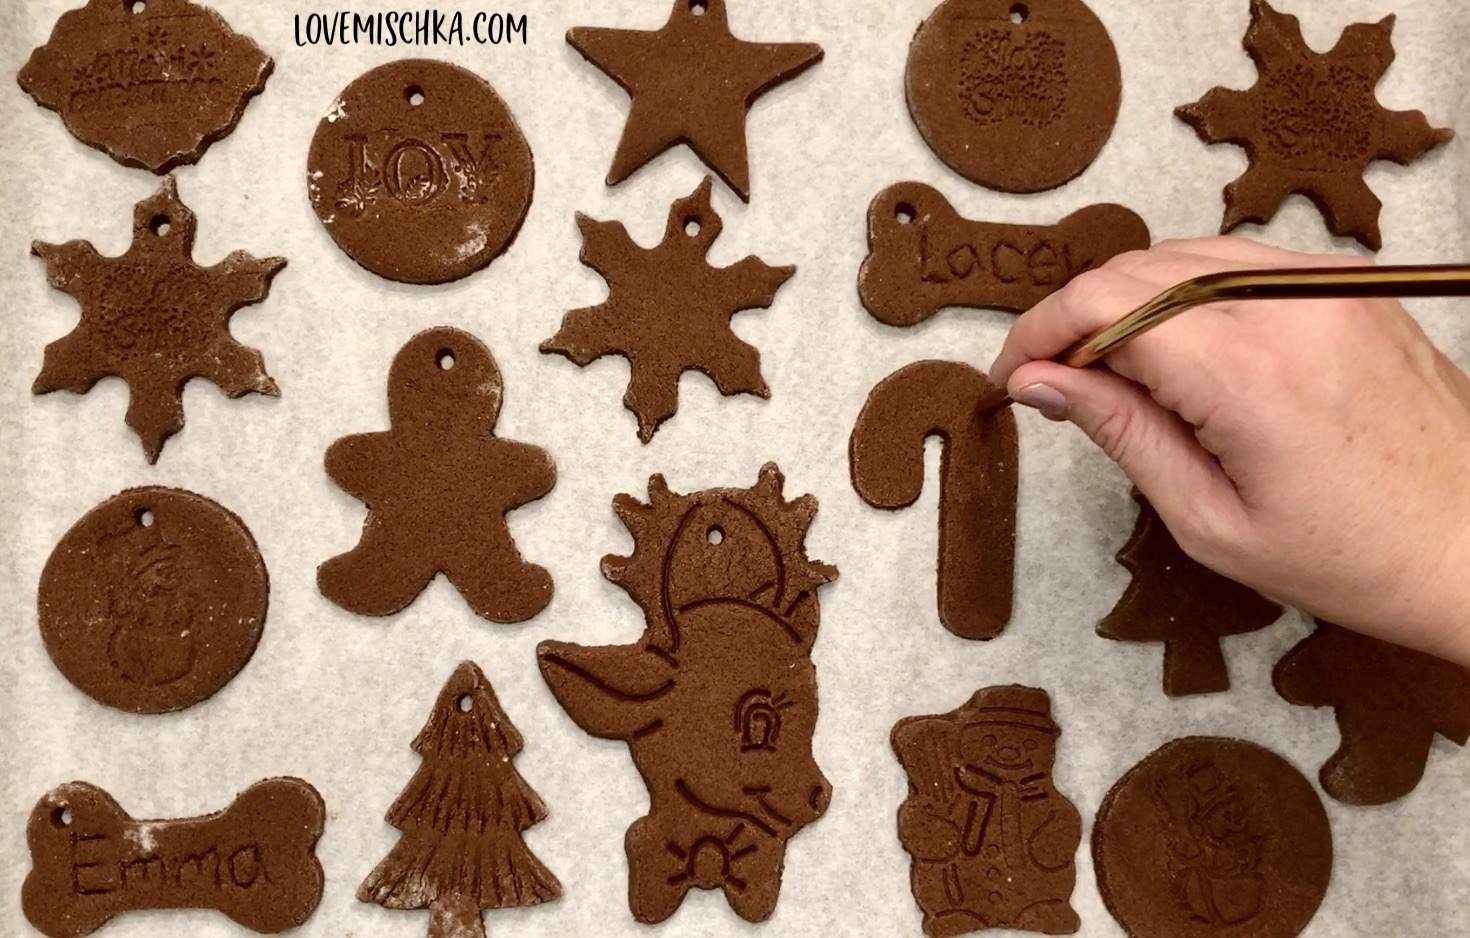
Before placing the cinnamon ornaments in the oven or leaving them out to dry, stamp or carve out any desired designs so they will be imprinted into the ornament when the dough hardens. I will describe how to do this further down.
To Bake or Not to Bake Cinnamon Salt Dough Ornaments
In the past, I have made this Cinnamon Salt Dough recipe and didn’t bake the ornaments. I let them air dry on the counter for daaayyysss. They were more fragile than I like. We shattered quite a few by accident.
This year, I tried not baking my first attempt at these Cinnamon Salt Dough ornaments. Unfortunately, I think I rolled the dough too thick. After four days, the ornaments were still damp AND they started to grow mold. I was so disappointed.
When I made them again, I decided to bake the ornaments. I also rolled the dough a bit thinner - to about ¼”.
The top of the ornaments did become lighter. I personally like the look. It feels rustic or farmhouse. The bottom of the ornaments, the side on the baking sheet, remained dark though (see below).
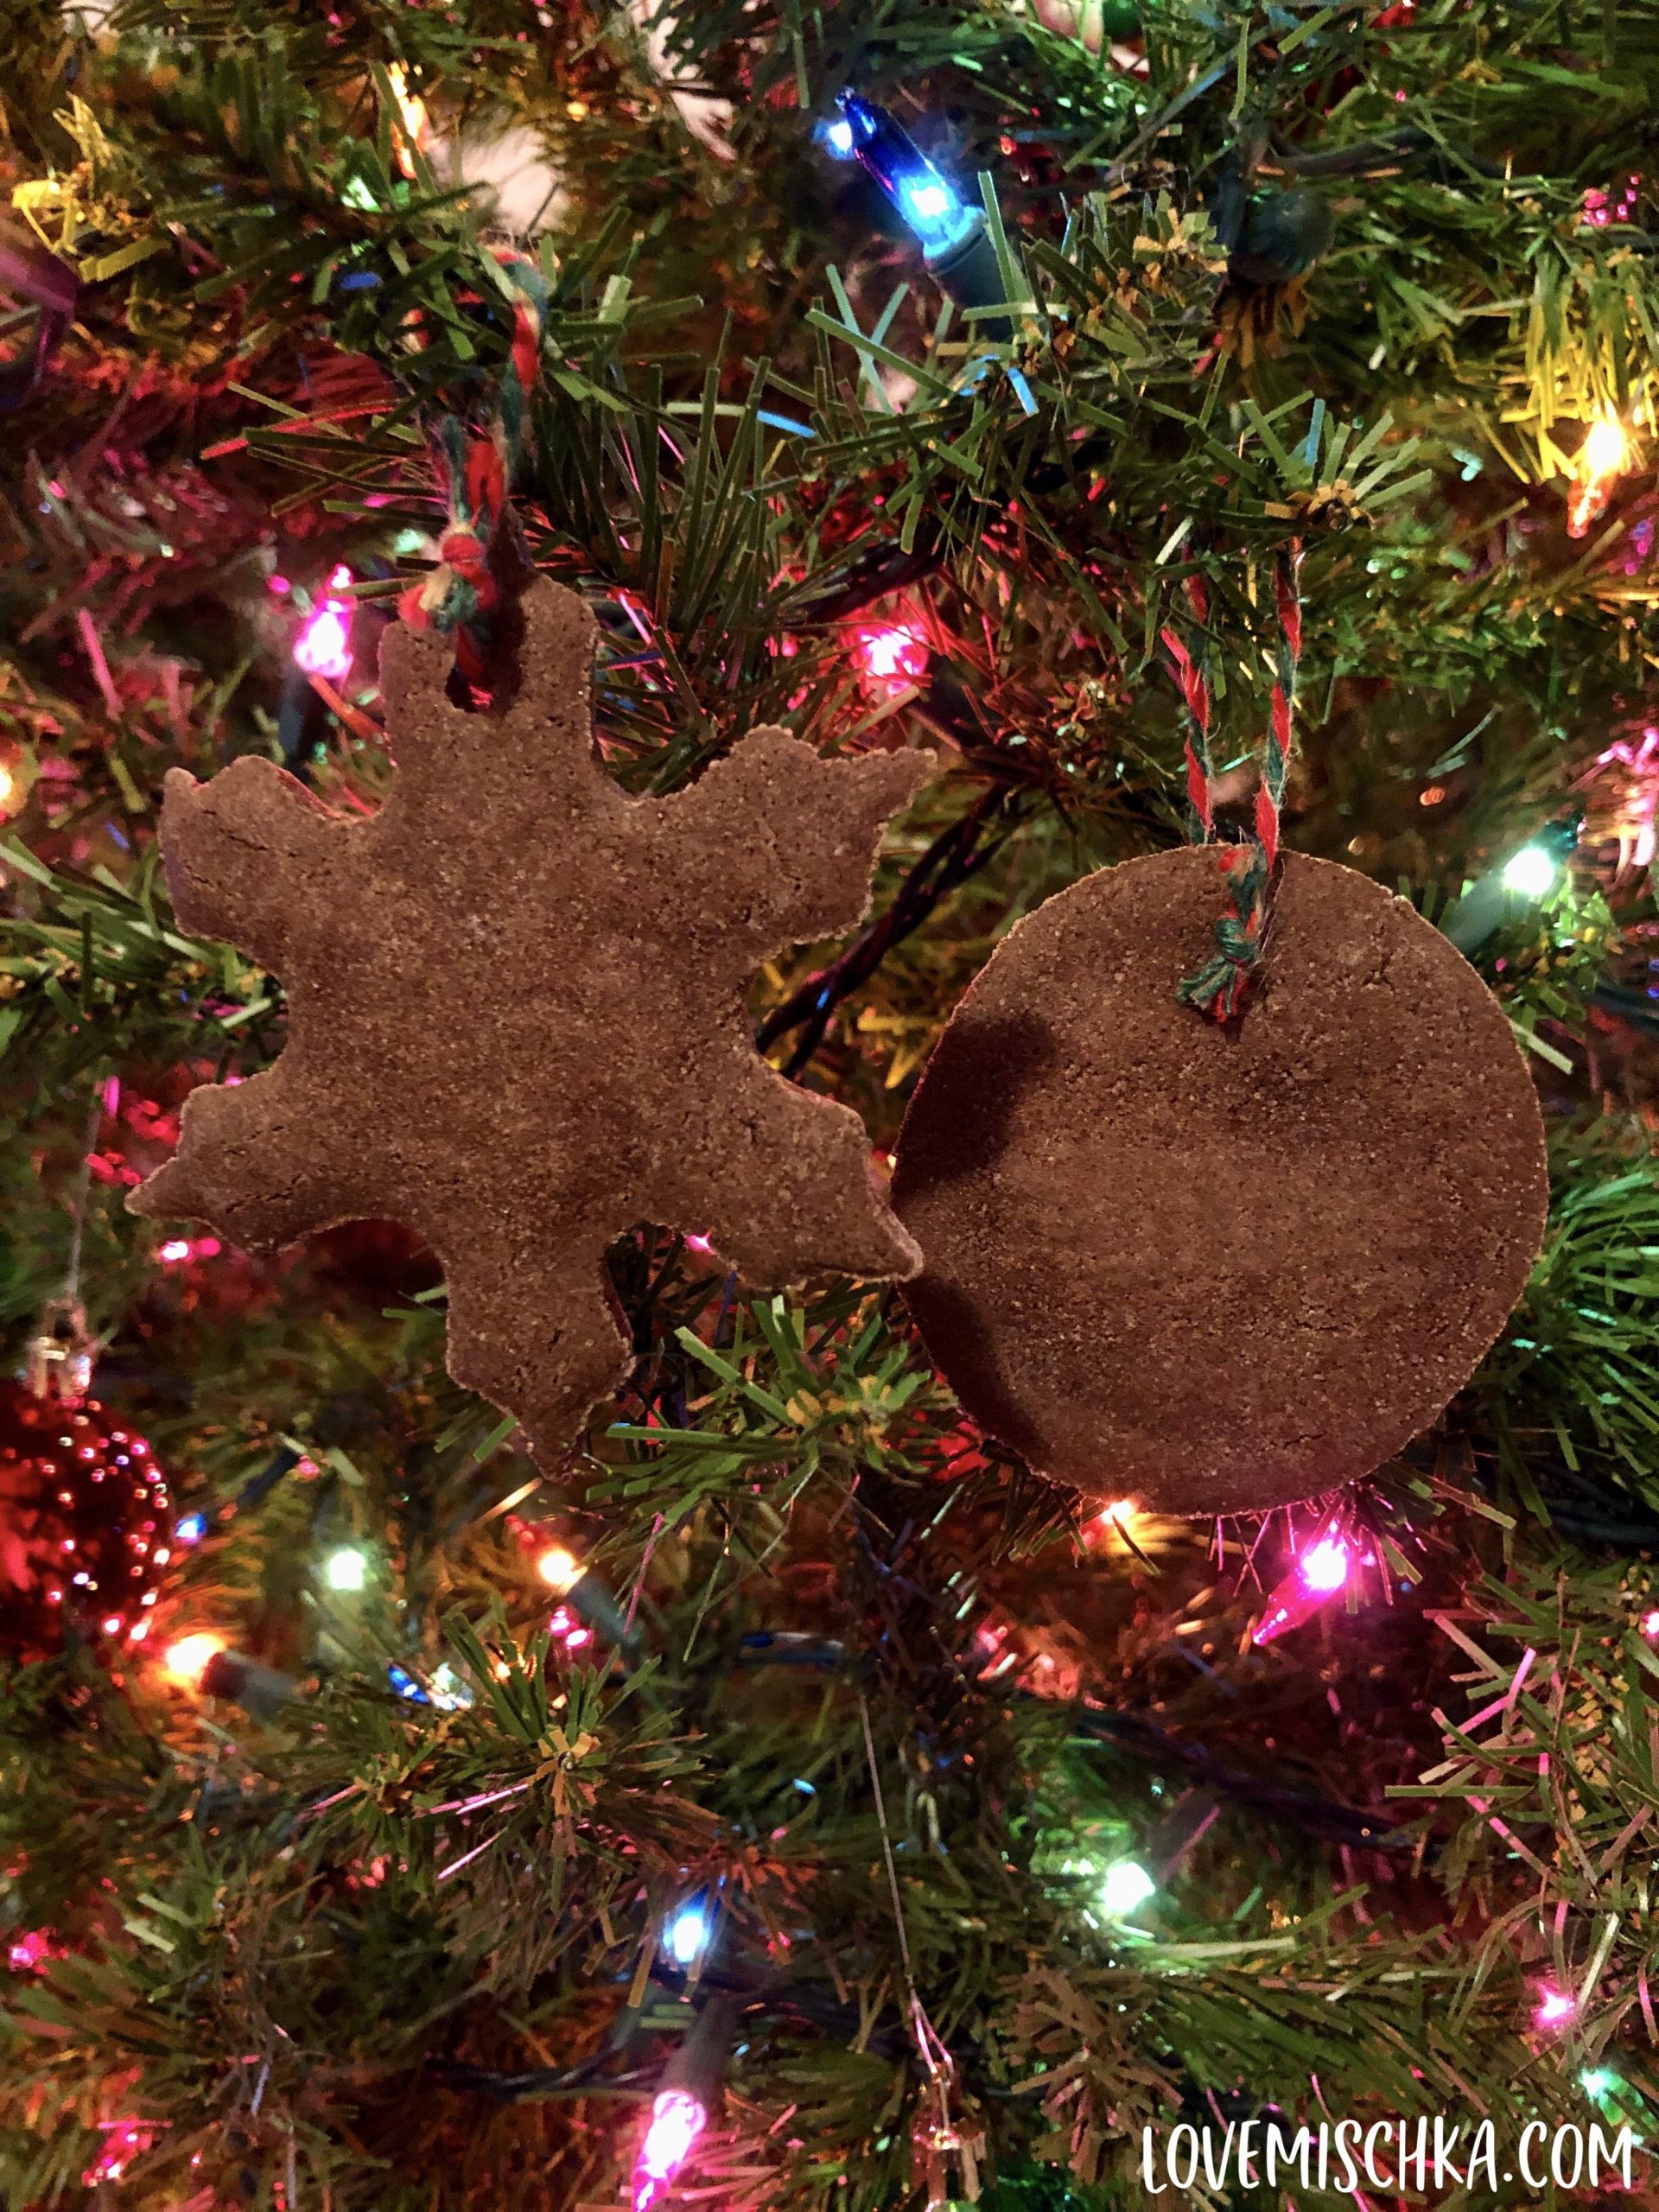
If you would like a darker cinnamon ornament, you could use that side. Or try flipping the ornaments a few times while they bake.
I didn’t do this because I used stamps to imprint on the batter and I was afraid it would flatten the design or cause it to become misshaped in some way.
If you do flip the ornaments while they bake or even try a lower temperature for a longer period of time, I would love to see how your ornaments come out.
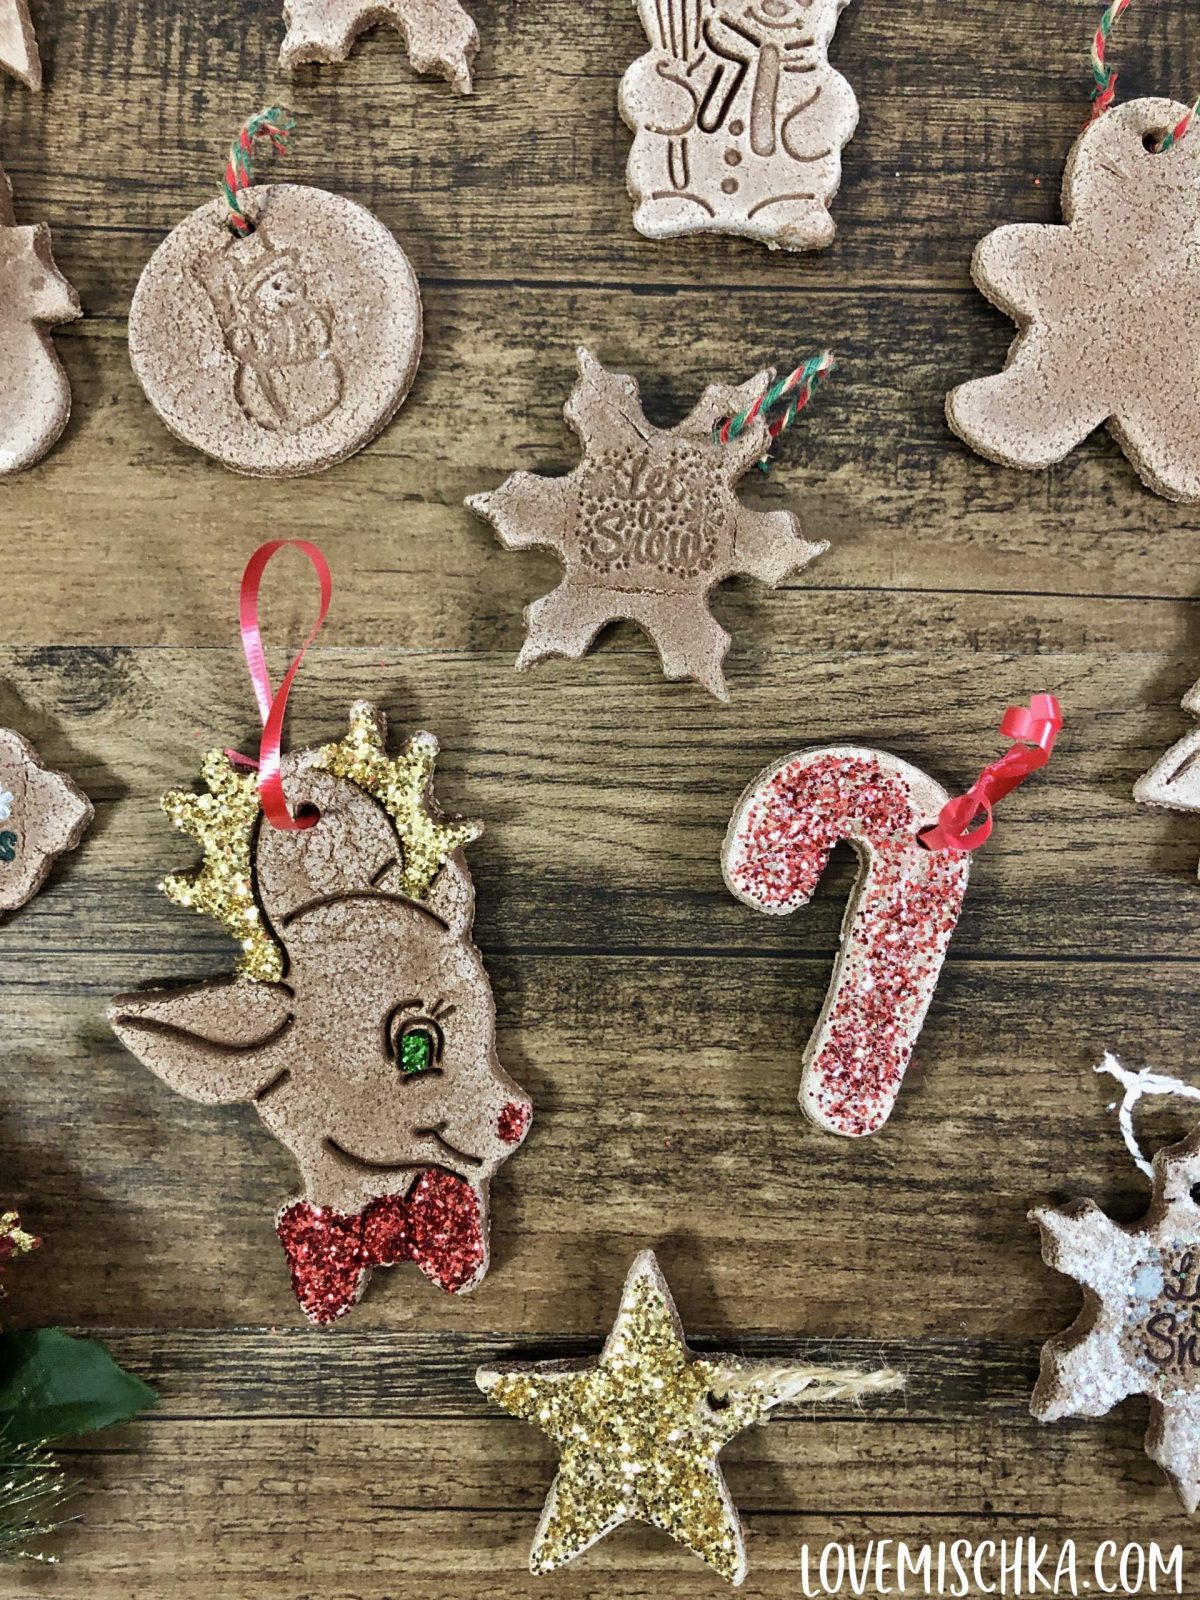
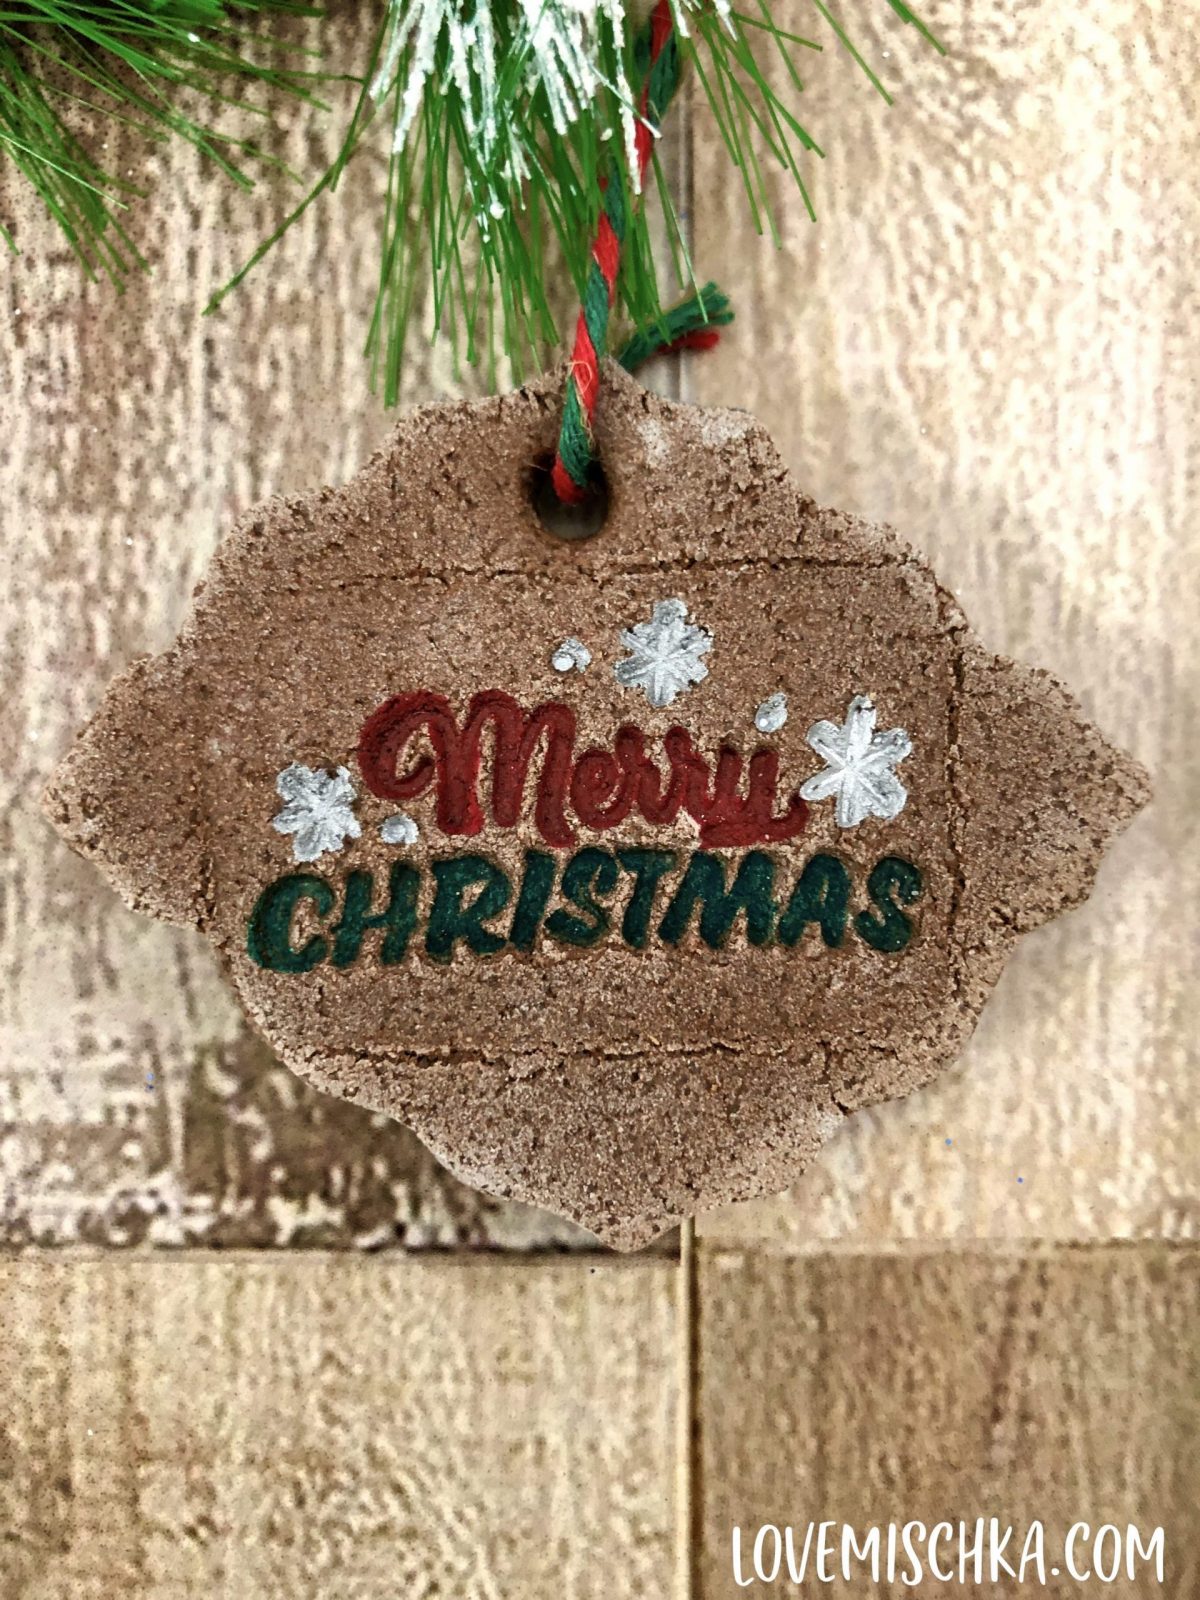
My Favorite Way to Decorate - STAMPS
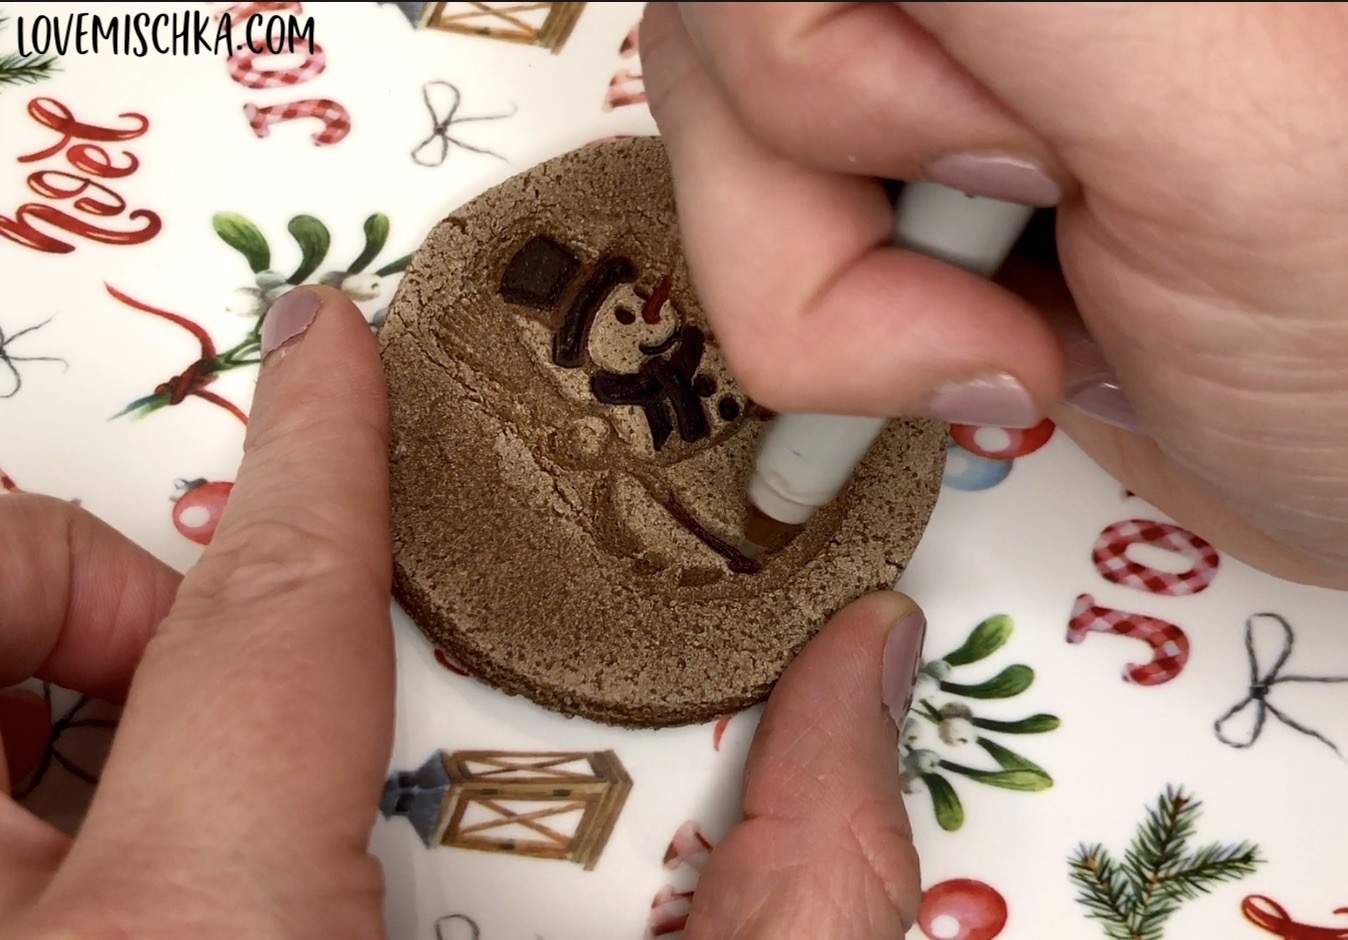
Right before I put the cinnamon ornaments in the oven, I “stamp” several of them with different designs. This imprints the image on the still damp dough.
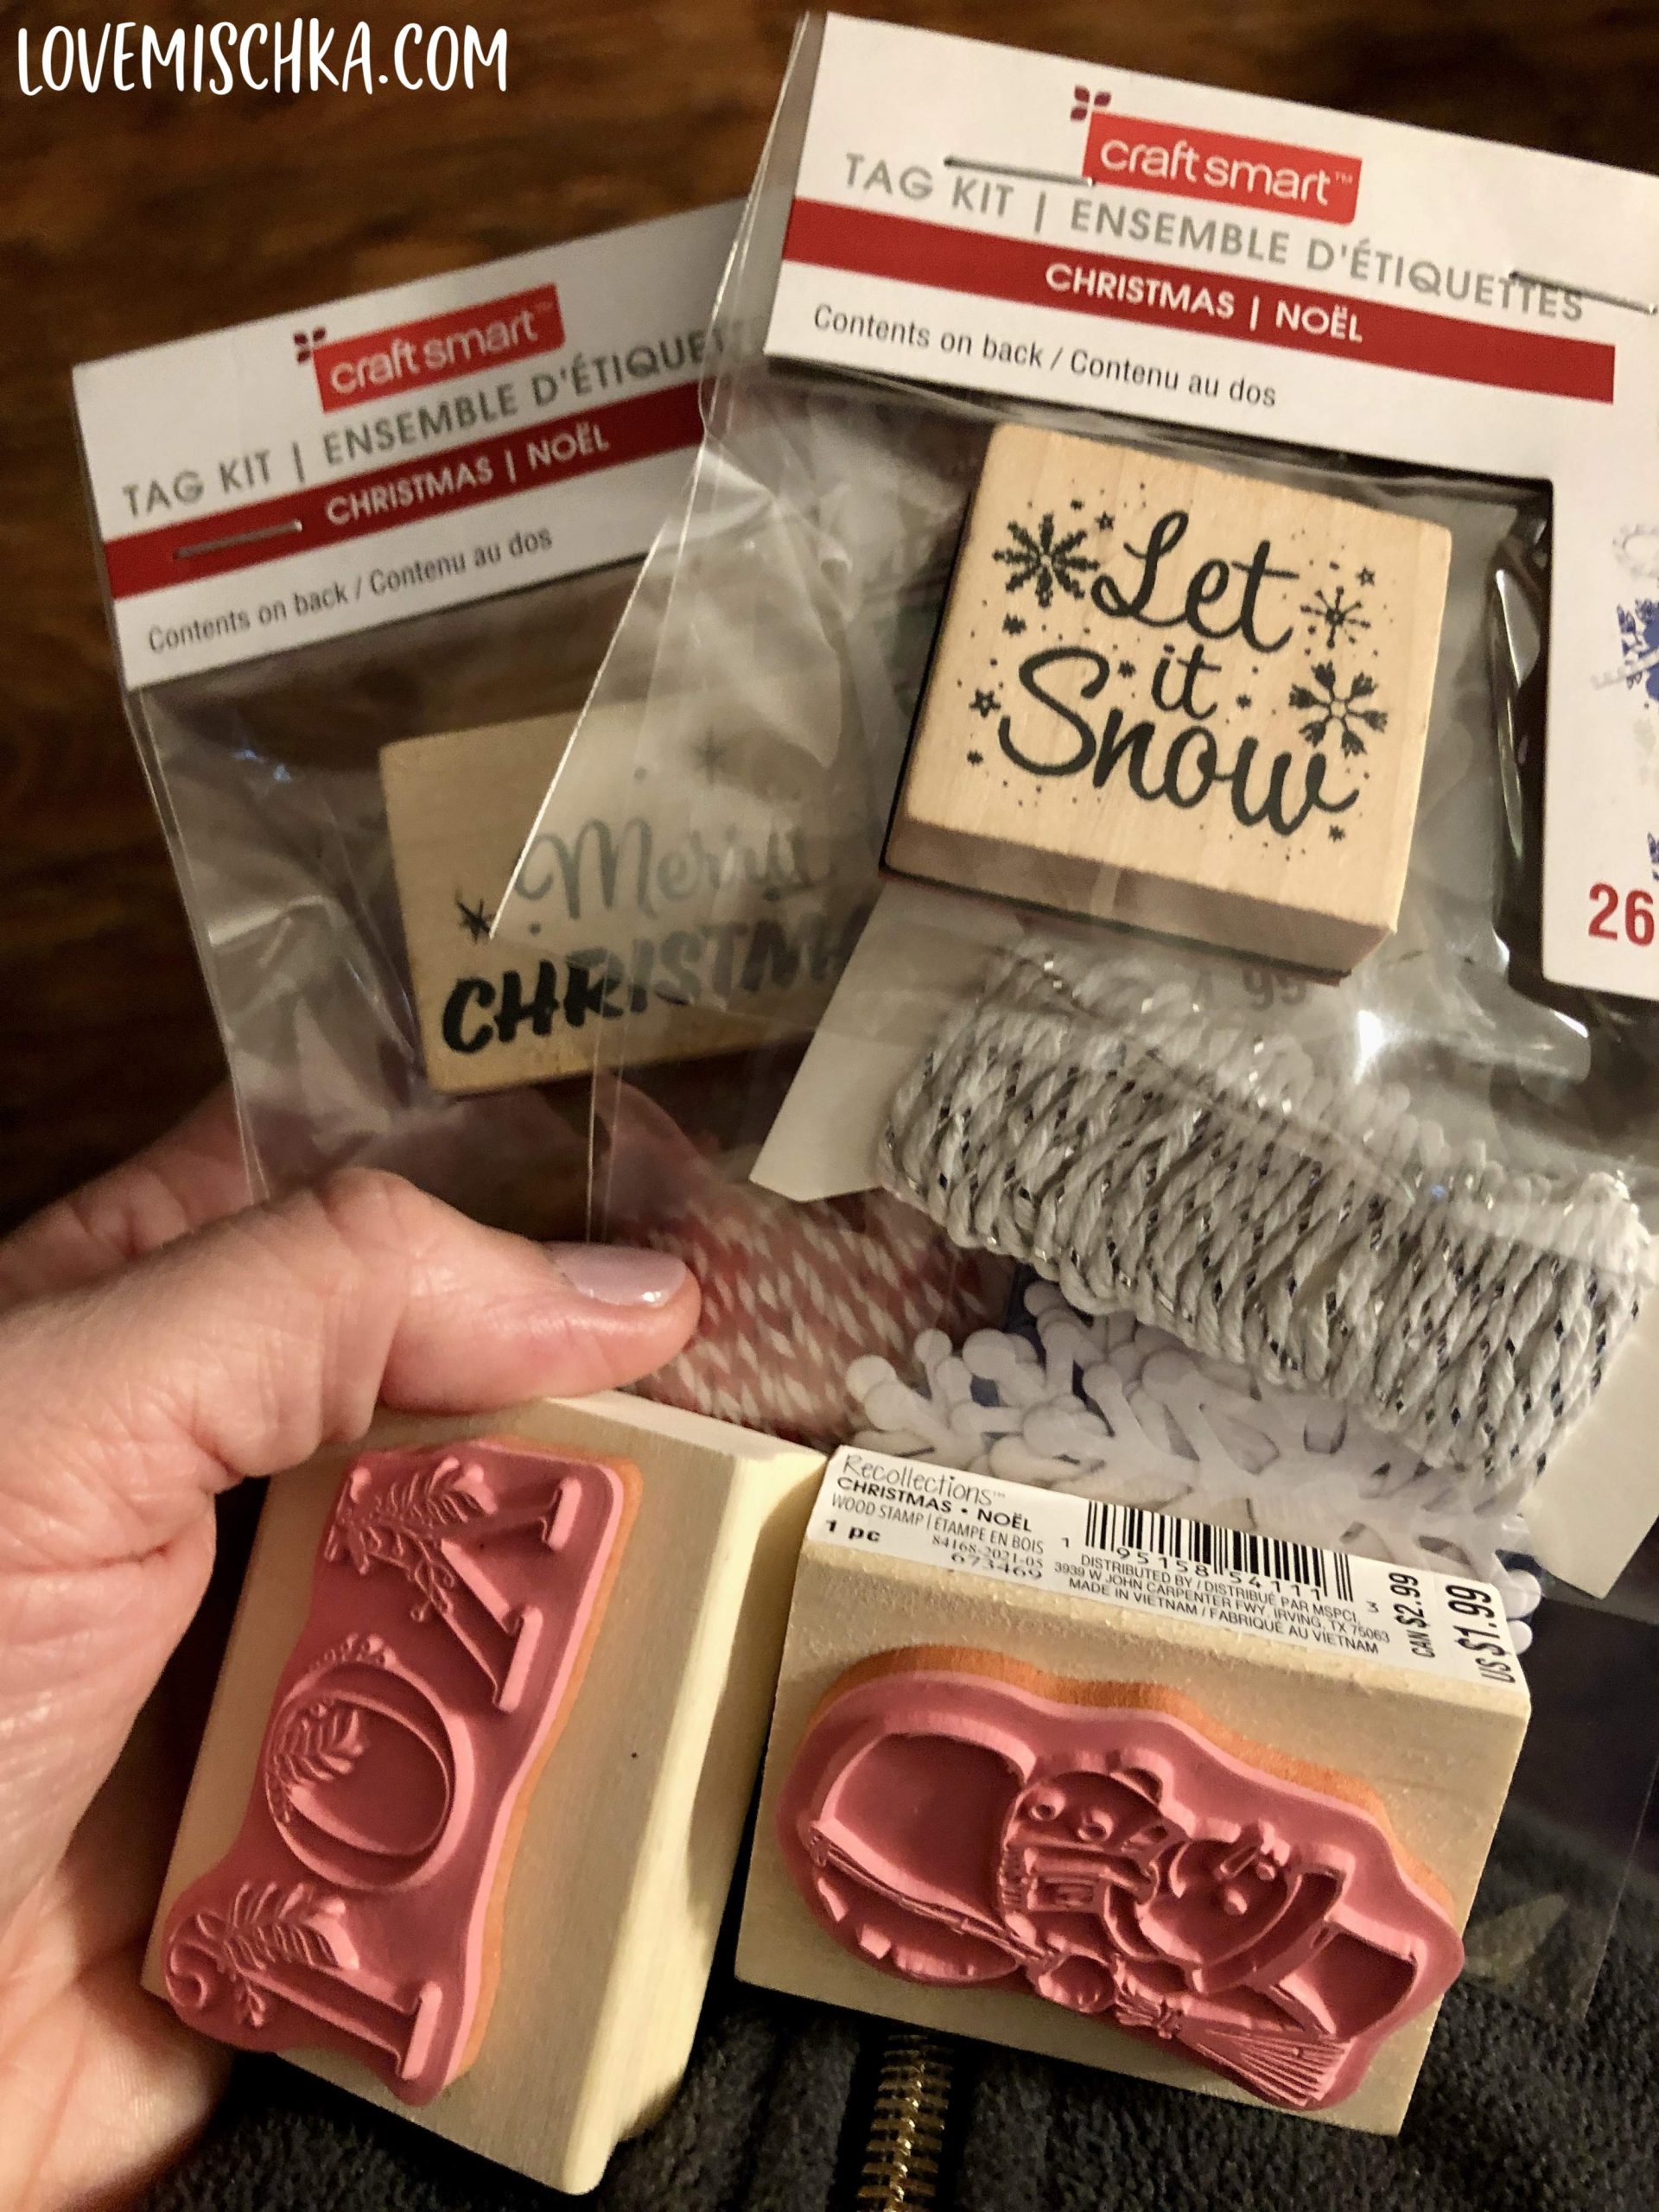
This year, I bought some Christmas stamps from Michaels. They worked great as you can see below!
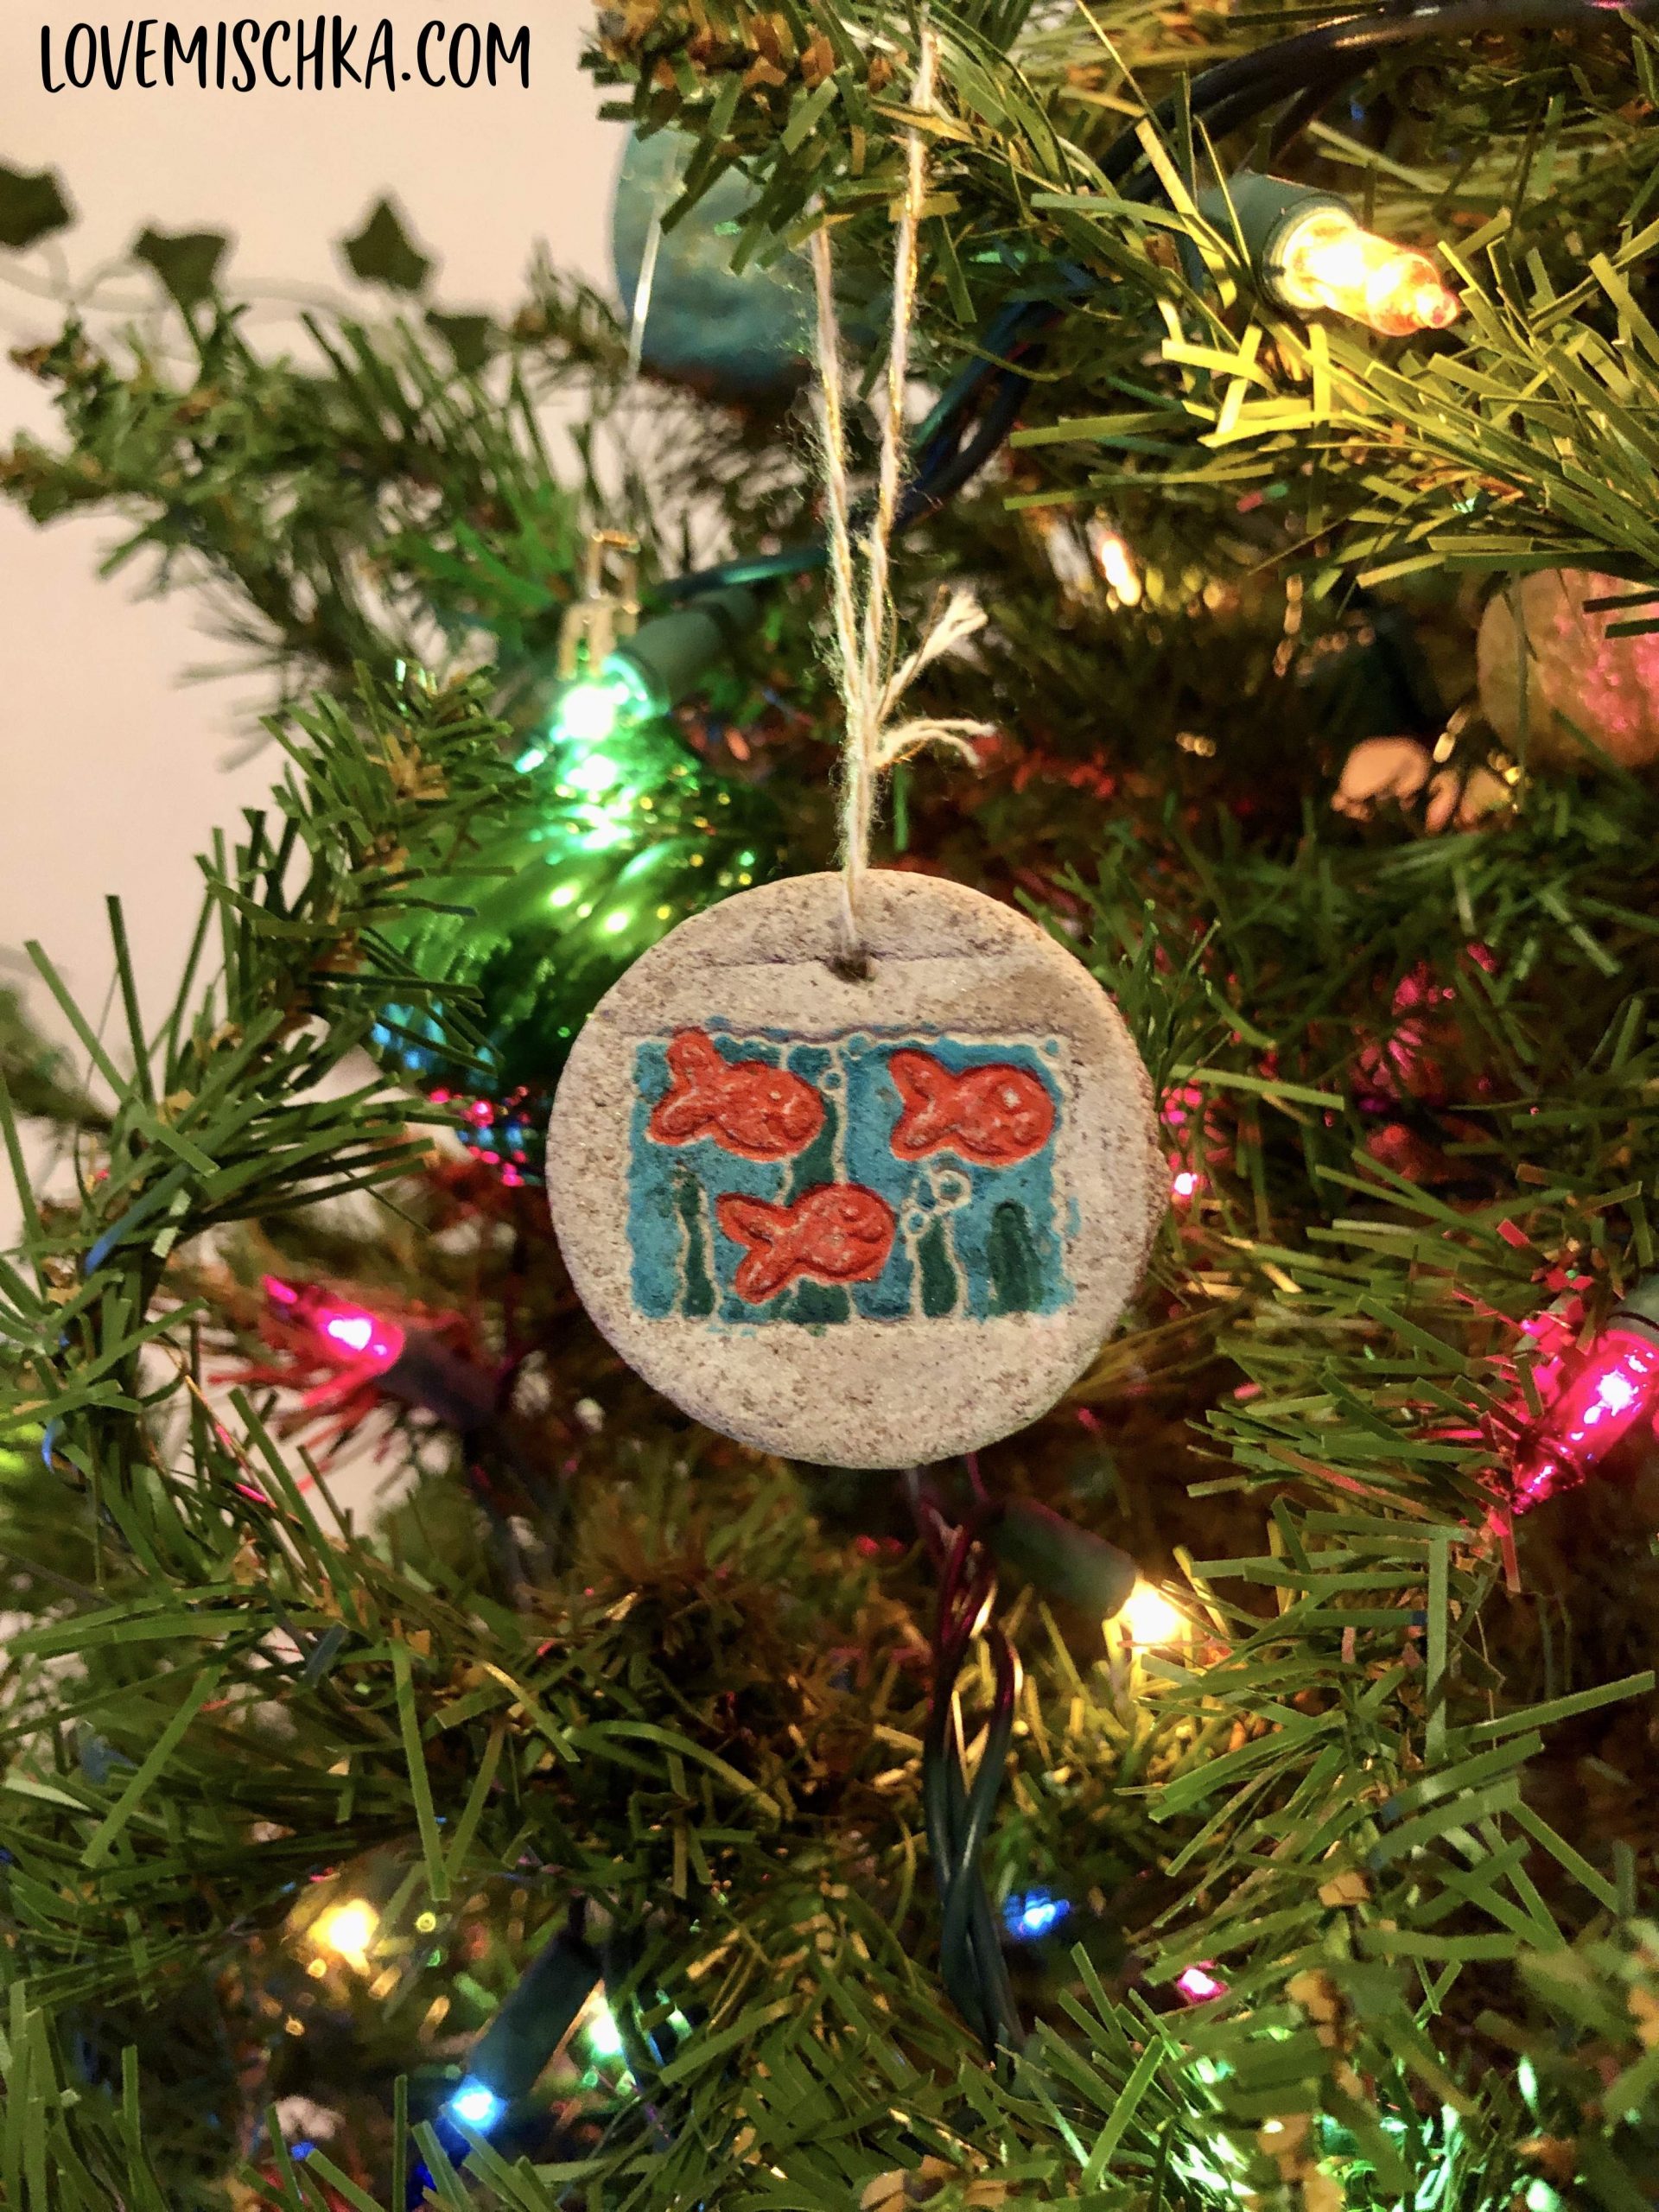
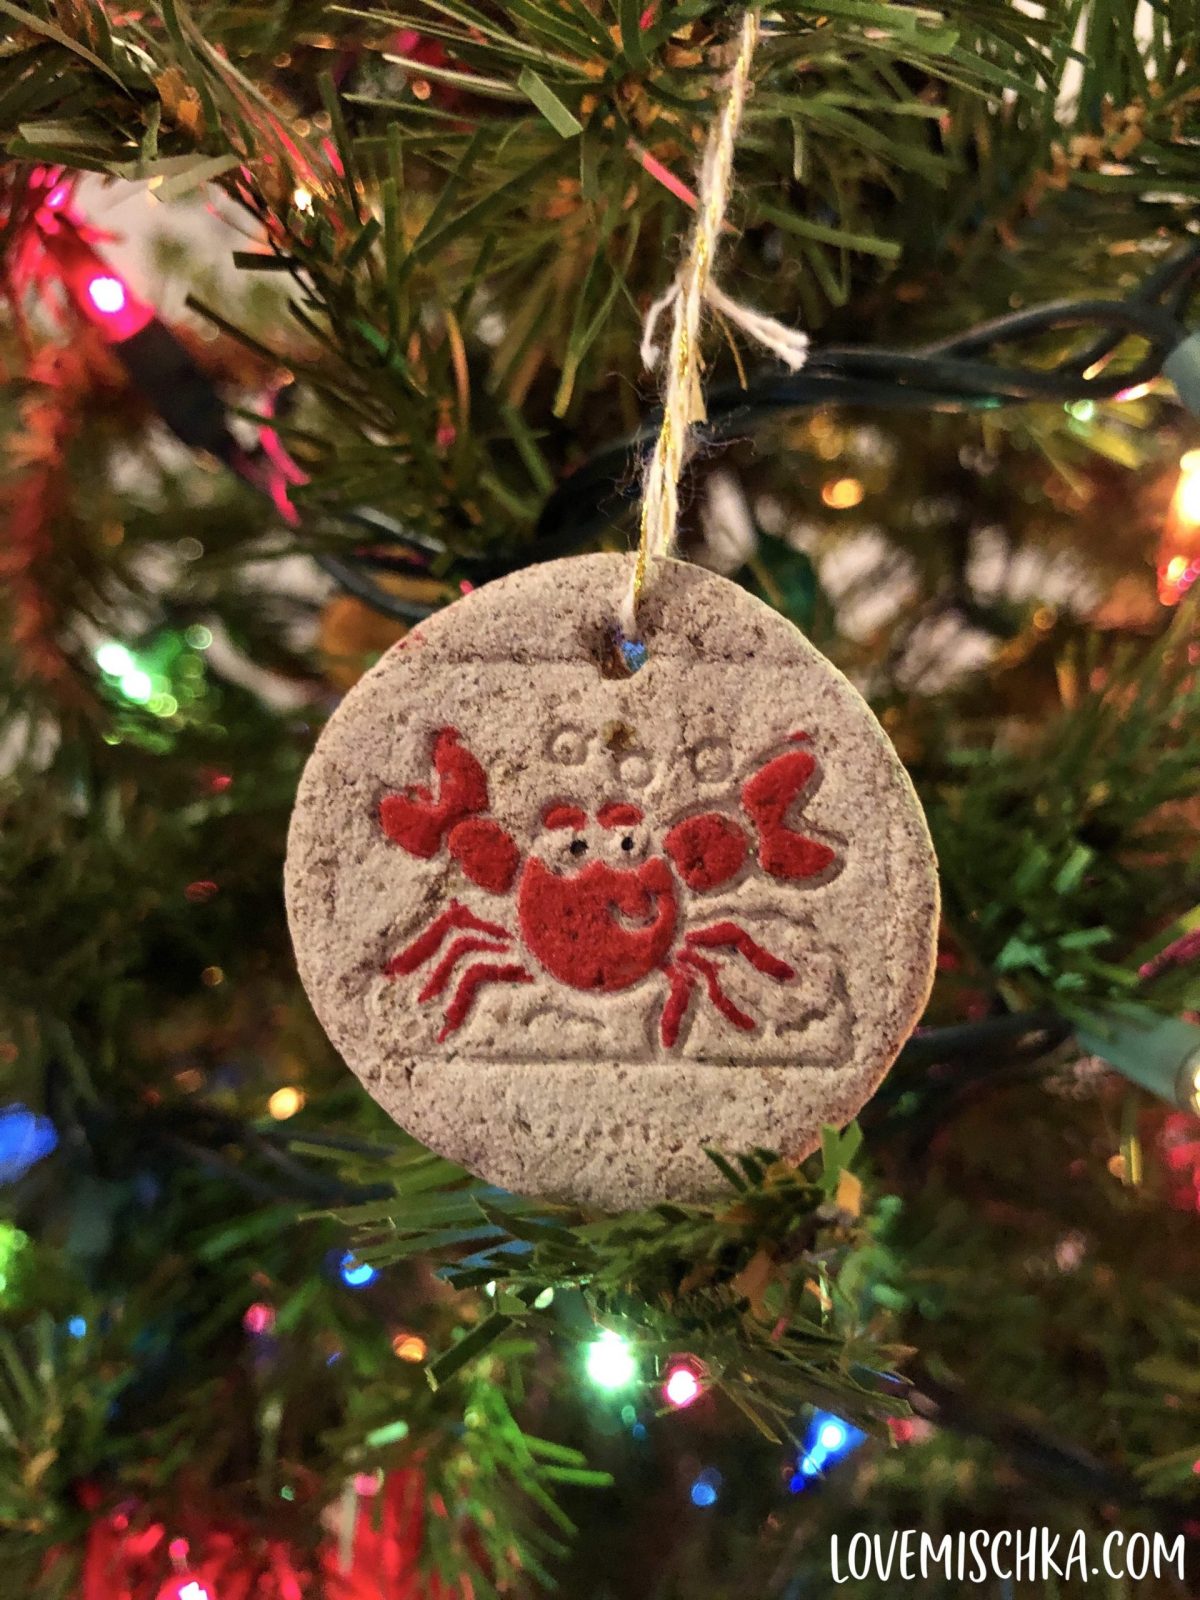
In the past, I used rubber stamps from when I was a kid. They looked a lot like these wooden animal stamps. I LOVED them.
My partner likes to fish, so five years ago, I made ornaments with the aquatic stamps. And we STILL have them!!! One is pictured below. It has lightened over the years, but it's still tree worthy and still faintly smells like cinnamon.
After the ornaments are dry and cool, I like to use sharpie markers to color in the stamp designs. The ultra fine point fits into the thin crevices and can add beautiful detail.
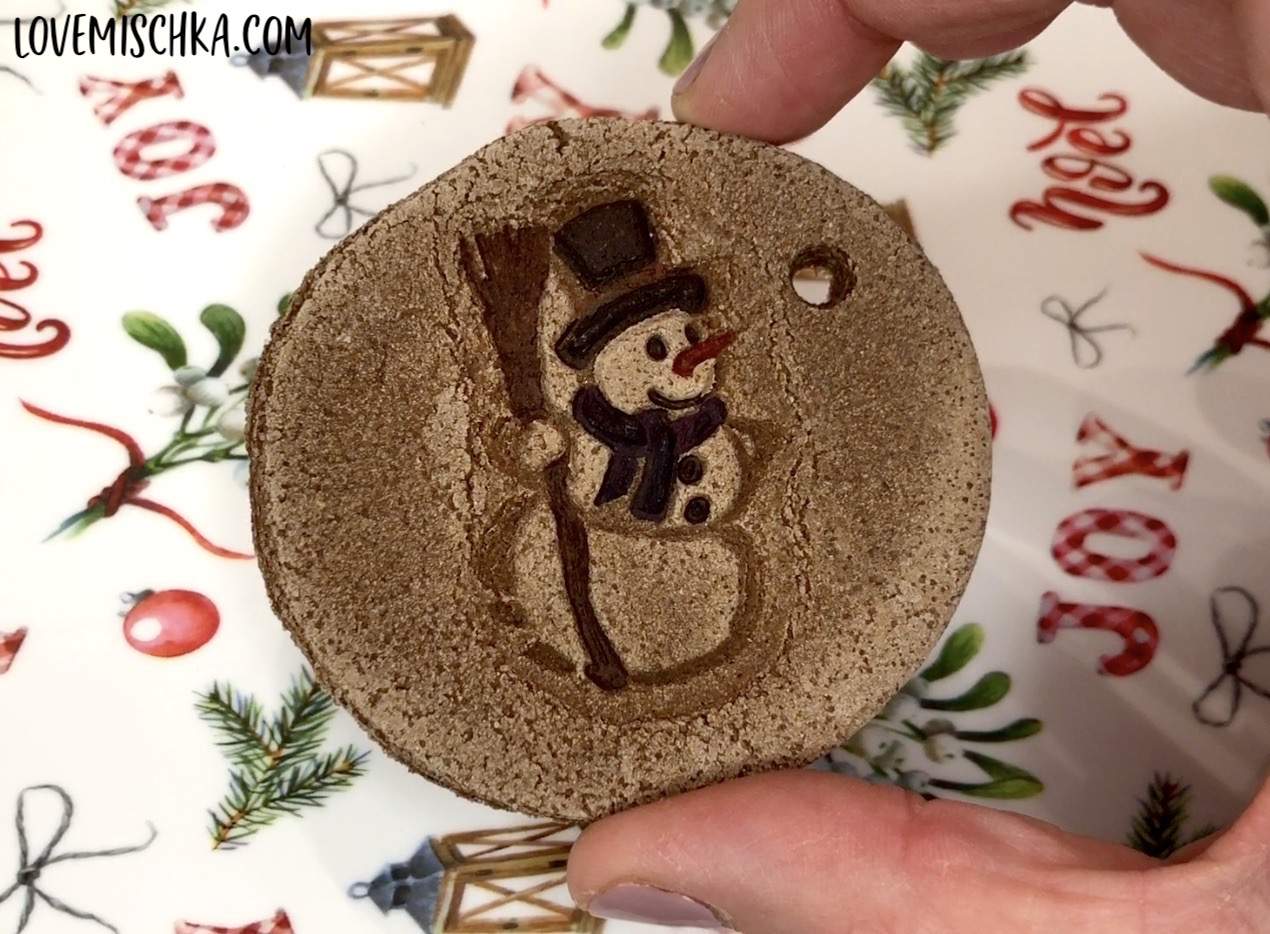
You definitely don't have to color in the stamp's lines though. Just the imprinted design is beautiful by itself. I think it adds to the rustic beauty to leave the stamp's design untouched, like the ornaments below.
More Ways to Decorate your Homemade Cinnamon Ornaments
Before the ornaments are put in the oven, you can use a sharp object to write or create lines in the dough. I used a Turkey Lacer, like these on Amazon to create the tree below.
I do not recommend painting these cinnamon ornaments. It’ll cover the cozy, delicious smell of cinnamon!!! Save the paint for regular salt dough ornaments! 😂
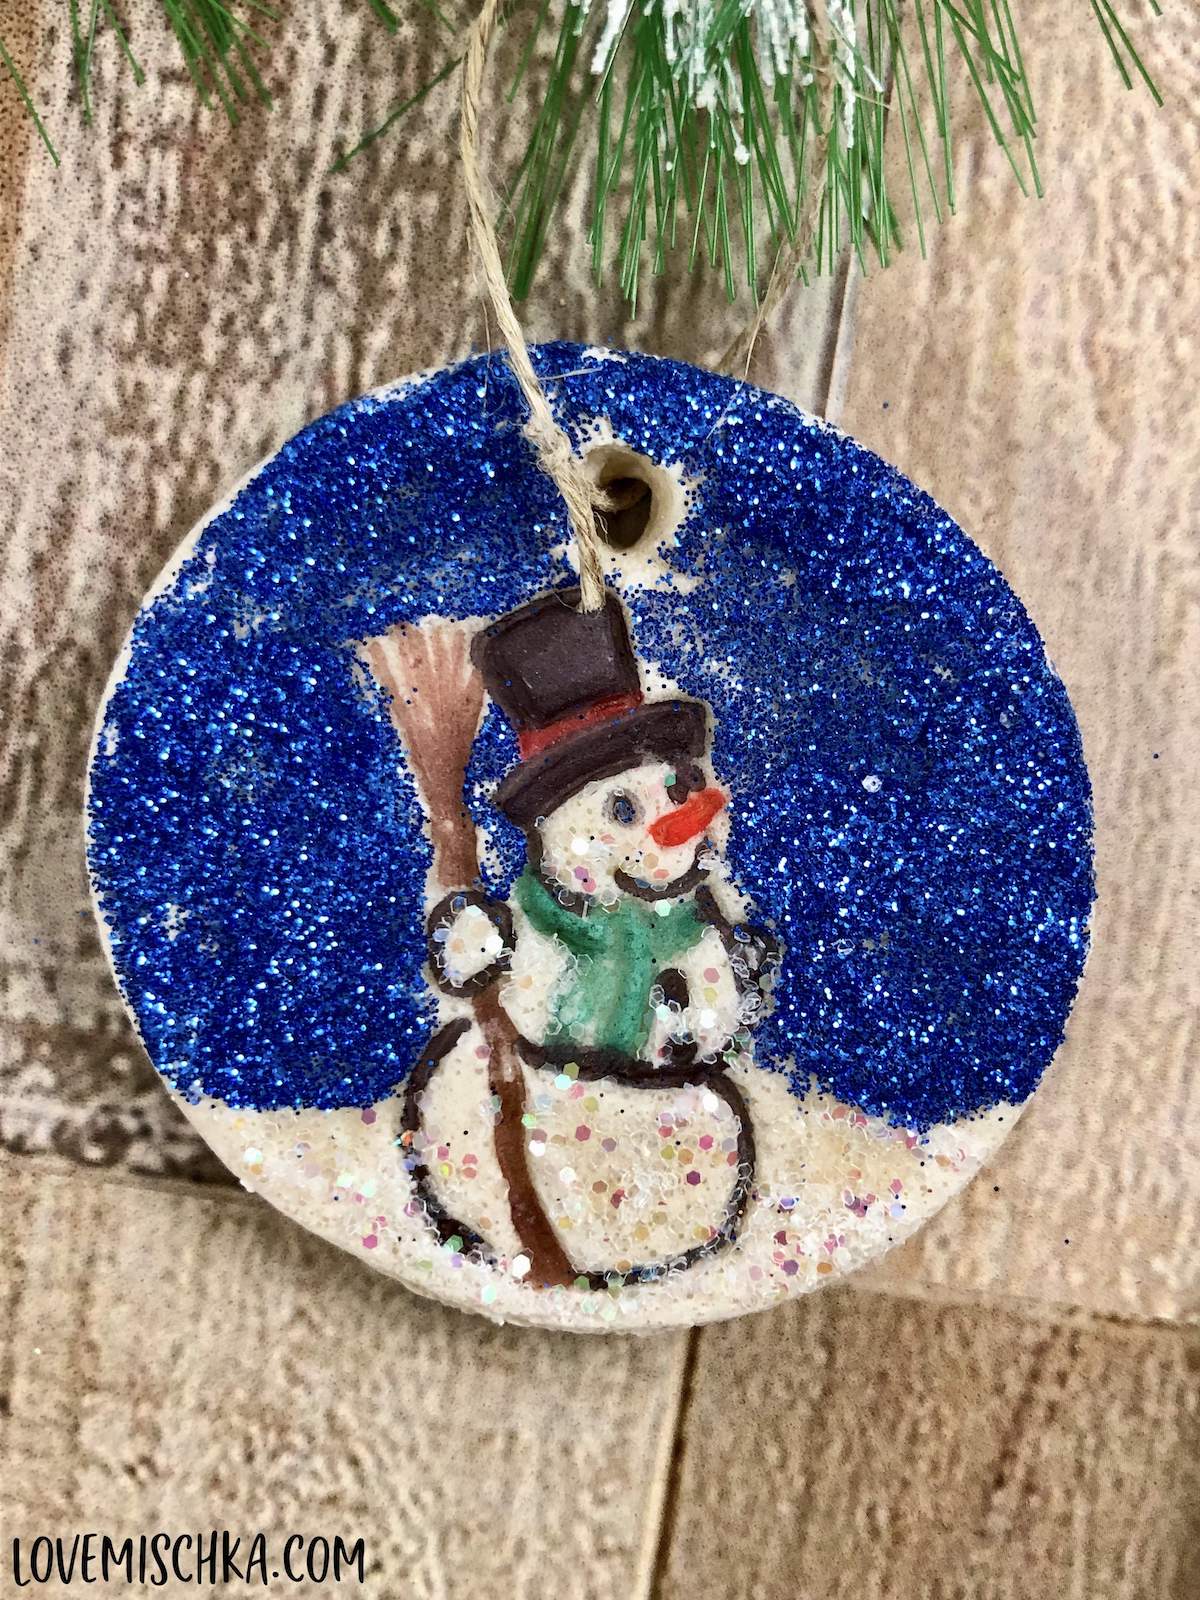
Glitter is an option though. Some sparkle is always fun. The key is not to completely cover the ornament with it (or the glue), so the beautiful cinnamon scent can still come through.
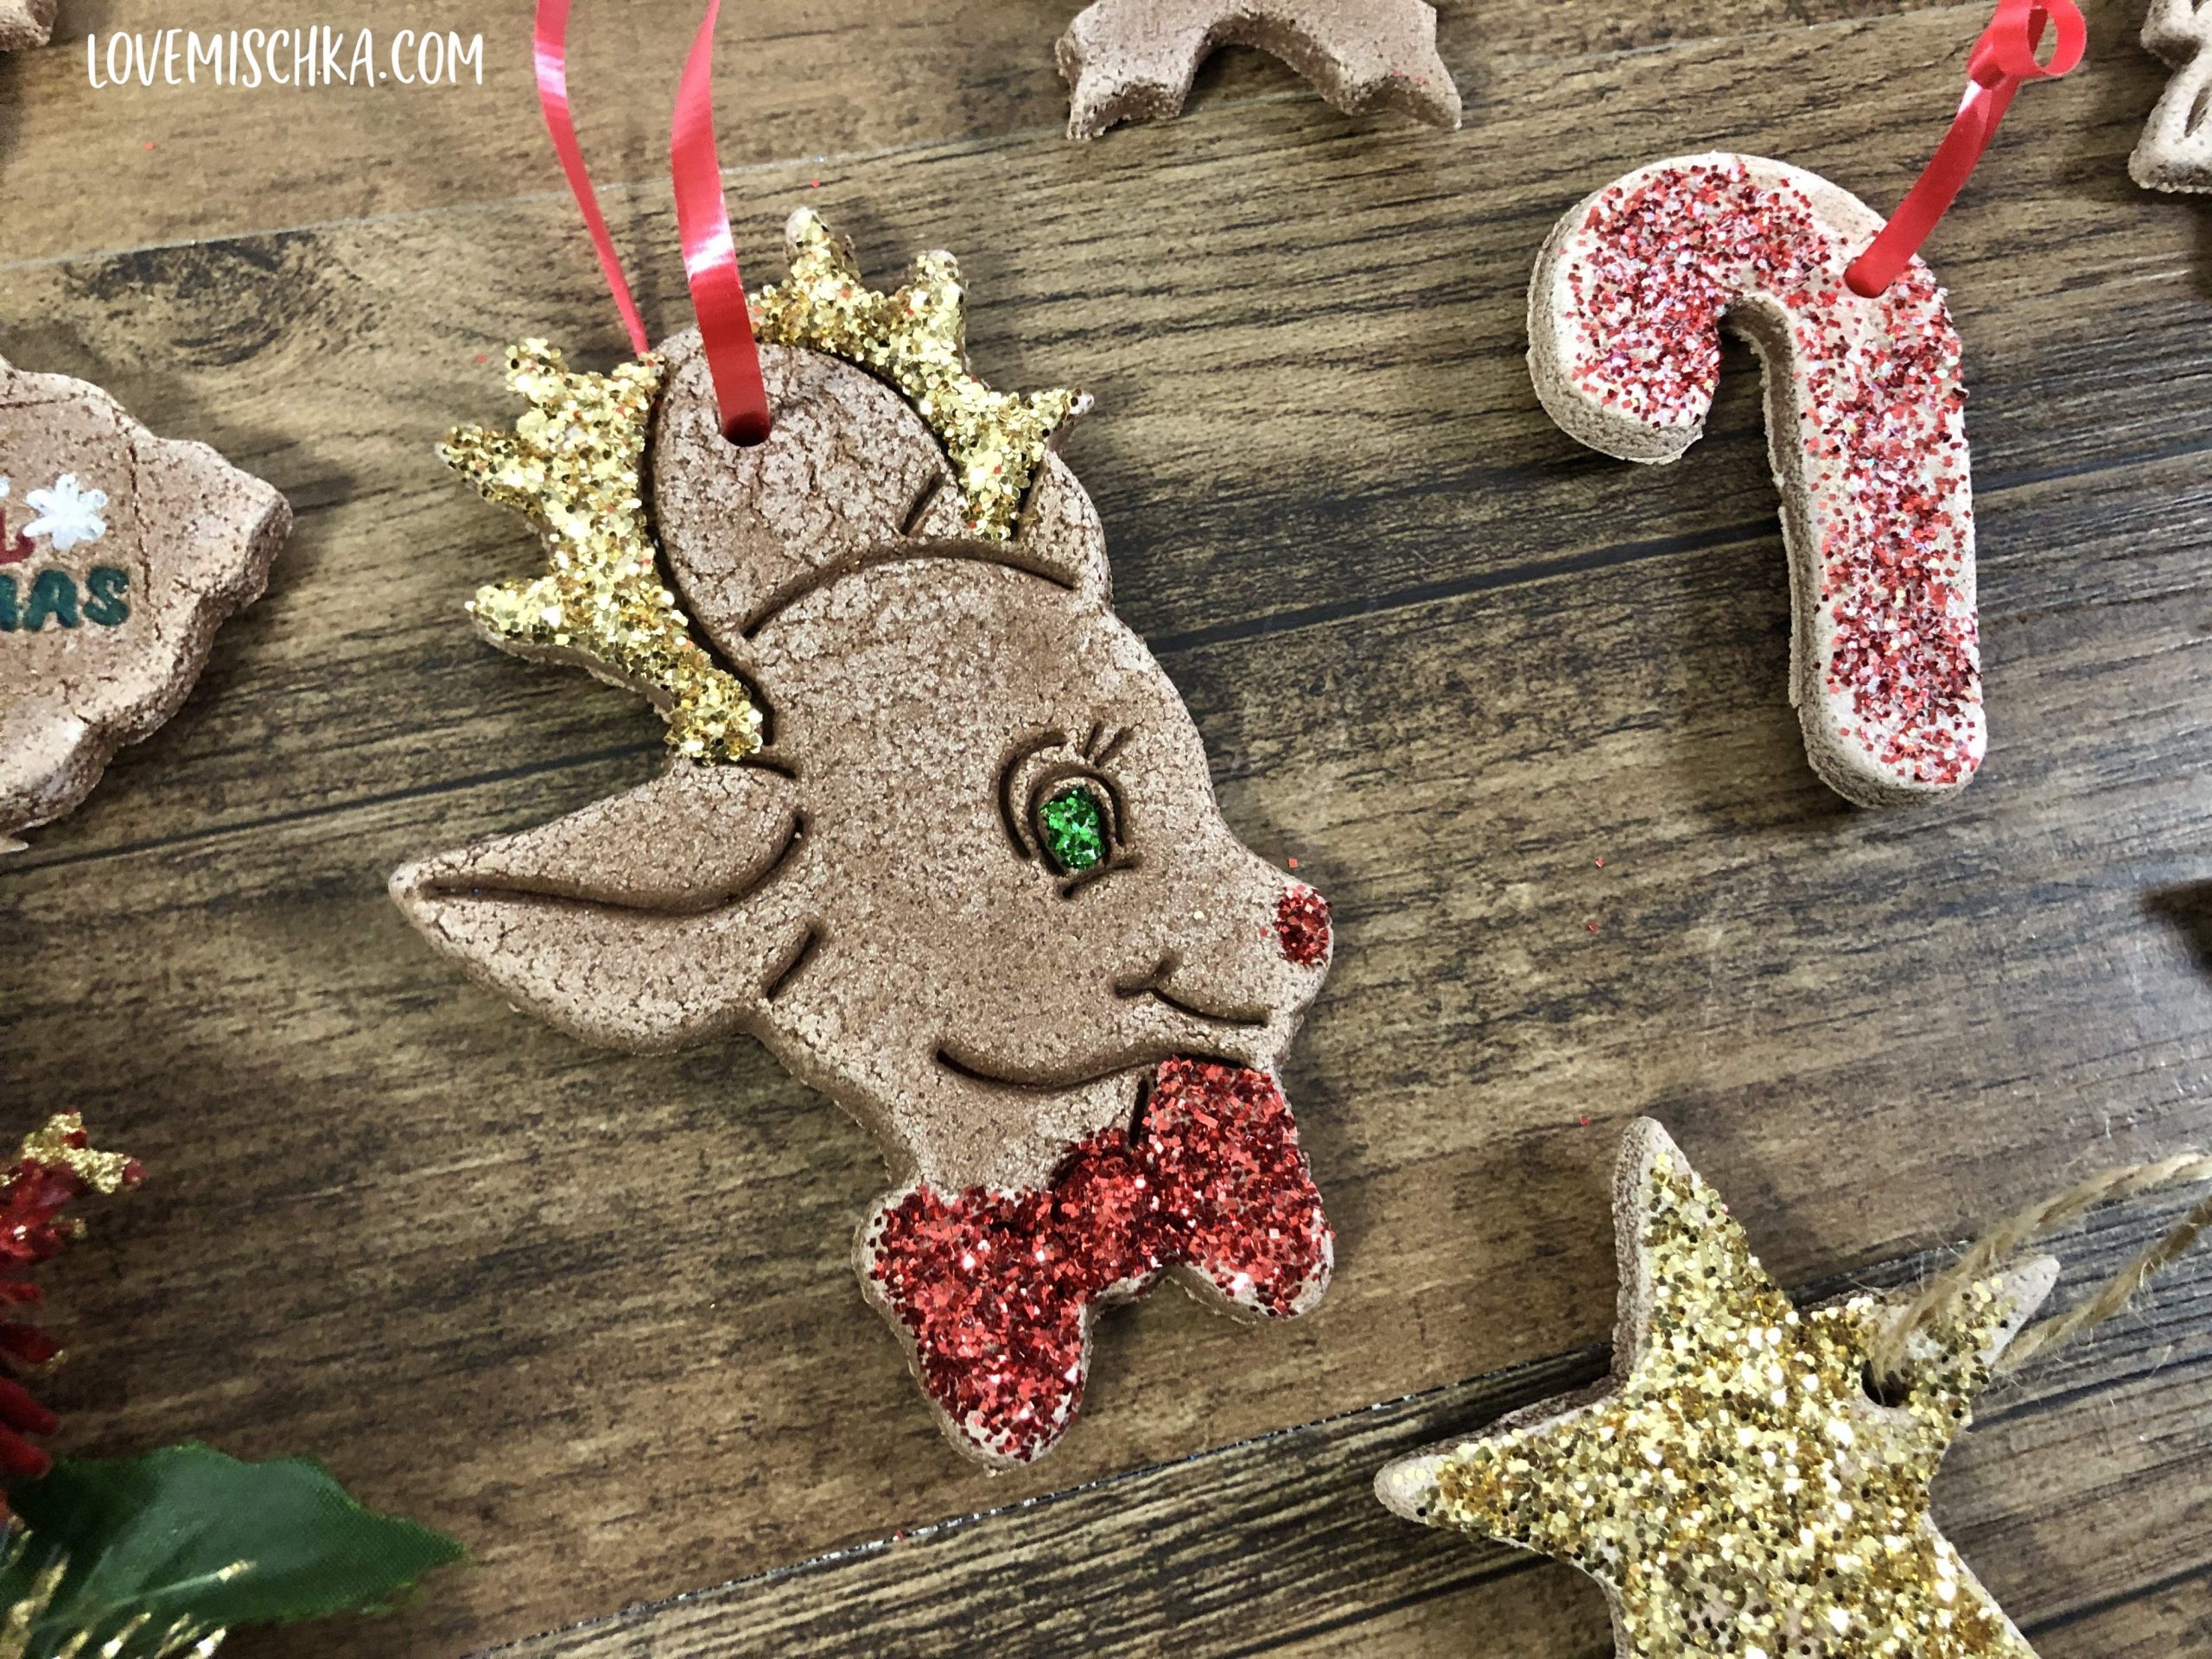
With regular salt dough ornaments, I do cover them completely with glitter. I also like to use a mix of sharpies and glitter for a detailed look. Like with this ornament -
How to hang Cinnamon Salt Dough Ornaments?
I like to use Christmas Twine like these rolls. It seems to last the longest and doesn’t distract from the ornament.
Just slide the twine in the hole you made with a straw before baking (or air drying). Cut it to your desired length. Then tie a knot near the ends. The loop you create is how you'll hang the ornament.
Do Cinnamon Ornaments go bad?
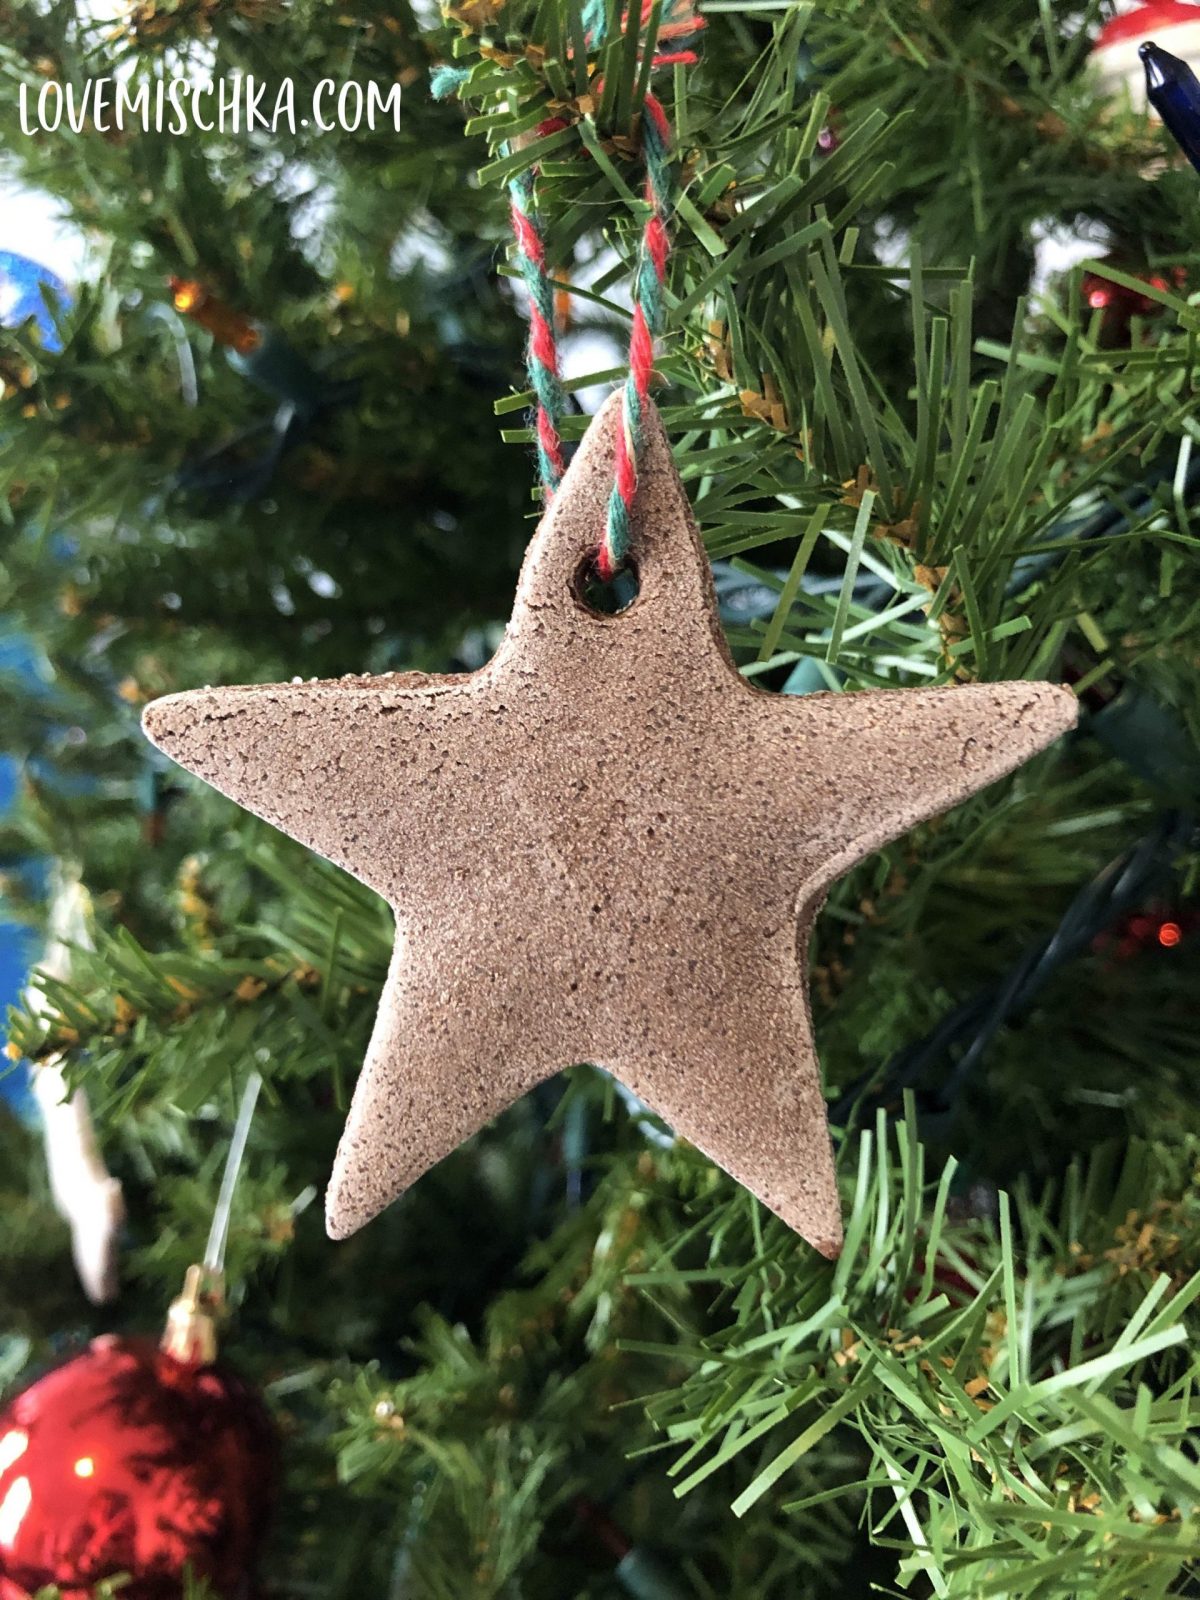
In 2016, I made my first batch of these cinnamon salt dough ornaments and I STILL hang them on my tree every year.
It’s been five years, but they still look great. Absolutely no mold. All in one piece.
They’re a tad lighter in color than they used to be. The scent of cinnamon has also faded over the years, but it’s still there.
For more holiday favorites, check out:
- Christmas Fudge Recipe
- How to Make DIY Reindeer Gift Bags
- Easy Hot Cocoa Cookies – Made with Hot Chocolate Mix
- Snickerdoodle Cake Mix Cookies
- Free Printable Christmas Bingo Game
DIY Cinnamon Salt Dough Ornaments
Ingredients
- 1 cup Cinnamon ground
- 1 cup Salt
- 1 cup Flour
- 1 cup Water
Instructions
- Preheat oven to 300°F.
- In a large mixing bowl, combine cinnamon, salt, and flour.
- Add water and mix.
- Continue with your hands to completely combine and form a dough.
- Sprinkle flour on a sheet of parchment paper then plop the dough on top.
- Roll out the dough until it's ¼-inch thick.
- Cut out shapes with cookie cutters.
- Place the cut pieces on a parchment-lined baking sheet.
- Repeat rolling and cutting until the dough is gone. You can re-roll and use the scraps as well!
- If using stamps for imprinted designs, stamp your desired shapes now.
- Poke holes at the top of each ornament with a straw, toothpick, or pencil. This is so you can hang the ornaments later.
- Bake for about 1 hour. Let cool.
- Decorate as desired. See the post for ideas and methods.
- Slide twine or ribbon through the hole at the top of the ornament. Cut it at your desired length. Tie a knot at the ends of the twine or ribbon to make a loop (to hang the ornament from).
- Gift your ornaments to loved ones and/or hang them on your tree!
Video
I would love to see your Cinnamon Salt Dough Ornaments!! Please tag me at @lovemischka on instagram, facebook, or pinterest. Thank you!! I hope you have a wonderful holiday season! ❤️🎄☃️

Heather Cypher says
Love all your ideas
Traci says
If I am doing this at school with kids and don’t have access to an oven can they air dry?
Kathryn says
This was fun and easy. Even my 2 year old was able to enjoy this. It was like fun play dough for her. I liked that the dough was very easy to clean up. It was not very sticky but held together well. I used gluten free flour. I would do this again! Thank you for the great recipe and explanation!
Debbie Allen says
What temptress do you cook these on? Also plain or selfrising flour.
Mischka says
Plain flour. They are baked at 300°F.
Carmela says
Hi! Can i use 1/2 cup ground cinnamon and 1/2 cup ground ginger for this recipe? Was thinking of doing it with my preschool students and it so happens that our Christmas Program song is “Let’s Build a Gingerbread house” 🙂
Mischka says
Aw! That would be so cute! I personally have never tried this recipe with ground ginger and ground cinnamon, so I don't know. They are similar textures so maybe? If you try it, please let us know how the ornaments came out.
Linda says
Can I make this dough ahead of time and store it until the grandkids come? If so how would I store it?
Linda