
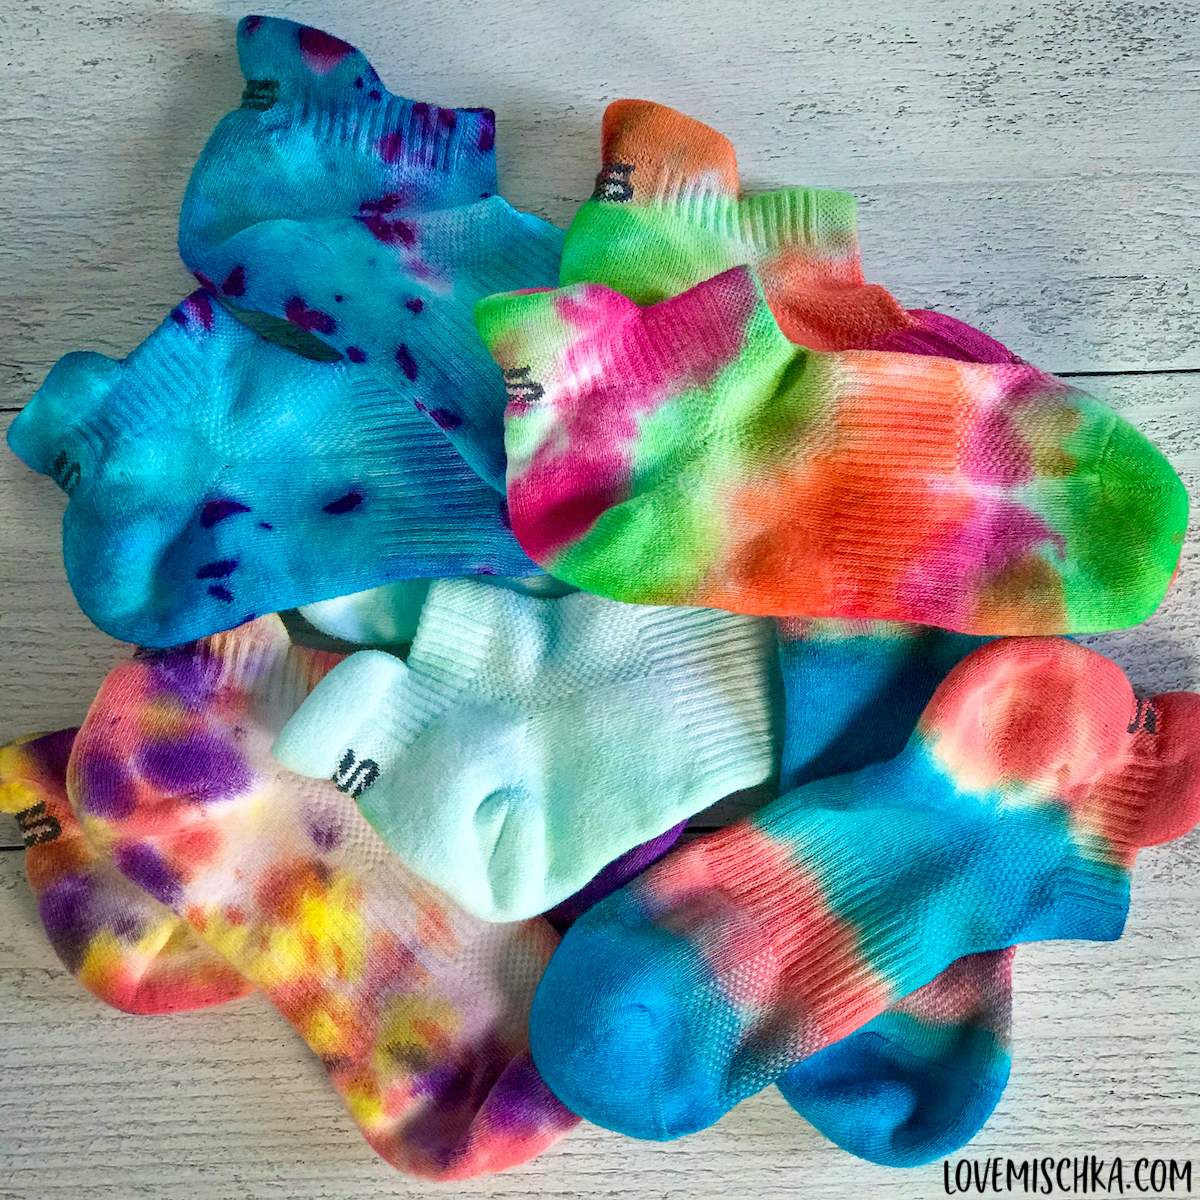
Learn how to tie dye socks with this easy DIY guide. So simple that even a tie-dye beginner can do it and so fun you’ll want to do it again and again.
This post contains affiliate links. This means, if you click a link and make a purchase, I may earn a small commission at NO extra cost to you. Thank you! 💜
I recently signed up for my third half-marathon, even though I haven’t ran in almost two years. 😳 My very first run was pretty rough. I couldn’t walk for almost a week.
What does this have to do with tie dye socks?
I decided to tie dye some running socks as motivation to run… or at least feel like I’m preparing in some way. 😂
It was such a fun, easy DIY project that would be perfect for tween slumber parties, birthday parties, or just a fun afternoon with the family.
If you're having a party, decorate with these easy DIY Tissue Paper Flowers.
Tie Dye Projects
I may have a new obsession with tie dyeing everything and anything. I never realized how much fun it is. And how simple.
Tie dyeing socks is one of the easiest, quickest, and most inexpensive tie dye projects to do.
It doesn’t use up a lot of materials, so you don’t have to buy multiple or huge tie dye kits.
It’s a great way to use leftover dye from other projects, especially if you have an old pair of socks lying around.
Instead of throwing away plain white socks that are still usable, but have dirty bottoms or are just old, tie dye them to have fresh, unique socks.
Tie dyeing socks is an inexpensive way to freshen up your wardrobe or express yourself with some awesome socks.
You could also make these DIY tie dye socks as a handmade gift and give them away in one of these adorable DIY printable goodie bags.
What kind of socks can you tie dye?
The best material to tie dye is 100% cotton.
Unfortunately, it can be difficult to find 100% cotton socks.
Polyester and other synthetic materials don’t absorb the dye from tie dye kits well.
But, a polyester blend can work if it’s mostly cotton. The more cotton, the better.
For best results, tie dye socks that are at least 75% cotton.
The style of them can be anything you want - low cut, ankle, crew, mid-calf, knee high, etc.
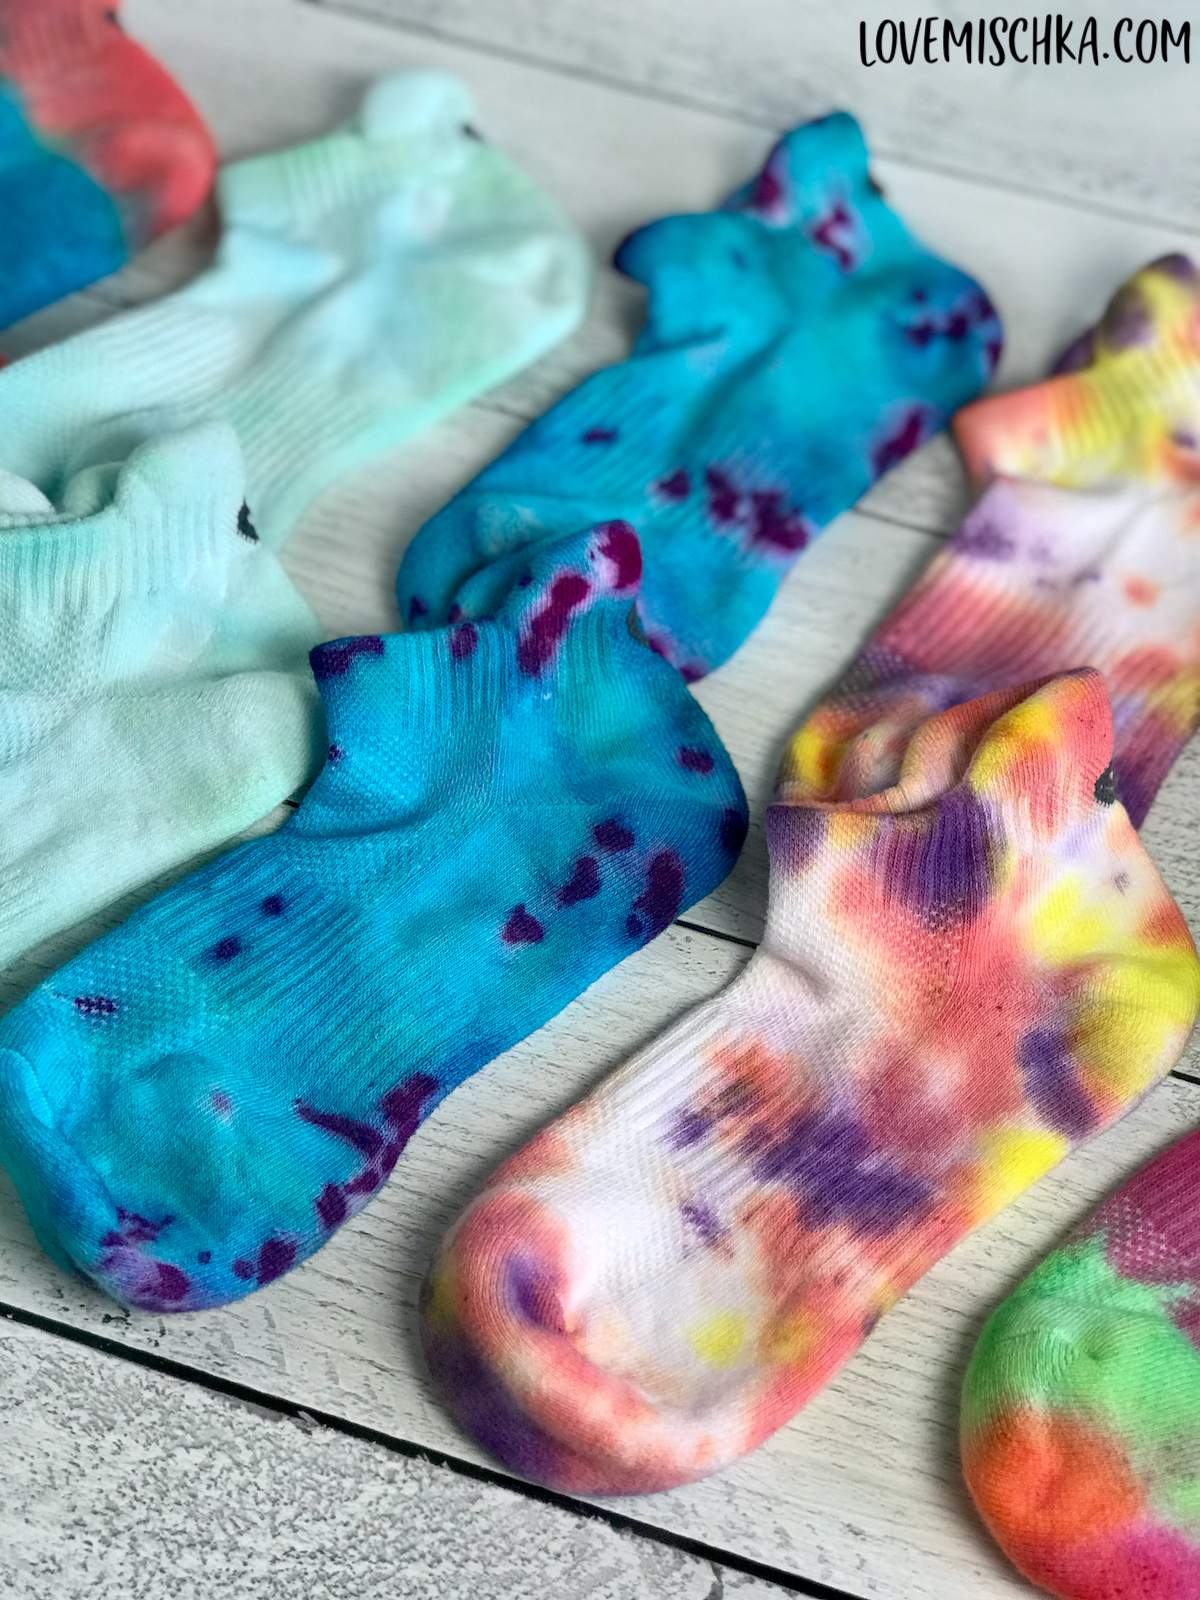
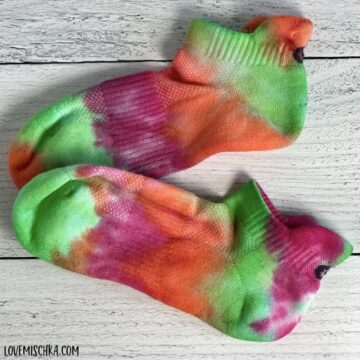
I chose these Ankle Athletic Running Socks for my first round of tie dyeing socks. I enjoyed it so much that I’ll be doing it again in a few weeks. Please let me know if there are any specific tie dye patterns or colors you would like to see!
If you need some help finding socks that have an appropriate amount of cotton (I felt a little overwhelmed at first), here is a list of high cotton socks in different styles from Amazon:
- Knee High Casual Tube Socks (90% Cotton)
- Kids’ Athletic Crew Socks (100% Cotton)
- Kids’ Knee High Socks (81% Combed Cotton)
Best Dye
There are so many different types of dye. If this is your first time tie dyeing, I recommend using one of the Tulip One-Step Kits.
I also recommend using one even if it's not your first time.
The kits usually come with most of the things that you need to tie dye socks - squeeze bottles that already have dye powder in them (just add water), protective gloves, and elastic bands.
Bigger Sets, like this Tulip One-Step Tie-Dye Party Kit, also come with a plastic cover.
I used that kit to dye six pairs of socks and over 15 shirts (sizes large and extra large).
They have smaller kits too, like this One-Step Mini Tie-Dye Kit, this One-Step Moody Blues Tie-Dye Kit, and this Summer Splash 8-Color Tie-Dye Kit.
Tulip One-Step Dyes do not require presoaking fabrics in soda ash before dyeing, which eliminates a step that is required with other brands and dyes.
It’s another reason why a Tulip One-Step Kit is a great item for someone’s first time tie dyeing. It’s as easy as it gets.
How to Tie Dye at Home
The very first thing to do is to wash any new socks before dyeing.
It is important to prewash socks to remove any dirt, oils, or chemicals that are leftover from manufacturing.
Sometimes, new clothes can feel like they have a coating on them. This can negatively affect dye absorption.
The next step is to set up a workspace that is away from fabric furniture or anything of value that can easily be ruined by dye.
The tie dying process can be very, very messy.
A lot of people choose to tie dye outside over grass and near a water hose. I like to tie dye in my garage. It already has oil stains on the floor so it doesn’t matter if I splatter some colorful dye on it too. It’ll actually make the floor look better. 😂
Protect your work surface with a plastic table cloth, an opened trash bag, or even a tarp. You can do the same for the floor underneath your work surface.
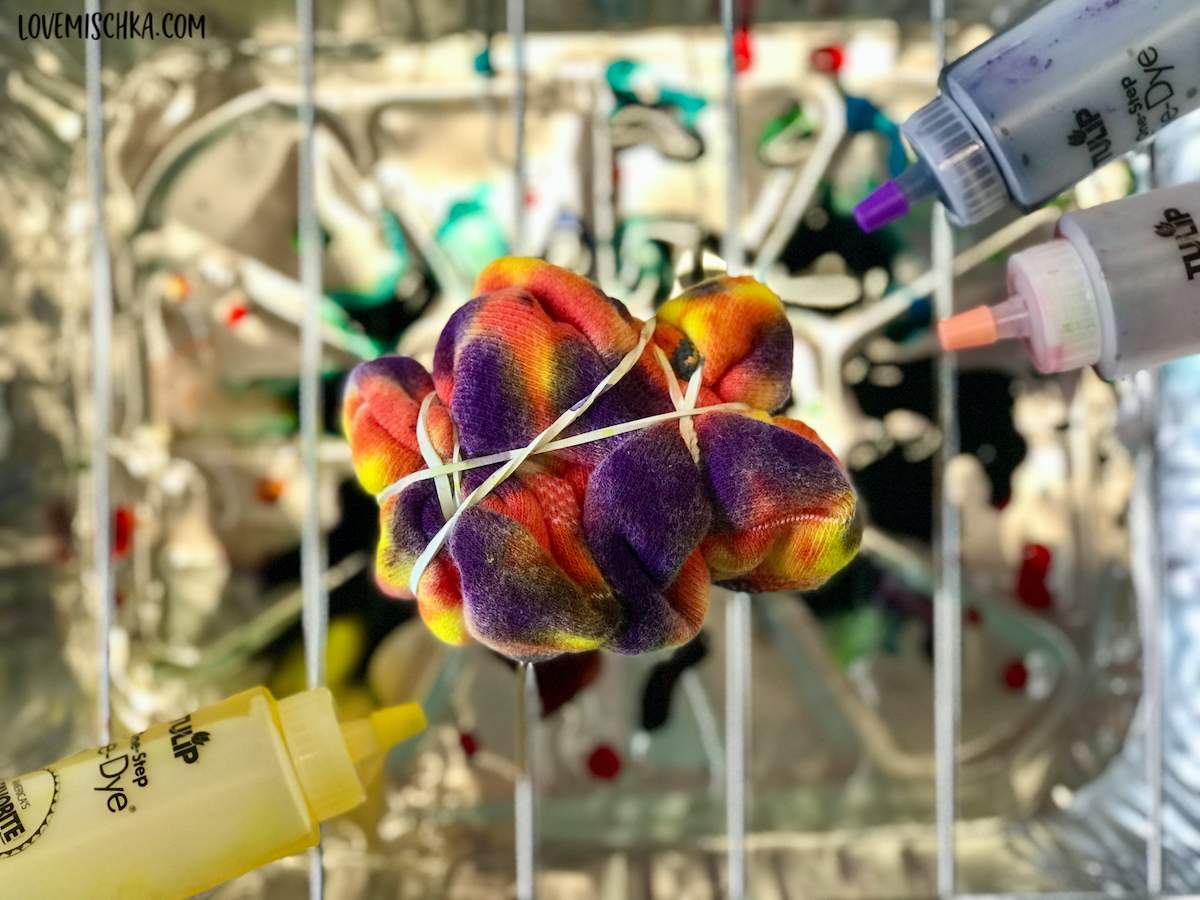
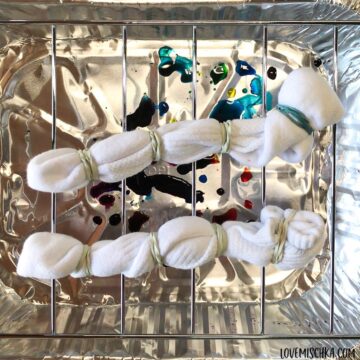
I like to tie dye on a wire cooling rack on top of an aluminum roasting pan to contain the tie dye mess.
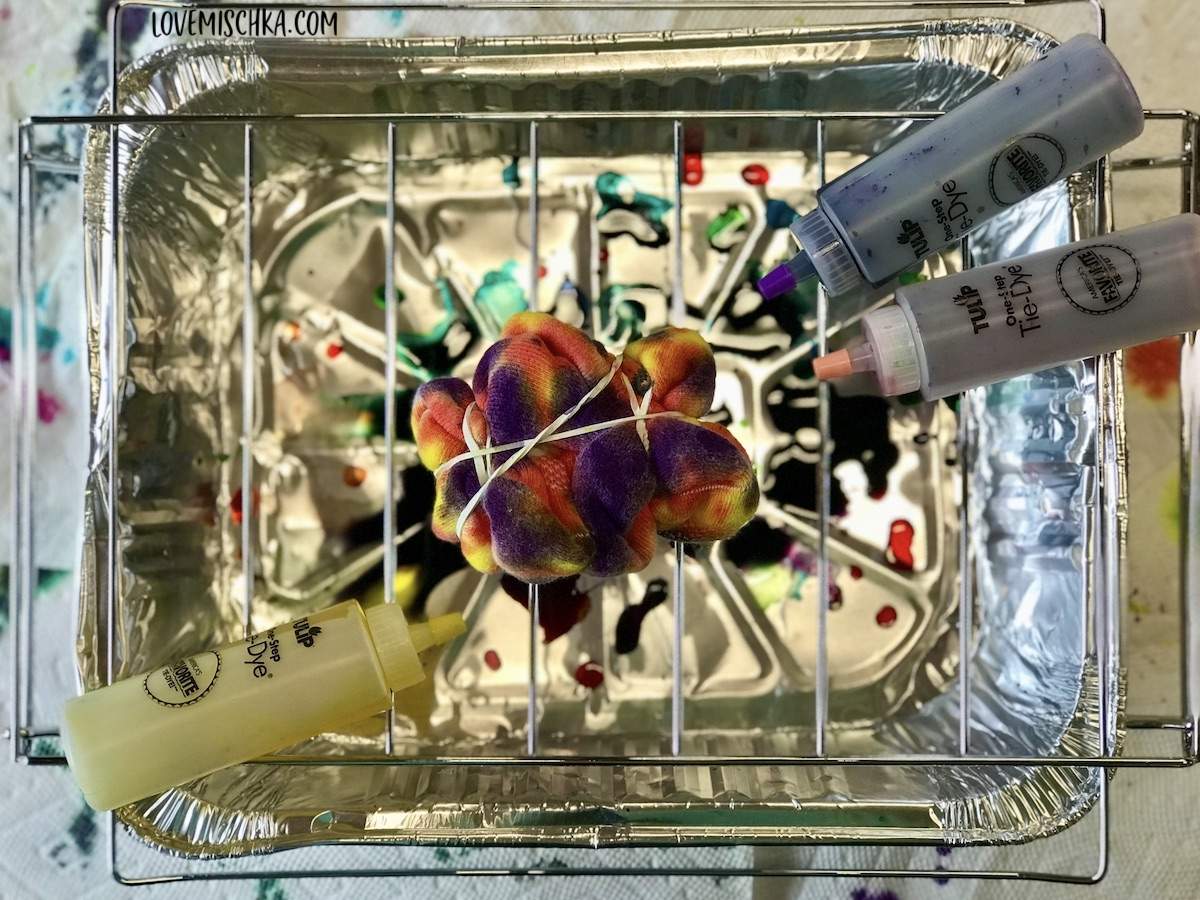
A wire rack keeps the socks elevated so the dye falls below into the pan. This prevents the dye from pooling around the socks. It also prevents excess dye from getting on your socks in places you do not want.
It’s a good idea to have a roll of paper towels in your workspace. I like to wipe down the wire rack in between each new sock or each new pair of socks. This also prevents unwanted dye from getting on the socks.
Wiping down the work surface allows us to lay socks on a clean surface every time.
Other Tie Dye Supplies
I already mentioned some of the necessities - dye, squeeze bottles, rubber gloves, a plastic cover or two to protect surfaces, elastic bands, and socks.
I also mentioned some optional supplies - paper towels, a roasting pan or plastic bin, and a wire cooling rack.
What other supplies are needed to tie dye socks?
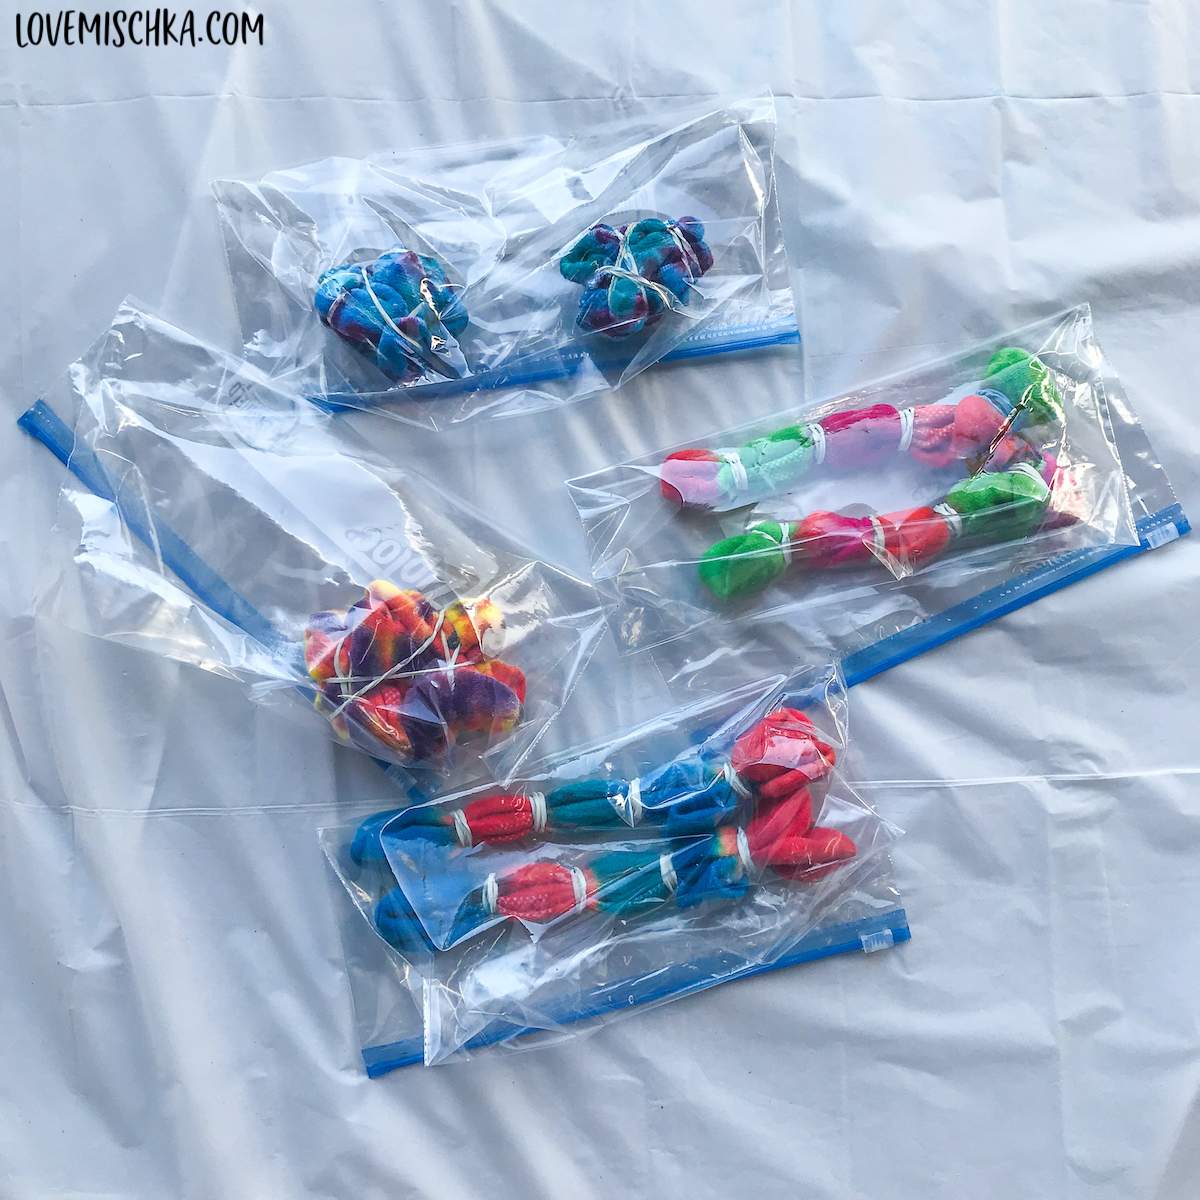
Plastic wrap or a plastic bag for each pair of socks.
Dyed socks are placed in bags or wrapped in plastic wrap to help set the dye.
You can recycle plastic shopping bags for this or use Ziploc bags.
Another needed supply is water.
When using Tulip One-Step Dyes, all you have to do is add water. Especially when they already come in squeeze bottles. Just add water to the line, shake to dissolve, then apply.
Water is also useful to dampen or re-dampen the socks.
Damp Socks vs Dry Socks
I mostly dye slightly damp socks. Damp fabric has great dye penetration. The dye spreads more and easily blends with other colors for a smoother, more consistent look.
Dyeing dry fabric has a couple positives too. It all depends on the finished look that you want to create.
Dye doesn’t spread as easily on dry fabric, so you have more control over color placement and preventing colors from blending. It’s easier to retain white spaces when dyeing dry fabric.
Dry fabric sucks up a lot more dye than damp fabric though.
DIY Tie Dye Socks
There are numerous ways to fold, scrunch, and roll socks. Each one will result in a different design.
Later, I will explain how to do different tie dye patterns. For now, let’s talk about the basics of how to tie dye socks in the card below.

How to Tie Dye Socks
Equipment
- Pair of Scissors to cut the rubber bands after rinsing
- Plastic Tablecloths, Large Trash Bags, or Tarps to protect work surfaces
- Roasting Pan or Plastic Bin (optional)
- Wire Cooling Rack (optional)
Materials
- Mostly Cotton Socks white
- Tie Dye Kit preferably Tulip One-Step Tie Dye
- Squeeze Bottles if not included in your tie dye kit
- Water
- Protective Gloves
- Rubber Bands
- Plastic Bag or Plastic Wrap
- Laundry Detergent
- Paper Towels optional
Instructions
- Dampen your pre-washed socks.
- Fold, scrunch, or twist your sock or socks. You can do each sock separately or together as a pair.
- Wrap rubber bands around your folded, scrunched, or twisted sock or socks to secure the design. The placement of elastic bands also help to create different patterns. They help to resist the dye, keeping it from saturating the fabric evenly.
- If doing each sock of a pair separately, repeat step 3 with the other sock in the pair.
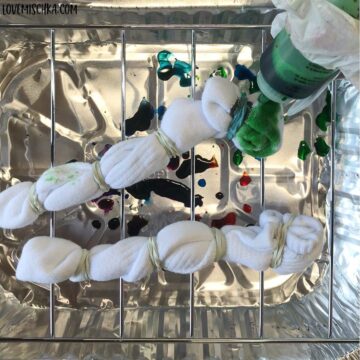
- Put protective gloves on. If you haven’t already, follow the package instructions of your kit to mix the dye. I recommend mixing the dye with gloves on in case it leaks.
- Place socks on your protected work surface.
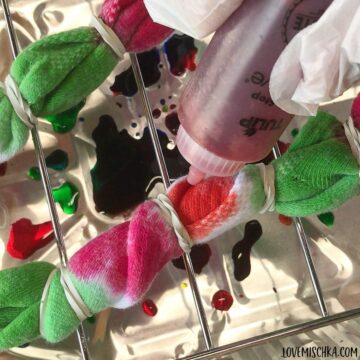
- Carefully remove the cap from your desired color's squirt bottle (it can splatter) and squeeze dye onto the sock. Do one color at a time.
- Use the tip of the bottle to get dye into folds. If you want more white areas, put it in less folds.
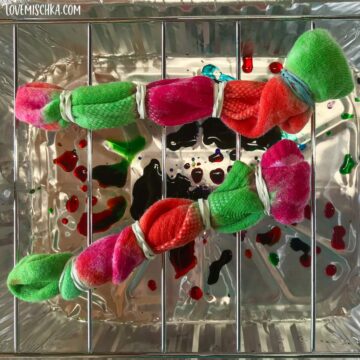
- Turn the sock or socks over and place dye in the same areas as the other side.
- If you want to add more colors, repeat steps 7-9 with each color. Do a single color at a time.
- Place the tie-dyed socks in a plastic bag. If they are separate, it is best to wrap each sock in its own plastic wrap to prevent the socks from hitting and transferring color. I learned this the hard way when I placed both socks in the Ziploc bag in the picture below.
- Allow dye to set for at least 8-12 hours. For the brightest colors and best color retention, allow dye to set for 24 hours.

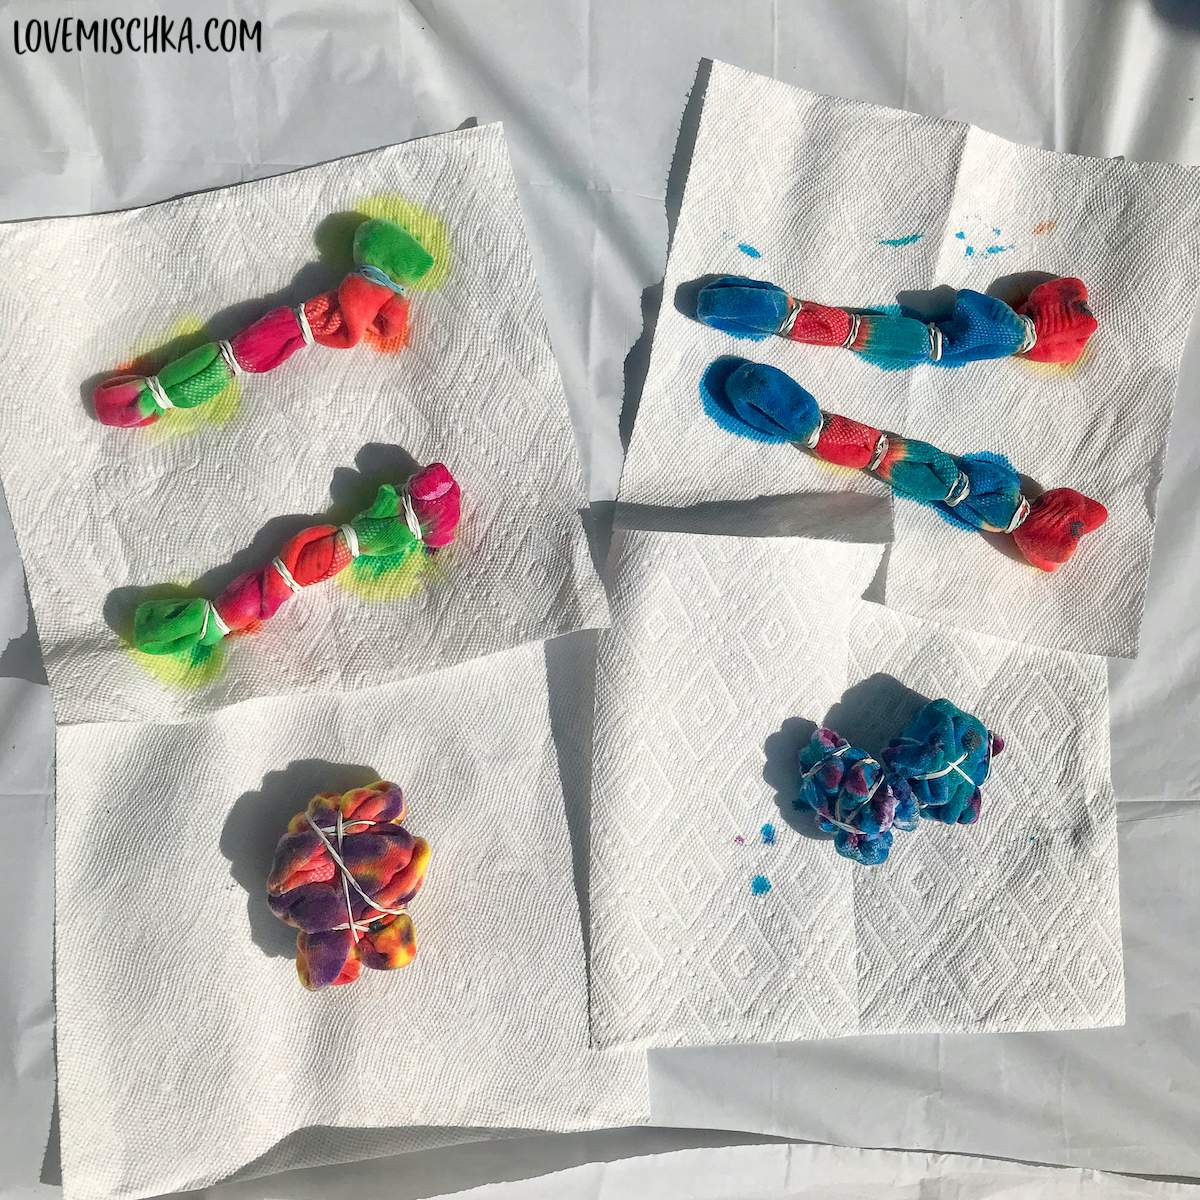
- After 8-24 hours, remove socks from the plastic bag or wrap.
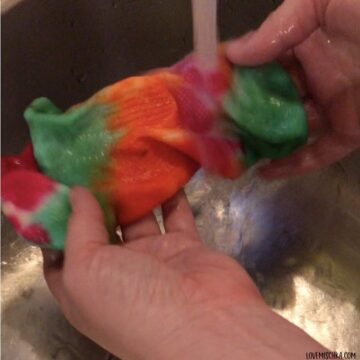
- Rinse each sock, if separate, or socks, if scrunched and secured together, under warm water until the water runs clear.
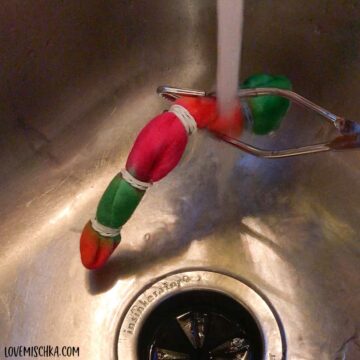
- Carefully cut the rubber bands and unravel the sock or socks.

- Rinse again to remove any additional excess dye.
- If doing one sock at a time, place that sock aside on a flat surface. Do not place it on any other socks, fabrics, or anything that can be stained. The wet dye will transfer.
- Repeat steps 14-16 with the other sock in the pair, if needed.
- Wash the socks. I washed each pair of socks by hand. If you’re comfortable throwing them in the washing machine, you can. Wash them with a little detergent for a full cycle.
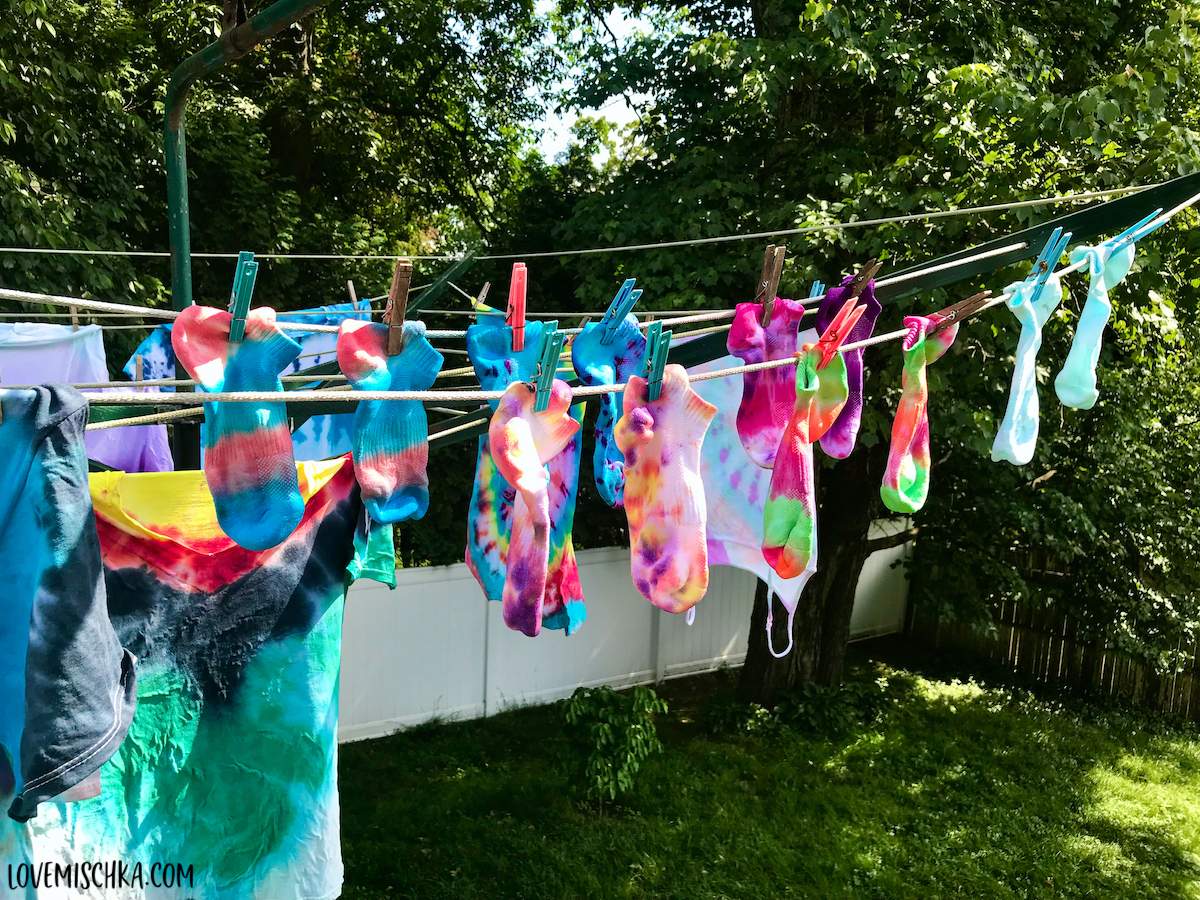
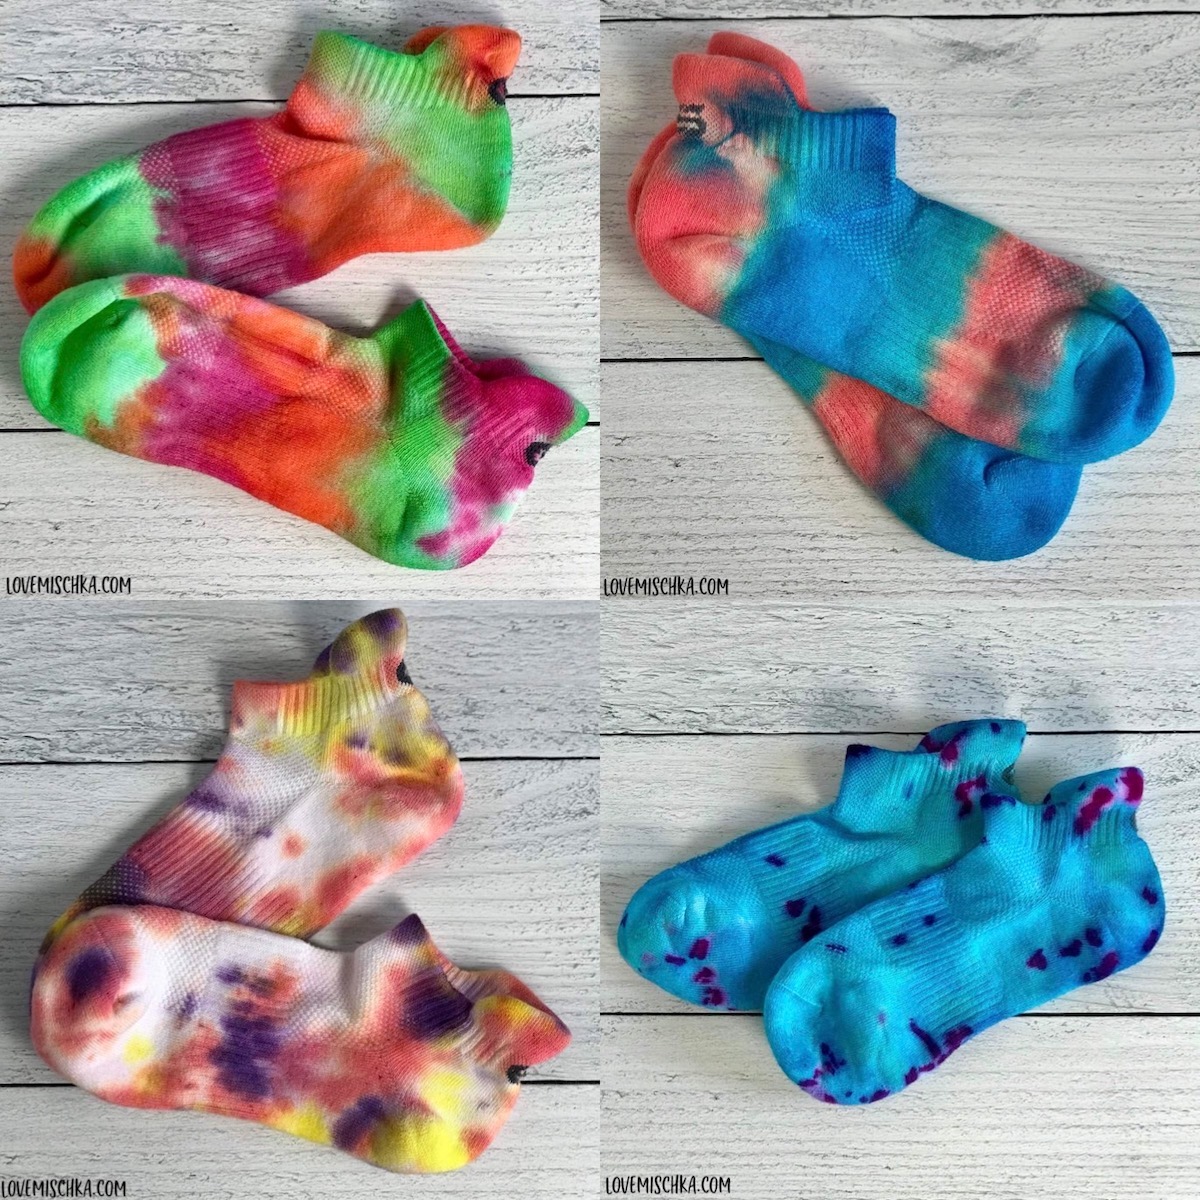
- Dry the socks. I hung my socks on the line, but you can also put them in the dryer.
- Enjoy your fun, unique socks!
If you made DIY Tie Dye Socks, I'd love to know how they came out in the comments below. You can also tag or mention @lovemischka on social media.


Karissa says
I was very pleased to uncover this site.
I want to to thank you for ones time for this particularly fantastic read!!
I definitely loved every bit of it and I have you saved to fav to see new things on your blog.